


This post is also available in:
 German
VMware Cloud Foundation (VCF for short) is a full-stack Infrastructure-as-a-Service (IaaS) platform that offers software-defined compute, storage, networking, security, and management.
Workload domains are created, configured, and managed using the SDDC Manager.
For the installation and management of a workload domain in VCF to work smoothly, a few infrastructure requirements must first be met. This article focuses on the data center network parameters. I also assume that the management domain has already been created using the SDDC Manager.
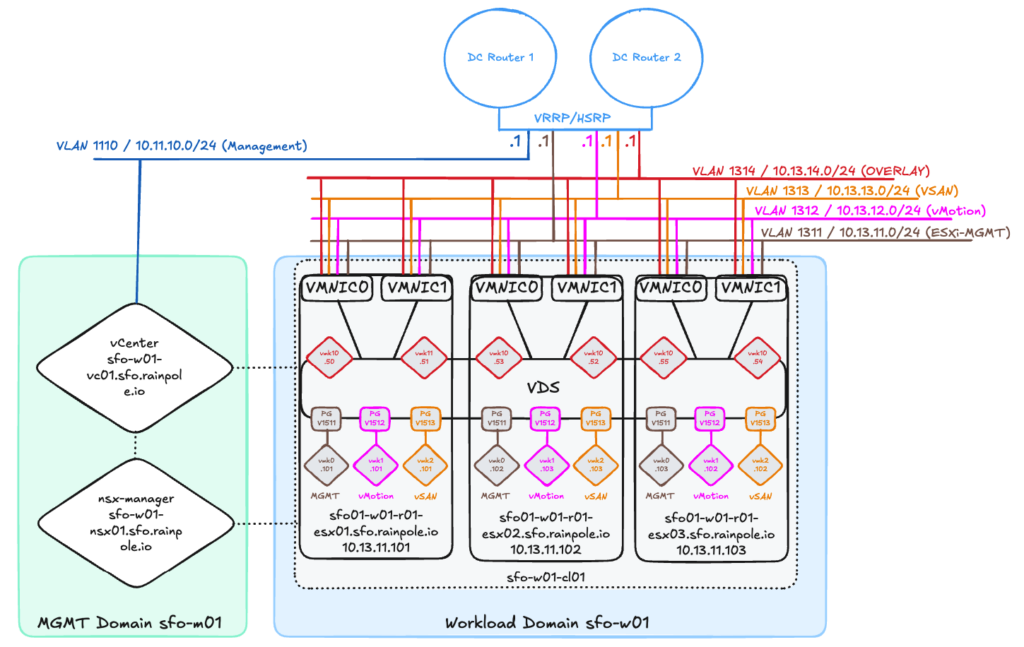
Before we look at the individual configuration steps, let’s first take a look at the target design.
Target design
After we have passed all parameters to the SDDC Manager, the workload domain with the name “sfo-w01” (blue box) is created automatically.
- In the management domain, vCenter and NSX Manager are installed for the network overlay, and then the hosts are integrated into the “sfo-w01-cl01” cluster.
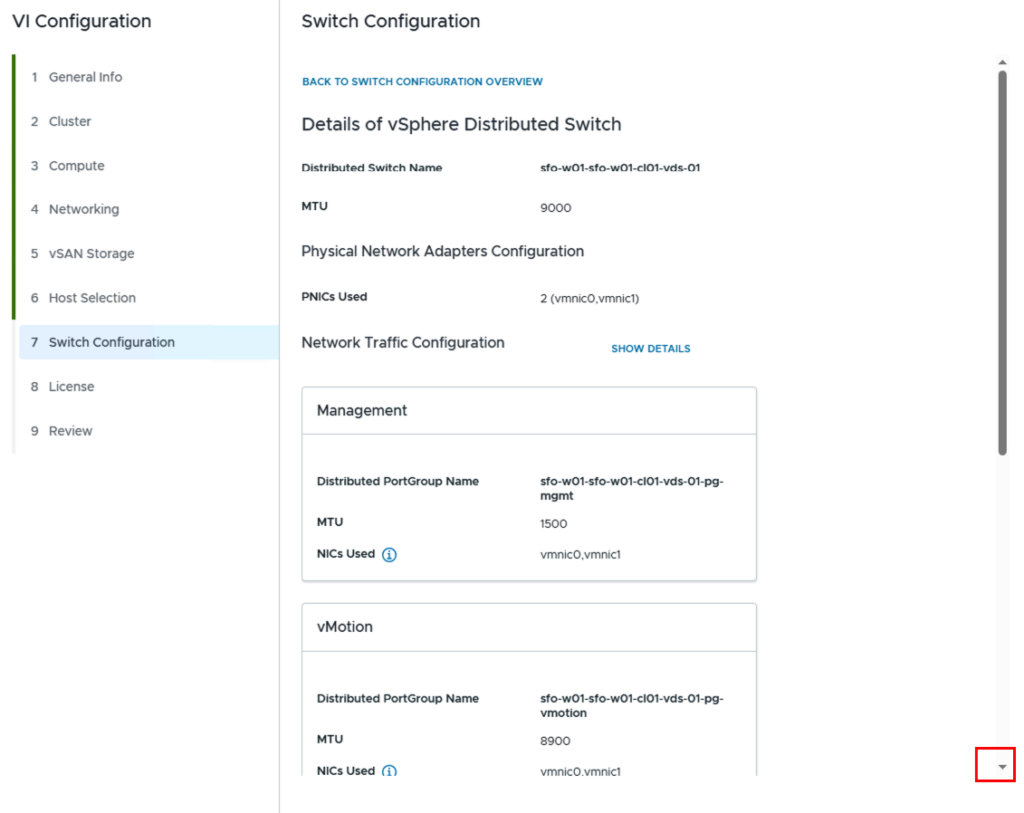
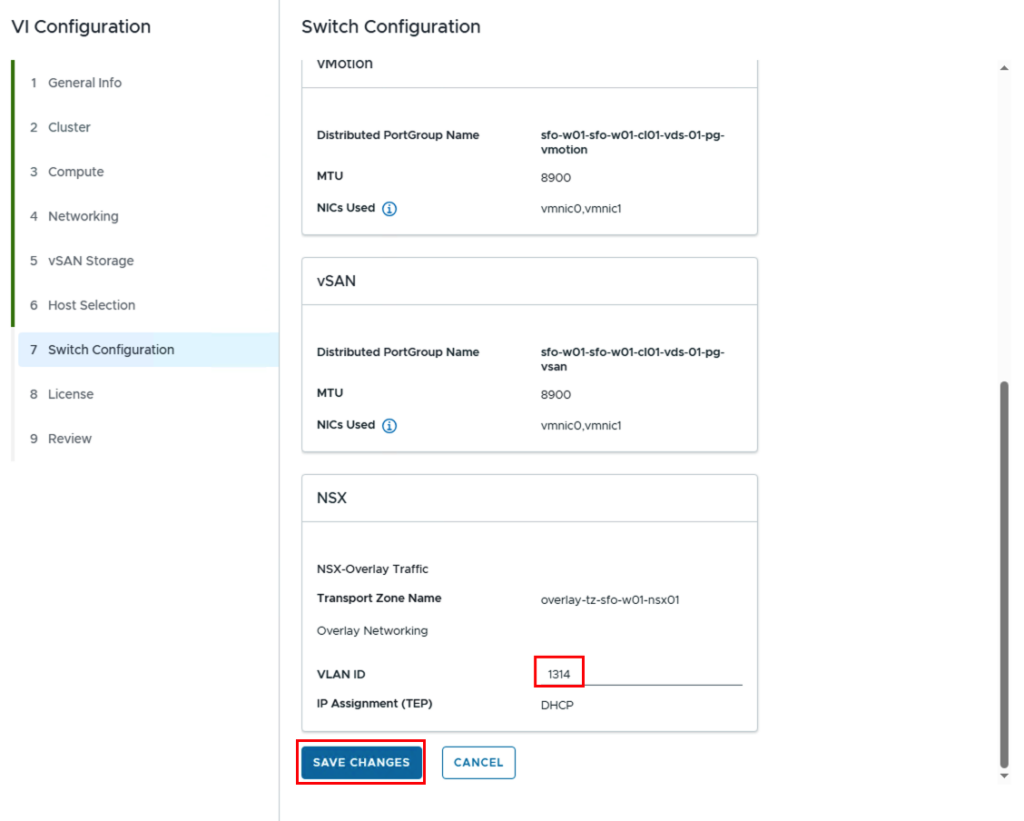
- The Virtual Distributed Switch (VDS) is configured on the hosts, and then the port groups for management (brown network), vMotion (pink network), and VSAN (yellow network) are created.
- The NSX Manager installs the VMkernel interfaces for the network overlay (red network) on the hosts.
Many other actions are performed, such as password management, creating the VSAN cluster, etc. But as already written, this article will focus on the network parameters, and as you can see in the image, a few networks are coming together.
Requirements
Before you can start the installation, some requirements must be met:
- The management domain has been created and access data for the SDDC Manager is available.
- At least three free hosts are installed with an ESXi image and are accessible via a management network.
- In addition to the management network, three additional VLANs (IP networks) are required that are connected to the physical ports of the ESXi servers:
- vMotion
- VSAN
- NSX Overlay (MTU size greater than 170)
- The NSX Overlay network requires a DHCP server from which the individual ESXi servers obtain their TEP (Tunnel Endpoint) addresses.
Let’s get started!
After all requirements have been met and the IP networks have been created in the hardware infrastructure, we can log in to the SDDC Manager and make the preparations for the setup there.
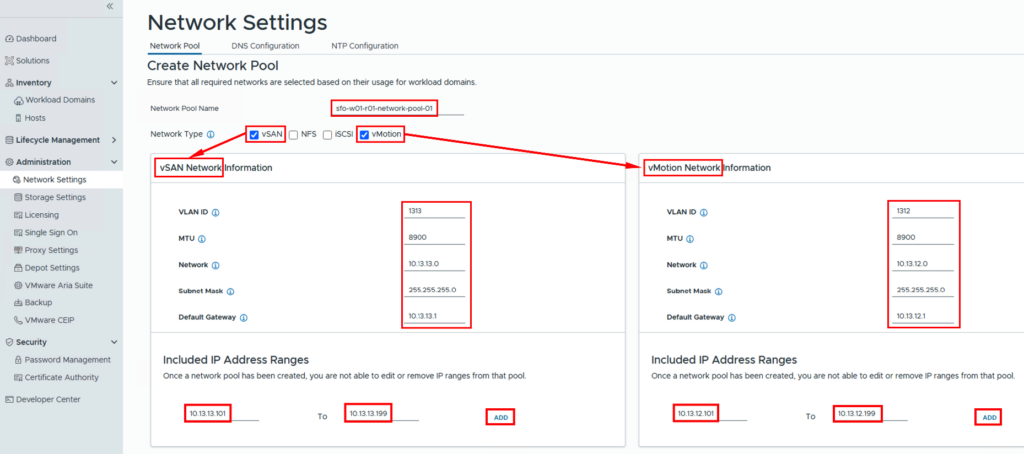
Creating network pools
A network pool is created for vMotion and vSAN. The ESXi servers are assigned IP addresses from this pool during configuration. This setting can be found in the SDDC Manager and Administration->Network Settings-> + CREATE NETWORK POOL

The network pool needs a name, and since we want to use vSAN and vMotion, both of these boxes must be checked for “Network Type.” Next, the VLAN IDs, MTU size, and IP address information are entered for the two networks. The IP address ranges specify which IP addresses from the subnet can be used.
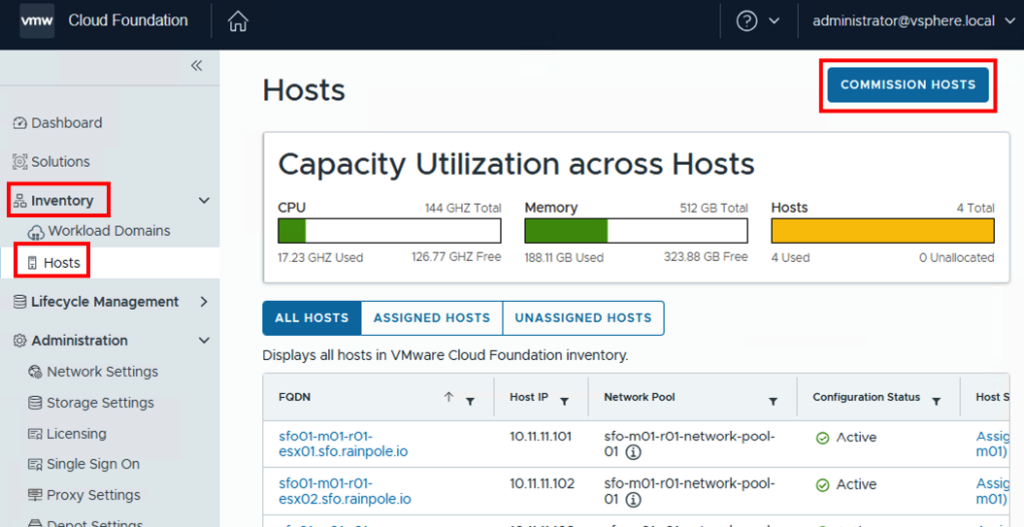
Host Preparation (COMMISSION HOSTS)
After the IP pool has been created, the hosts can now be prepared for the workload domain. The settings can be found under Inventory->Hosts->COMMISSION HOSTS
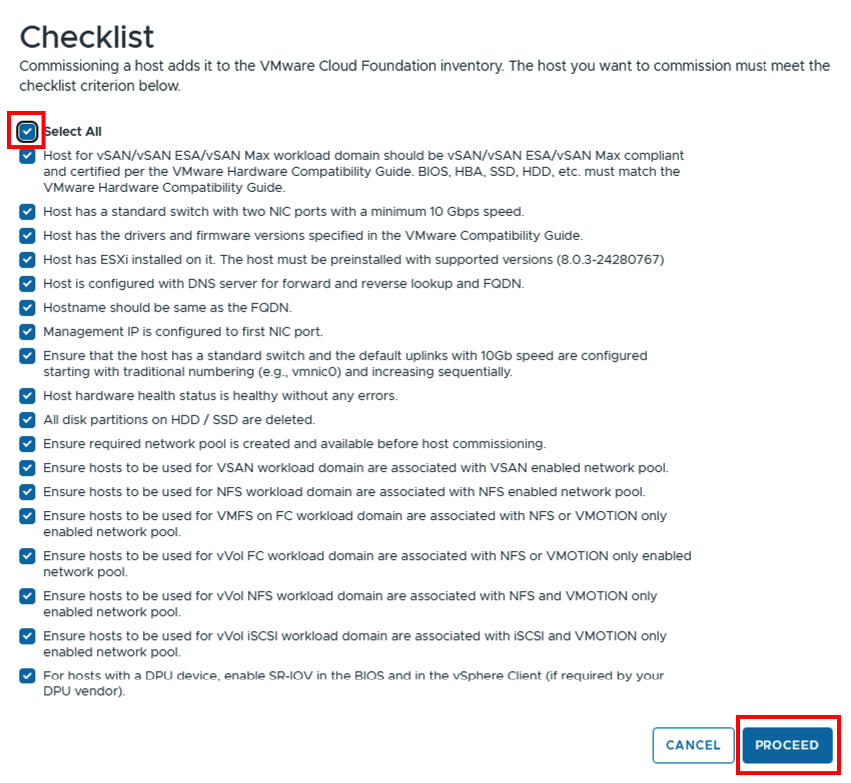
The checklist should be carefully reviewed to ensure that all requirements have been met. The “PROCEED” button only becomes active after all checkboxes have been checked.
In the input mask, you need to enter the FQDN of each host and specify the storage type. Select the previously created network pool for the “Network Pool Name.” Add the hosts using the “ADD” button.
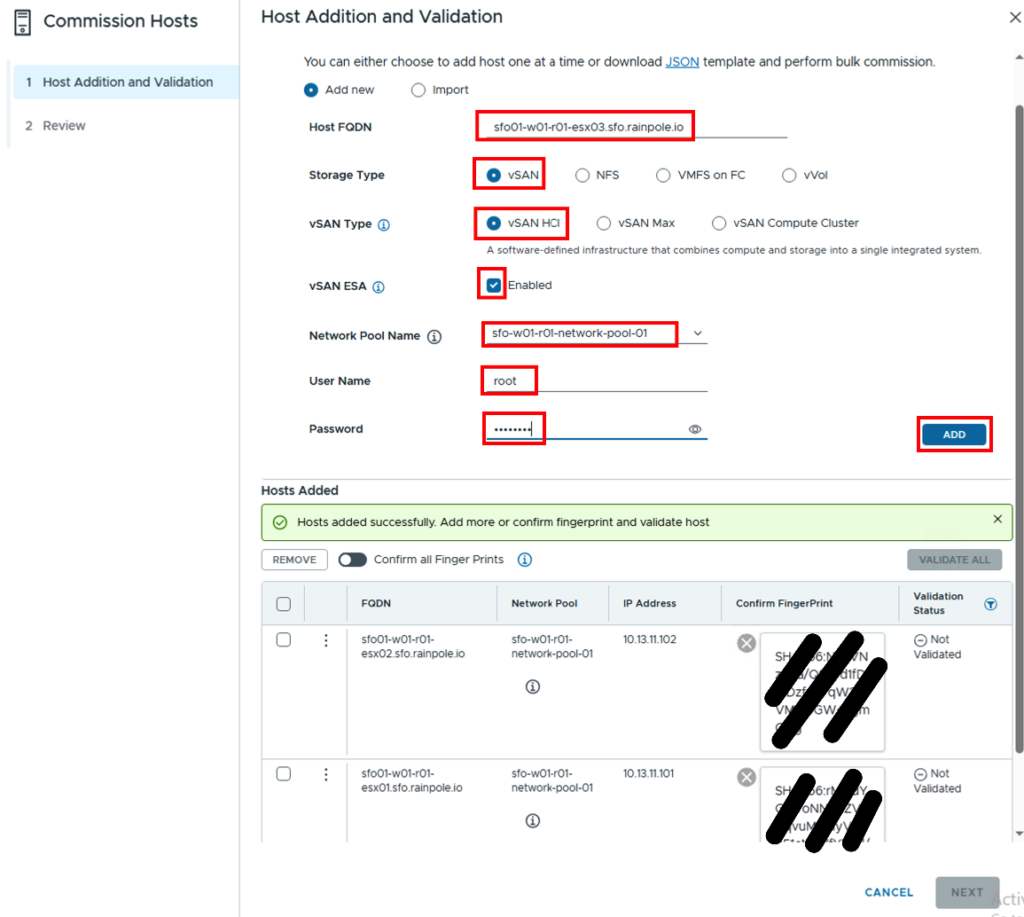
The SDDC Manager connects to the ESXi servers and displays the respective fingerprints, which can be confirmed after validation by clicking “Confirm all fingerprints.” Once this is done, you can check whether all requirements are met by clicking the “VALIDATE ALL” button.

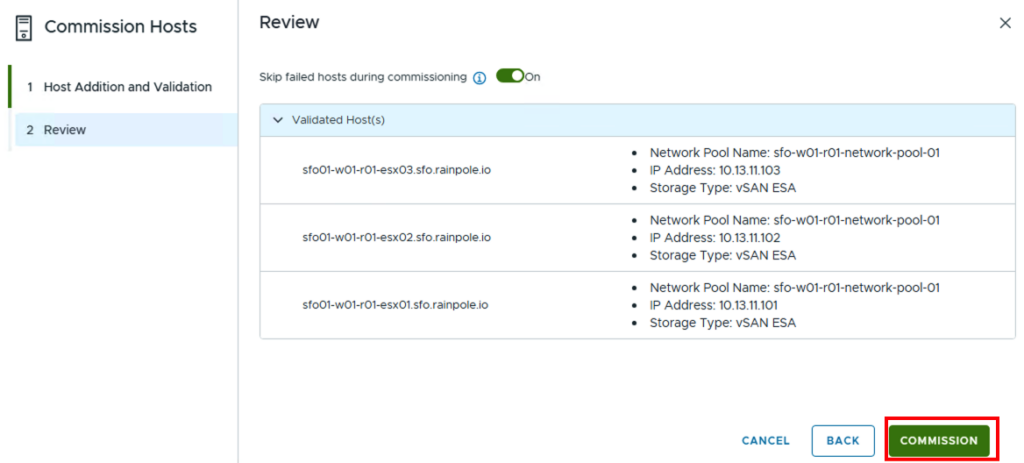
Once the verification is complete, the configuration can be started via “COMMISSION”.
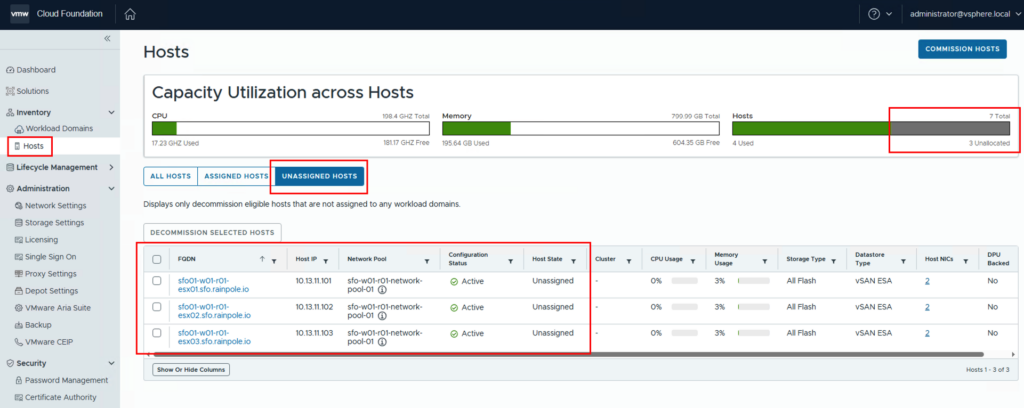
Once the configuration is complete, the hosts will appear as “UNASSIGNED HOSTS” in the inventory.
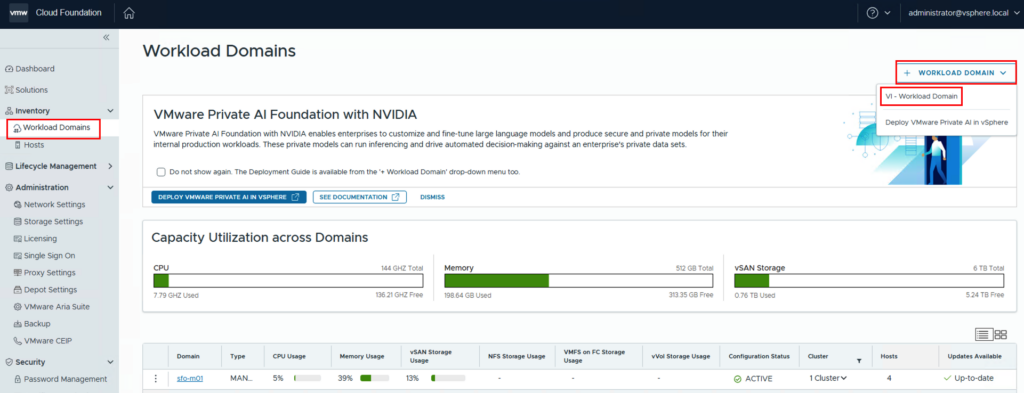
Creating the Workload Domain
In the next steps, the workload domain will be configured and installed with its own vCenter and NSX Manager. Configuration is done via Inventory -> Workload Domains -> Workload Domain -> VI – Workload Domain.
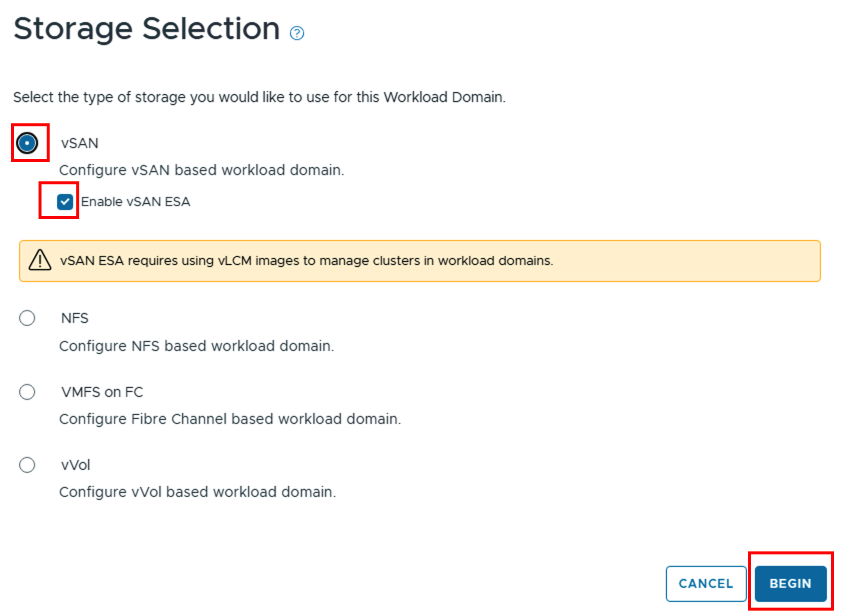
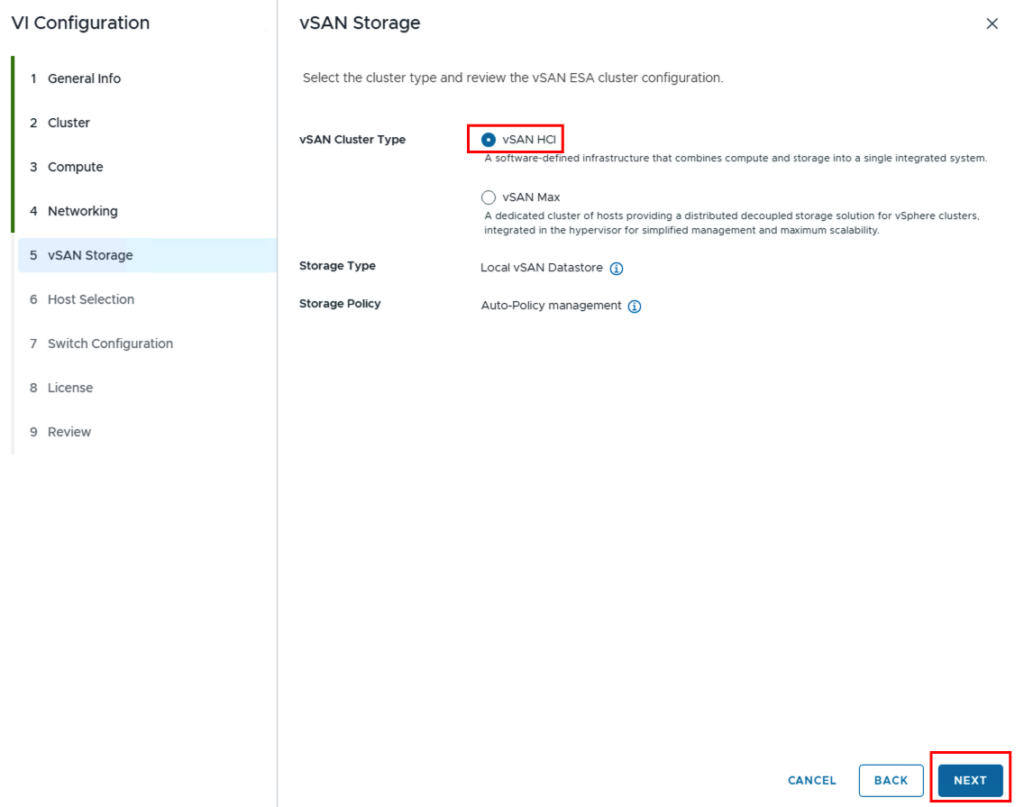
Since we want to use vSAN ESA in this setup, this is selected accordingly in the “Storage Selection”.
In the first input screen, enter the name and organization of the new workload domain. We’ll use the SSO domain created during the VCF installation.

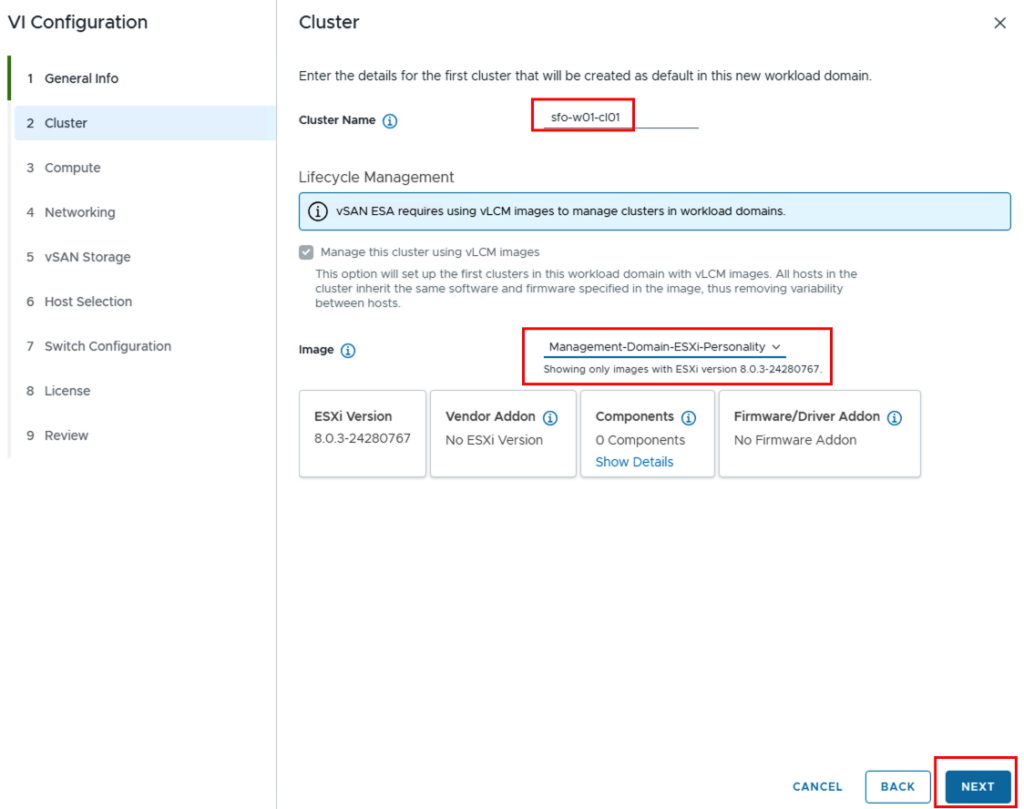
A vCenter cluster is created in the workload domain, and a name is also required here. If a specific image isn’t required, the existing image can be used.
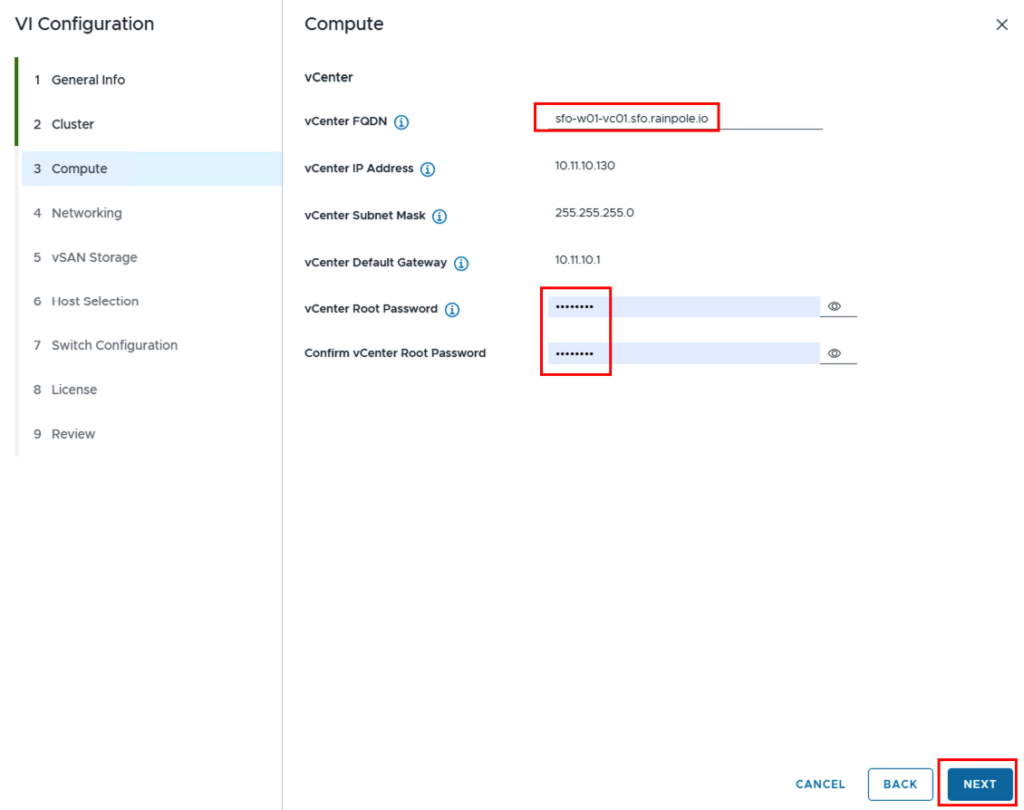
For the vCenter, an FQDN should already be configured on the DNS server. Once the FQDN is entered, the IP address will be automatically adopted.
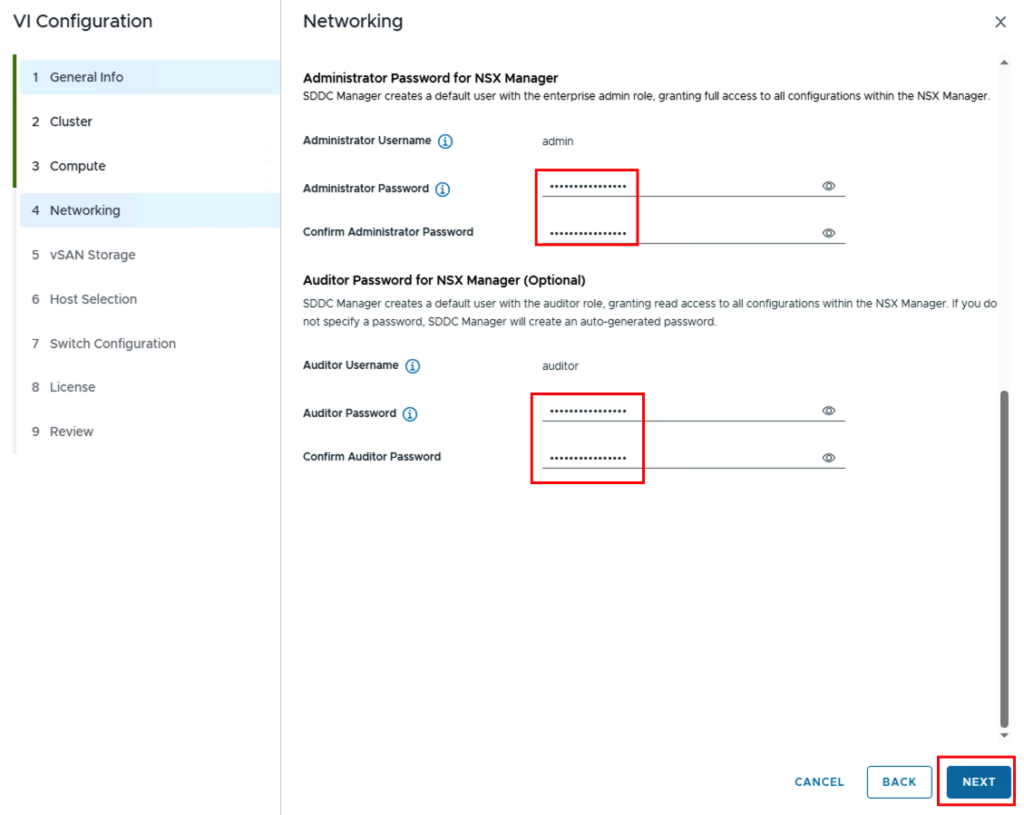
Three NSX Managers are installed for redundancy. The NSX management cluster also requires a virtual IP address (from the same IP network as the NSX Managers) through which the management cluster can be reached.

For vSAN storage, “vSAN HCI” is selected as the cluster type.
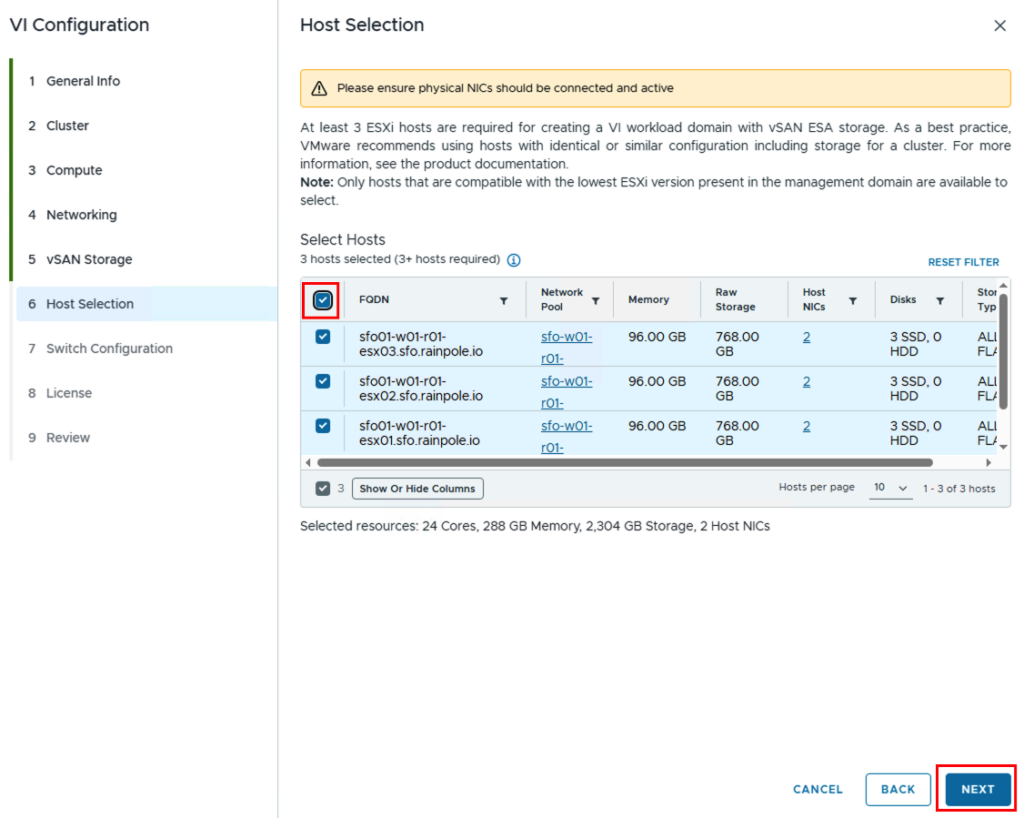
In the next step, the previously configured ESXi servers are selected.
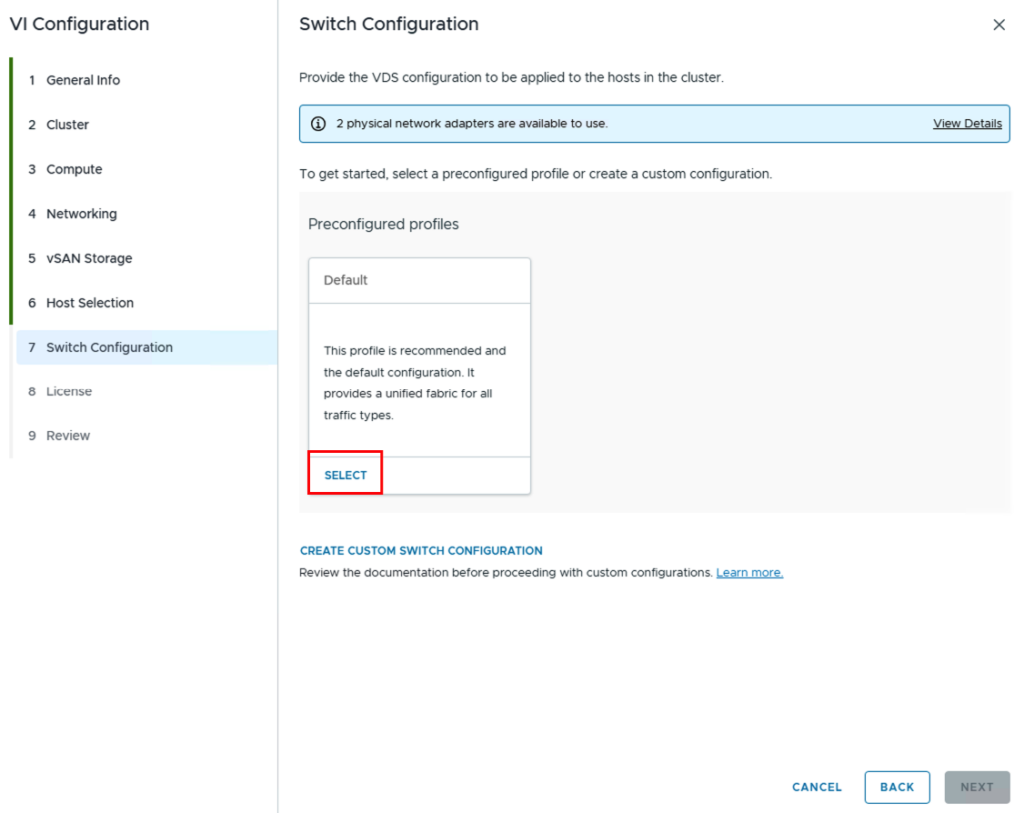
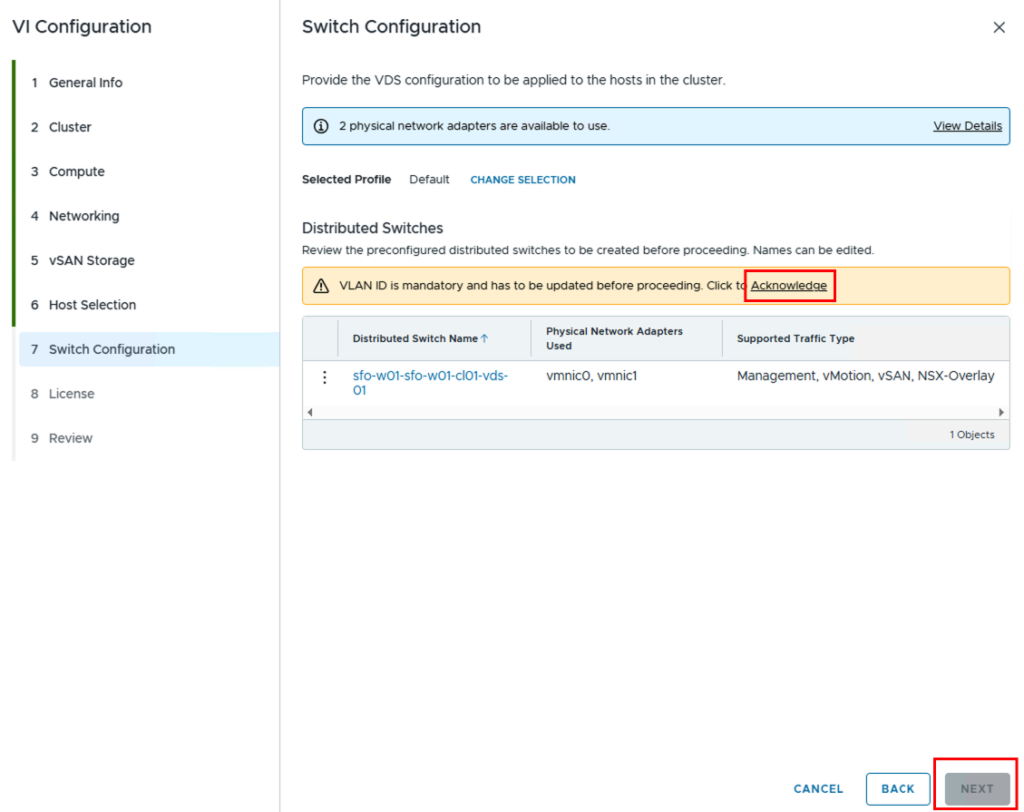
As a rule, the default profile can be used.
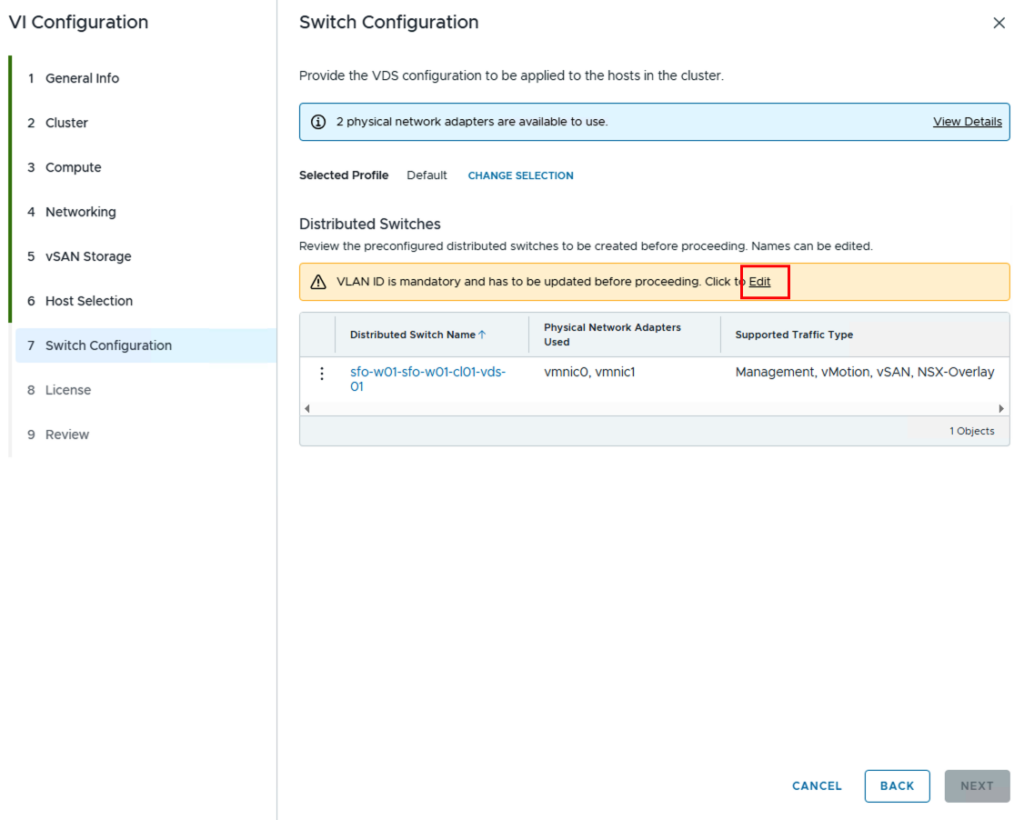
The VLANs for vMotion and vSAN have already been defined via the profile. The VLAN for the NSX overlay network still needs to be entered. IP assignment for the TEP network is handled via DHCP.
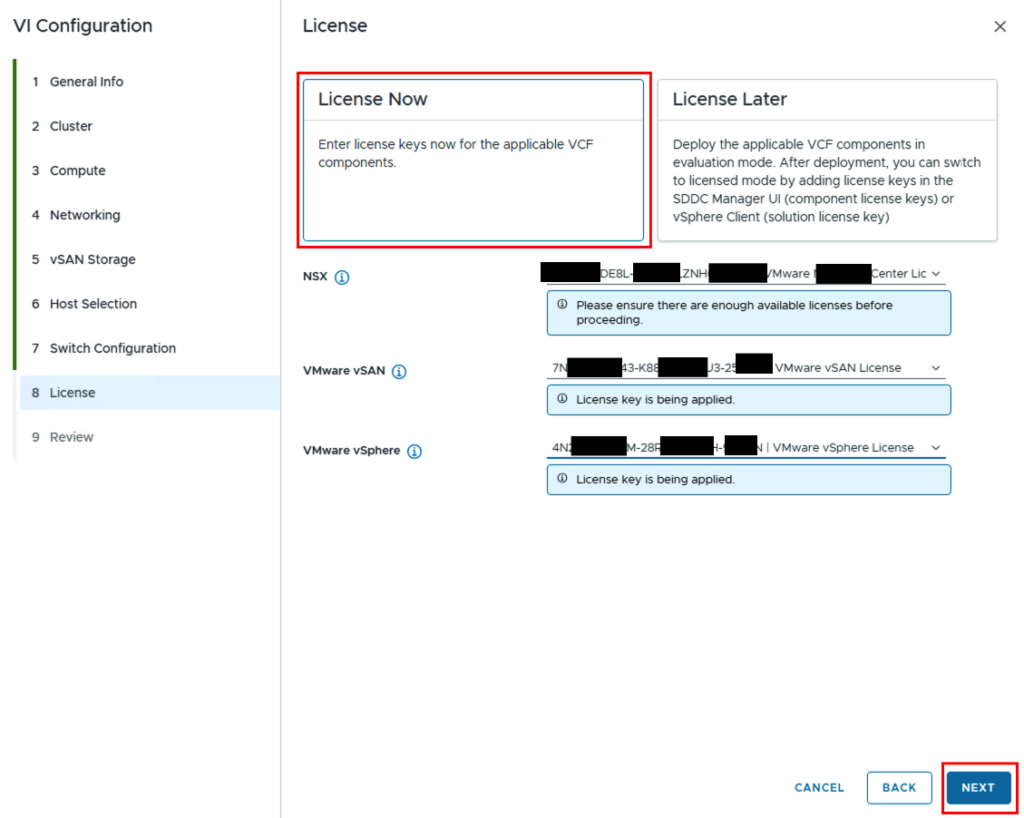
The licenses should be stored centrally on the SDDC Manager and will be entered automatically.
In the last step, the configuration can be finally checked and the installation process can be started by clicking “FINISH”.
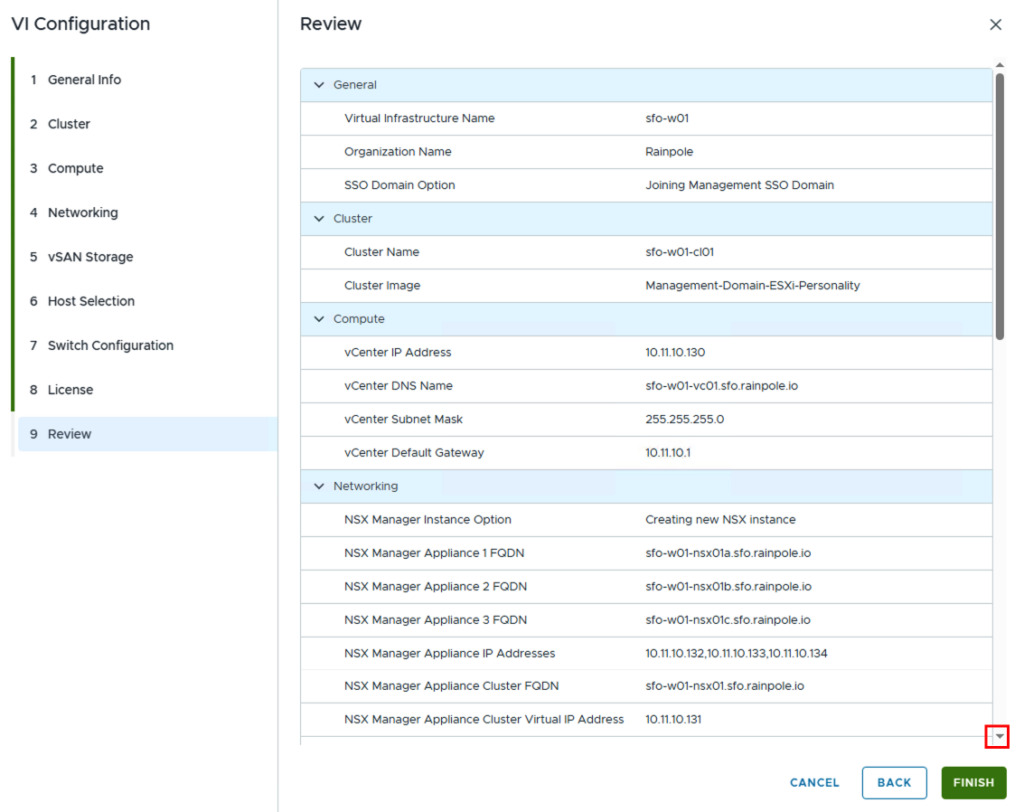
Review
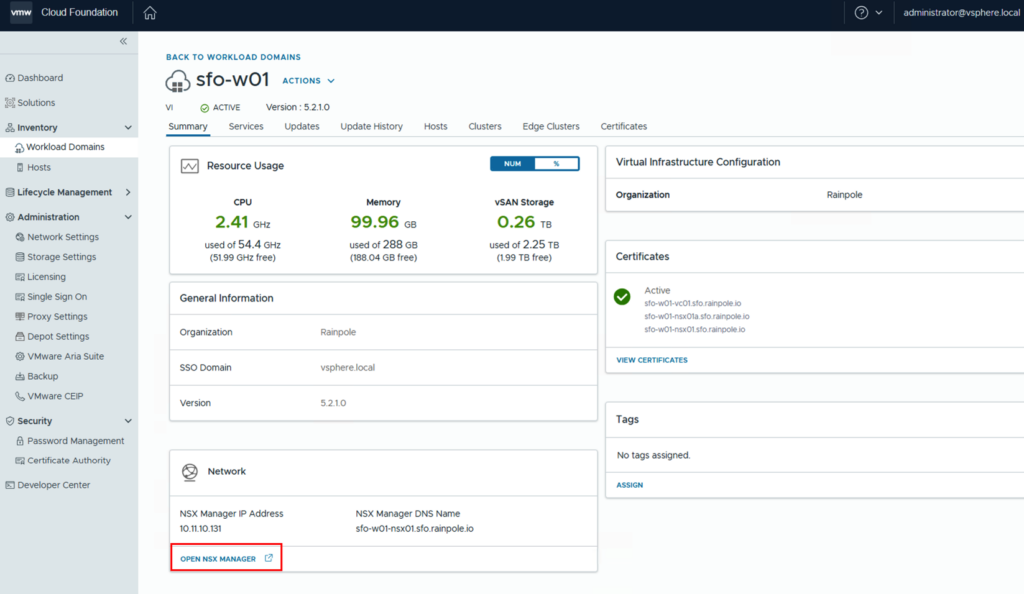
Once the workload domain has been created, it will appear under Inventory->Workload Domains and should have a configuration status of “ACTIVE.” The “sfo-w01” link takes you to the workload domain’s details.

In the summary you can see the virtual IP address of the NSX management cluster and by clicking “OPEN NSX MANAGER” a new browser tab to the NSX Manager opens.
In the NSX Manager under System->Fabric->Hosts-Clusters you can see that the hosts have been integrated into NSX.
Next Steps
The workload domain has been created, and the hosts are prepared for the network overlay. Routing is required to enable communication outside the software-defined data center. The configuration will be described in my next blog (https://vrealize.it/2025/06/02/vcf-nsx-edge-setup-aus-netzwerksicht/).

- VCF9 NSX-Edge Setup – What has changed - 11. July 2025
- VCF NSX-Edge setup from a network perspective - 2. June 2025
- VCF Workload Domain Setup from a network perspective - 2. June 2025
Great write-up, Daniel!
Did I understand that correct (and after RTFM) – the MGMT domain can use DHCP or IP Address Pools for Host Overlay, but in v9.0 any (additional) WLD is forced to use DHCP for Host Overlay networks? Or is it just enforced via the UI, but IP Address Pools for Host Overlay could be done via the API?
I am def. unable to change the TNP from DHCP to an IP Address Pool after WLD deployment (just tried it ;)).
Seems a bit odd, esp. since the Design part do not mention this limitation, but explicitly state both options as viable.