


Customers who don’t have internet connectivity in their datacenter will need an offline depot server which hosts the VCF 9.x installation, patch and update sources. For this any standard web server can be used. One option however is to deploy a web server based on the VMware Photon OS appliance. The process to create a web server is described in the official VCF documentation but requires several steps to be done manually.
Together with my peer, Christian Liebner (and our digital assistant 🙂 we created a powershell script which fully automatically deploys a Photon OS 5 based web server with the documented procedure.
Prepare for script run
After you have downloaded the script to a Windows system with Powershell installed, following prerequisites must be performed:
Enable SSH root access on vCenter
Open PowerShell Window
Install VMware PowerCLI
Install-Module -Name VMware.PowerCLI -Scope CurrentUserConfigure ExecutionPolicy
Set-ExecutionPolicy -ExecutionPolicy Bypass -Scope ProcessIn addition, make sure your datastore has at least 2TB space free.
Script details
The script follows the procedure of the official documentation. It first downloads the Photon OS 5 image to a local cache directory and imports it into the vCenter which credentials have been specified. To set the root user account to non-expiry and configure the network interface it populates the VM with respective cloud-init data which is executed on first boot.
To store the download files a 2TB additional disk will be added, formatted and mounted.
The script further checks the connectivity to the depot server through SSH and executes all relevant commands. For the certificate signing it copies a signing request from the depot server to the vCenter server and receives back the signed certificate files. Be aware that for this process it will change the shell temporarily from appliancesh to bash.
The apache web server will be configured for HTTPS.
Script Execution
On script execution, you will need to provide all required input parameters.
If you want to provide the input parameters through the command line, you will find all necessary parameters in the top of the script and can use them with this syntax:
.\depot-server-script.ps1 -VCenter "vcenter01.mlab.vmw" <add other parameters>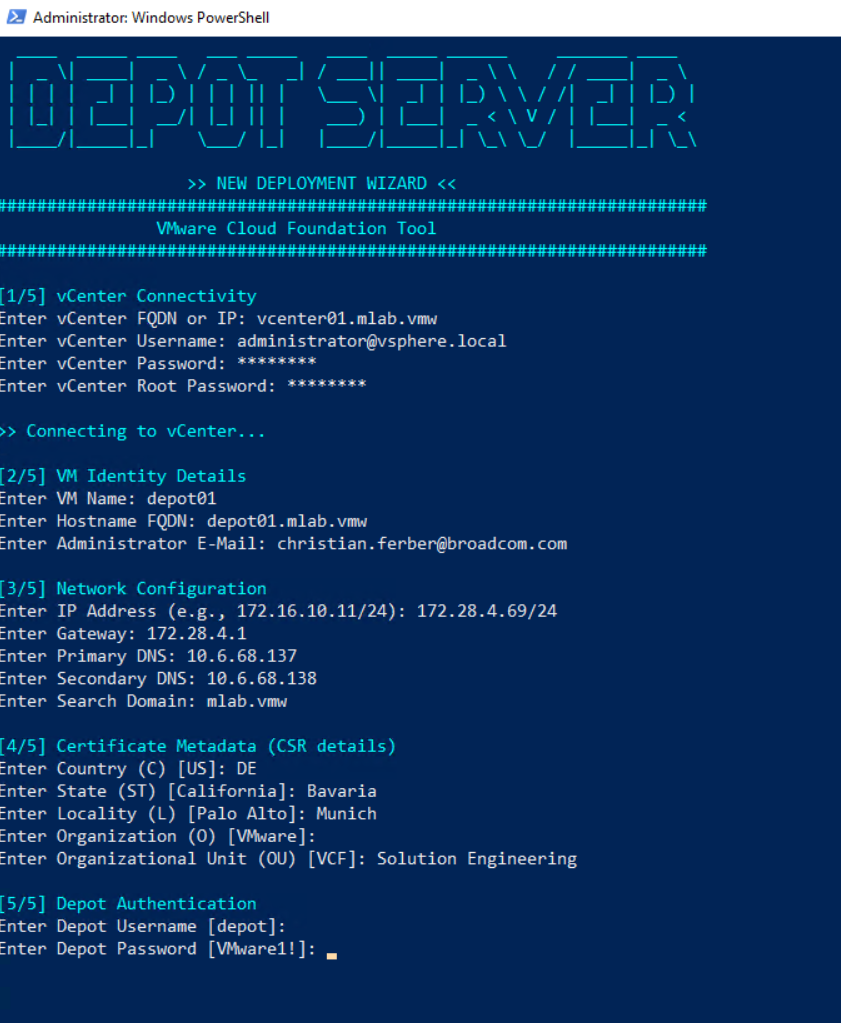
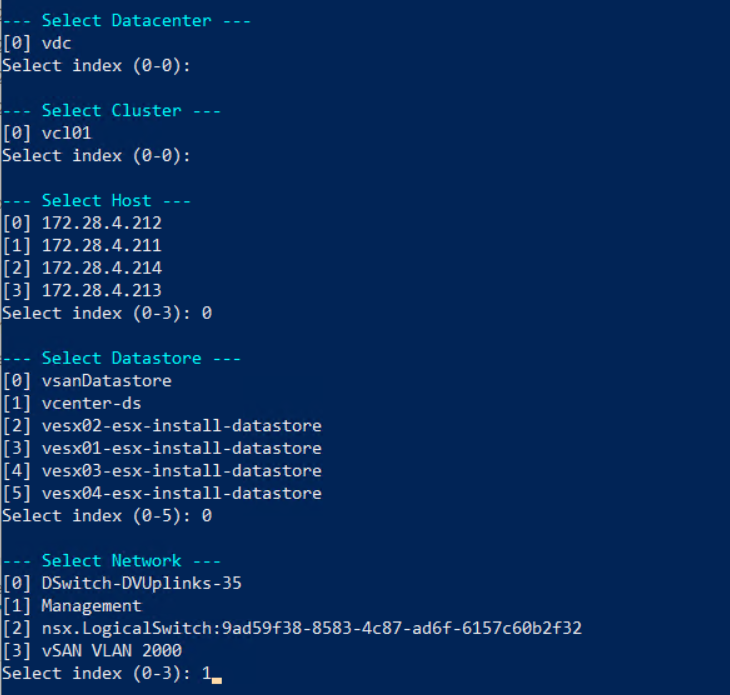
Once all input parameters have been specified, the script talks to vCenter and identifies the Datacenter, Cluster, available ESX hosts, Datastores and Networks. You can select which of the components to use for the further deployment of the VM.
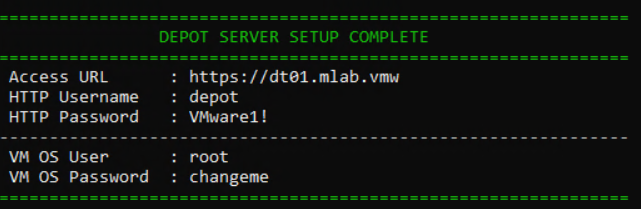
When the deployment has finished you should see a summary screen which shows the access credentials.
Root Certificate Import
The VCF 9 VCF installer & depot configuration as well as the VCF 9.1 installer don’t accept a self-signed certificate automatically through UI. You must import the certificate through CLI beforehand.
VCF 9.1 depot configuration (after installation) will ask in the UI for the certificate to trust.
To manually import the certificate, run the following steps:
Access VCF installer / SDDC manager through SSH
Login with “vcf” user
Change to root with “su -“
Get certificate from depot server (insert depot server FQDN)
openssl s_client -connect <depot server FQDN>:443 < /dev/null | sed -ne '/-BEGIN CERTIFICATE-/,/-END CERTIFICATE-/p' > /tmp/depot.crt Import certificate in Java store
keytool -importcert -alias custom-depot -file /tmp/depot.crt -keystore /etc/alternatives/jre/lib/security/cacerts -storepass changeit -nopromptRestart LCM service
systemctl restart lcmHave fun!

- VCF 9 – Automated Offline Depot Server Creation - 19. May 2026
- VCF Automation 9 – Content Libraries - 18. May 2026
- VCF 9 – Management Domain with vSphere 8 - 1. April 2026