


VCF 9 provides fully integrated Kubernetes support. This starts with a supervisor installation that in a nutshell enables Kubernetes on the ESX hosts. Finally, it allows provisioning of vSphere Kubernetes Clusters within a namespace. There’s also the capability to leverage supervisor services which are delivered by VMware directly on the supervisor clusters. Find here the list of available supervisor services and some details on their functionality.
If you are a vSphere Administrator and didn’t have many touch points with Kubernetes so far, it’s probably challenging to understand what all the services are doing and which value they provide.
To accommodate that I am starting with this blog to explain such services with the simplest example everybody can reproduce easily in his VCF 9 supervisor environment.
Although I am using VCF Automation in by blog, it could also be done with a standalone supervisor and its VKS cluster. The authentication method, however, will differ slightly.
This blog demonstrates the functionality of the Contour ingress controller. To be clear: I am not considering myself being a Kubernetes expert but try to explain an example use case as easy as possible allowing everybody to understand it and draw his conclusions.
Use case of Contour ingress controller
The Contour ingress controller consists of 2 components: Contour and Envoy. Both are installed with the Contour installation.
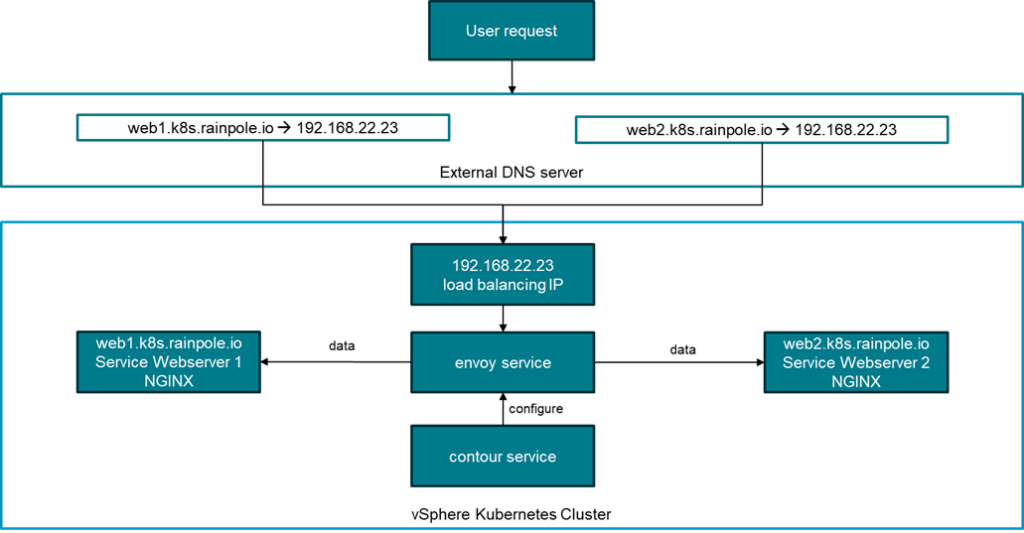
The use case of an ingress controller is minimizing the IP usage for high scale deployments. In the example of web servers, you can have multiple web servers reachable by their individual FQDN, but all FQDNs are pointing to the very same IP address. In the drawing web1.k8s.rainpole.io points to web server 1 and web2.k8s.rainpole.io points to web server 2. Another advantage is that it helps to get rid of static IP address assignments which reduce the flexibility of systems.
Envoy is the “engine” which does the actual data redirection. Contour is the “control plane” which programs the rules into envoy. If Contour wouldn’t be there you would have to create an envoy json logic on every IP address change manually.
When Contour is installed, envoy automatically creates a service of type LoadBalancer which retrieves an IP address from the configured ingress address pool. This was pre-configured when the supervisor configuration was created. By default, NSX is doing the load balancing technically.
Pre-requisites for a demo setup
There are a couple of pre-requisites which need to be done before the example configuration can be deployed.
- Working vSphere Supervisor configuration (here including VCF Automation with an all-apps-org leveraging the supervisor cluster)
- Deployed VKS Cluster (I’d recommend a node pool side of medium or higher – 2CPU 8GB RAM)
- Install VCF CLI, add the context of the VKS cluster and switch to it (process explained here)
Manage package repository
VKS has the capability to install packages into VKS cluster with the VMware package repository. The package repository is managed by the vcf cli command. For each VKS release (currently 3.5) a new repository version is released which must be configured manually.
The URL for the package repository can be retrieved from the release notes of the VKS release.
For version 3.5 the package repository link is projects.packages.broadcom.com/vsphere/supervisor/packages/2025.10.22/vks-standard-packages:3.5.0-20251022
You can add or update the repository reference in your installation with the command below. The documentation includes some more details.
vcf package repository add broadcom-standard-repo --url projects.packages.broadcom.com/vsphere/supervisor/packages/2025.10.22/vks-standard-packages:3.5.0-20251022 -n tkg-systemCert Manager Installation
Cert Manager takes care of the certificate handling for encrypted connections. As the access to web services or similar usually is HTTPS protected, Cert Manager is an essential component which is required to be installed before Contour.
In our example where we use a simple HTTP (80) connection, Cert Manager has no functionality. It must be installed though.
There’s a more detailed documentation how to install Cert Manager available. In a nutshell, you need two commands:
Retrieve the available package versions:
vcf package available get cert-manager.kubernetes.vmware.com -n tkg-systemInstall Cert Manager with the desired (usually latest) version:
vcf package install cert-manager -p cert-manager.kubernetes.vmware.com --namespace package-installed --version 1.18.2+vmware.2-vks.2Install Contour with Envoy
Contour is installed in a similar way like Cert Manager. The VCF documentation includes that part as well. Contour is configured through a configuration file which is specified with the installation command.
You can use this example file which will suffice for this use case:
---
infrastructure_provider: vsphere
namespace: tanzu-system-ingress
contour:
  configFileContents: {}
  useProxyProtocol: false
  replicas: 2
  pspNames: "vmware-system-restricted"
  logLevel: info
envoy:
  service:
    type: LoadBalancer
    annotations: {}
    externalTrafficPolicy: Cluster
    disableWait: false
  hostPorts:
    enable: true
    http: 80
    https: 443
  hostNetwork: false
  terminationGracePeriodSeconds: 300
  logLevel: info
certificates:
  caDuration: 8760h
  caRenewBefore: 720h
  leafDuration: 720h
  leafRenewBefore: 360h
Now you can list the available package versions:
vcf package available get contour.kubernetes.vmware.com -n tkg-systemInstall Contour with this command specifying the desired version and the previously created values file:
vcf package install contour -p contour.kubernetes.vmware.com -v 1.33.0+vmware.1-vks.1 --values-file contour-data-values.yaml -n contourAfter successful installation you will see the contour and envoy services in the tanzu-system-ingress namespace.

Please note the IP address of the envoy LoadBalancer service (192.168.22.23 in this case) as this is the IP you must point your DNS entries to.
Configure DNS server
On the DNS server side simply add one entry for each target web server pointing to the very same IP address. You can use different DNS names if you like. Just make sure you add them correctly into DNS and configure them in the nginx yaml files below.

Create NGINX Pods
As all Contour configuration has been done, the next step is to deploy a workload which makes use of it. Here we are using two simple NGINX web servers which present the webpage web1 and the webpage web 2. Although I say “simple” here, it might look rather complicated for somebody who is not familiar with Kubernetes yaml files. Let me break the file down into different sections explained by comments in the beginning of each section.
If you are using a different DNS name than the one I used in this example, make sure to modify the VirtualHost in the HTTPProxy section.
nginx-ingress-web1.yaml
# This creates a namespace for the service on the Kubernetes cluster
apiVersion: v1
kind: Namespace
metadata:
name: nginx-web1
---
# This part is required to present a different web page than the default one on the nginx server.
# As I didn’t want to modify the nginx image, I am storing the web page code in a configmap object
# Later this config map will be mounted to the nginx pod and replace the existing index.html file
apiVersion: v1
kind: ConfigMap
metadata:
name: nginx-html-config
namespace: nginx-web1
data:
index.html: |
<html>
<head>
<style>
body { font-family: sans-serif; text-align: center; margin-top: 50px; }
.highlight { color: #008000; font-weight: bold; }
</style>
</head>
<body>
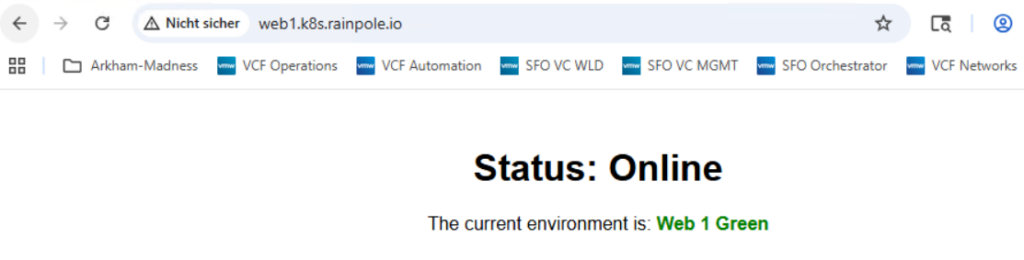
<h1>Status: Online</h1>
<p>The current environment is: <span class="highlight">Web 1 Green</span></p>
</body>
</html>
---
# This is the deployment object for the nginx service. It creates the actual nginx pods (containers).
# You will see the above-mentioned mounting of the configmap entry in it.
# It includes some security sections and uses a specific unprivileged nginx image to meet
# the security requirements defined for VKS clusters
apiVersion: apps/v1
kind: Deployment
metadata:
name: nginx-web1
namespace: nginx-web1
spec:
replicas: 1
selector:
matchLabels:
app: nginx-vks
template:
metadata:
labels:
app: nginx-vks
spec:
securityContext:
runAsNonRoot: true
runAsUser: 101
runAsGroup: 101
fsGroup: 101
seccompProfile:
type: RuntimeDefault
containers:
- name: nginx
image: nginxinc/nginx-unprivileged:stable-alpine
ports:
- containerPort: 8080
# Mounting config map to replace index.html
volumeMounts:
- name: html-volume
mountPath: /usr/share/nginx/html/index.html
subPath: index.html
# ---------------------------------------
securityContext:
allowPrivilegeEscalation: false
capabilities:
drop:
- ALL
resources:
limits:
cpu: 100m
memory: 128Mi
requests:
cpu: 50m
memory: 64Mi
volumes:
- name: html-volume
configMap:
name: nginx-html-config
---
# The service exposes the nginx service through a port which eliminates the need to access
# each individual pod if there are multiple ones
# Note that nginx internally is accessed by port 8080 while externally (for the user) port 80 is used
apiVersion: v1
kind: Service
metadata:
name: nginx-service-web1
namespace: nginx-web1
spec:
selector:
app: nginx-vks
ports:
- protocol: TCP
port: 80
targetPort: 8080
---
# This is the actual conde which configures Contour
# It defines the actual FQDN for the web service and specifies to redirect traffic to the
# nginx service (nginx-service-web1) in the section before once the FQDN is detected
apiVersion: projectcontour.io/v1
kind: HTTPProxy
metadata:
name: proxy-web1
namespace: nginx-web1
spec:
virtualhost:
fqdn: web1.k8s.rainpole.io
routes:
- conditions:
- prefix: /
services:
- name: nginx-service-web1
port: 80
The yaml for the web 2 service looks similar, just the names for the namespace/service and the HTML content have been replaced.
nginx-ingress-web2.yaml
apiVersion: v1
kind: Namespace
metadata:
name: nginx-web2
---
apiVersion: v1
kind: ConfigMap
metadata:
name: nginx-html-config
namespace: nginx-web2
data:
index.html: |
<html>
<head>
<style>
body { font-family: sans-serif; text-align: center; margin-top: 50px; }
.highlight { color: #0000FF; font-weight: bold; }
</style>
</head>
<body>
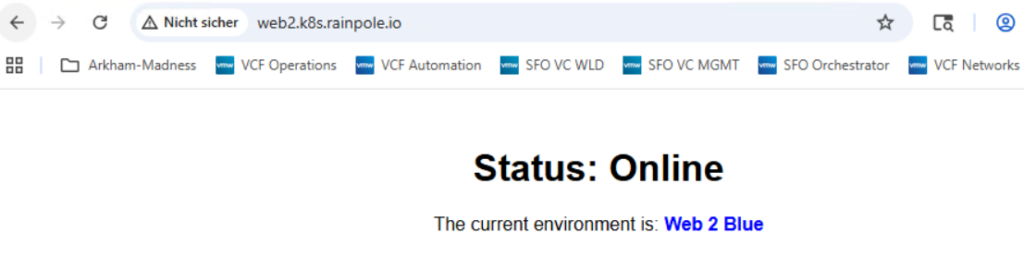
<h1>Status: Online</h1>
<p>The current environment is: <span class="highlight">Web 2 Blue</span></p>
</body>
</html>
---
apiVersion: apps/v1
kind: Deployment
metadata:
name: nginx-web2
namespace: nginx-web2
spec:
replicas: 1
selector:
matchLabels:
app: nginx-vks
template:
metadata:
labels:
app: nginx-vks
spec:
securityContext:
runAsNonRoot: true
runAsUser: 101
runAsGroup: 101
fsGroup: 101
seccompProfile:
type: RuntimeDefault
containers:
- name: nginx
image: nginxinc/nginx-unprivileged:stable-alpine
ports:
- containerPort: 8080
# Mounting config map to replace index.html
volumeMounts:
- name: html-volume
mountPath: /usr/share/nginx/html/index.html
subPath: index.html
# ---------------------------------------
securityContext:
allowPrivilegeEscalation: false
capabilities:
drop:
- ALL
resources:
limits:
cpu: 100m
memory: 128Mi
requests:
cpu: 50m
memory: 64Mi
volumes:
- name: html-volume
configMap:
name: nginx-html-config
---
apiVersion: v1
kind: Service
metadata:
name: nginx-service-web2
namespace: nginx-web2
spec:
selector:
app: nginx-vks
ports:
- protocol: TCP
port: 80
targetPort: 8080
---
apiVersion: projectcontour.io/v1
kind: HTTPProxy
metadata:
name: proxy-web2
namespace: nginx-web2
spec:
virtualhost:
fqdn: web2.k8s.rainpole.io
routes:
- conditions:
- prefix: /
services:
- name: nginx-service-web2
port: 80
Store both files with their names nginx-ingress-web1.yaml and nginx-ingress-web2.yaml.
To create the service simply issue following command:
kubectl apply -f nginx-ingress-web1.yaml -f nginx-ingress-web2.yamlTest your setup
If everything has been configured correctly, you should be able to connect to web1.k8s.rainpole.io and web2.k8s.rainpole.io

- VCF 9 – VKS Clusters with External-DNS - 19. February 2026
- VCF 9 – VKS Clusters with Contour - 16. February 2026
- VCF Automation 9 – Accessing VKS Clusters - 30. January 2026