Beforehand I would like to express my thanks to Sascha Warno for his help in configuring the Keycloak integration.
vRealize Automation 8 is leveraging VMware Identity Manager for authentication of users. While in most environments Identity Manager is integrated with LDAP directory services like Microsoft Active Directory, it supports a wide variety of other identity providers e.g. through SAML protocol. This blog captures the necessary configuration steps for integrating VMware Identity Manager with Keycloak authentication service in a vRealize Automation environment.
Download SAML service provider metadata
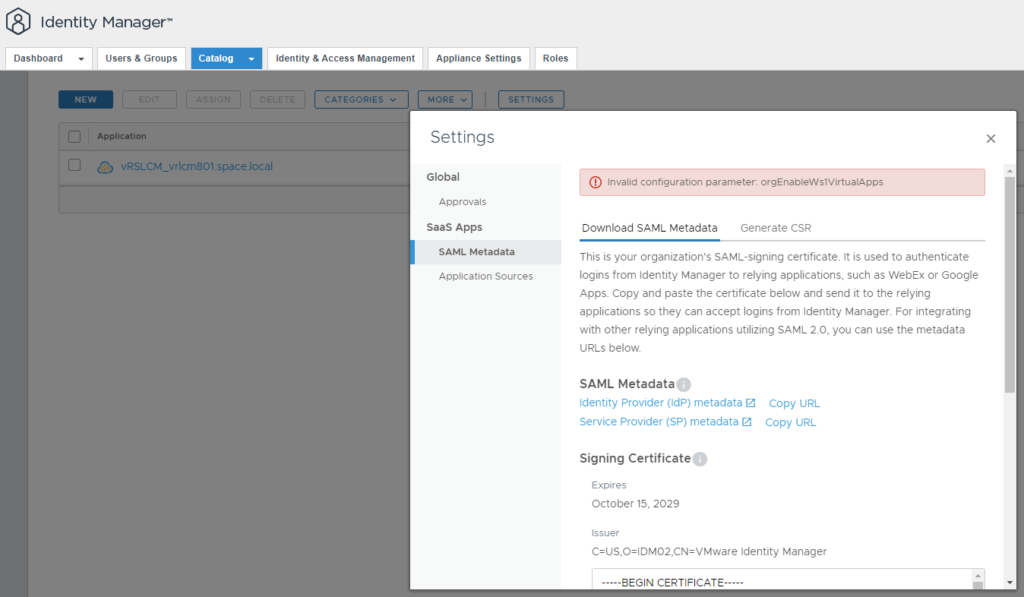
Login to Identity Manager Administration Console
Go to “Catalog” à “Web Apps” à “Settings” à “SAML Metadata”
Download the “Service Provider (SP) metadata” XML file
Configuration in Keycloak
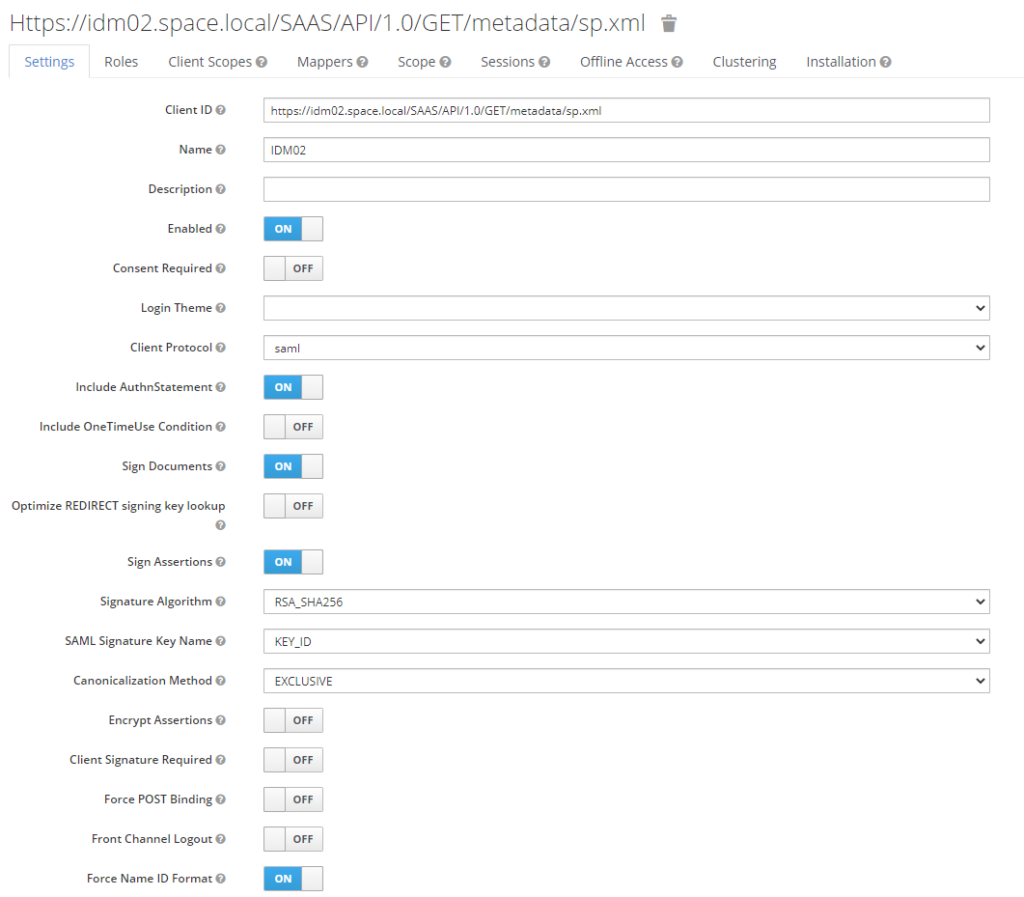
Create a new client in Keycloak and select the file that just has been downloaded


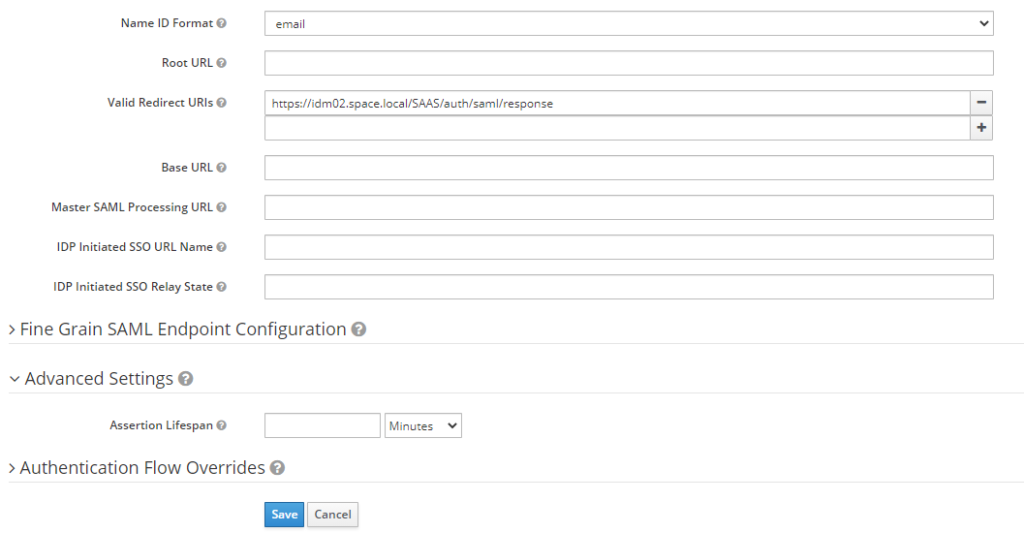
Modify the settings as per below screenshots
Go to “Client Scopes” and remove the assigned role_list

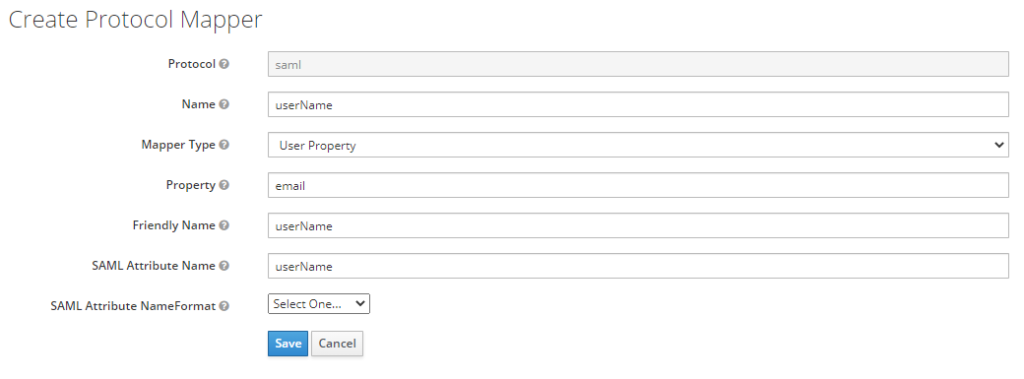
Go to “Mappers” and add below mappers

Create a new protocol mapper as per below screenshot
Edit the 3 existing mappers as per below screenshots
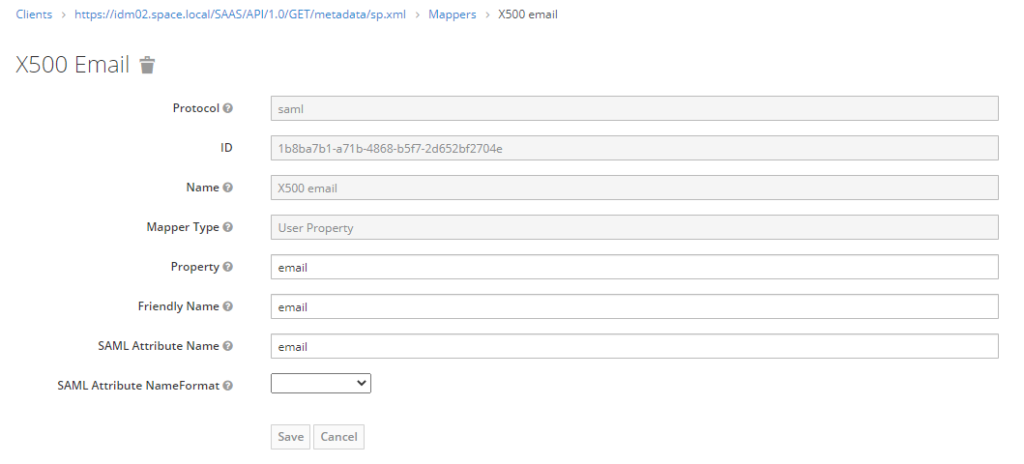
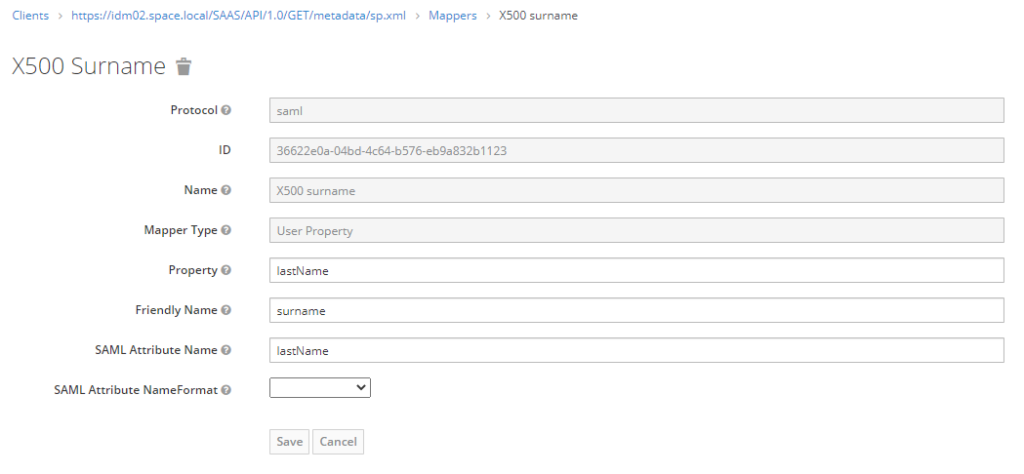
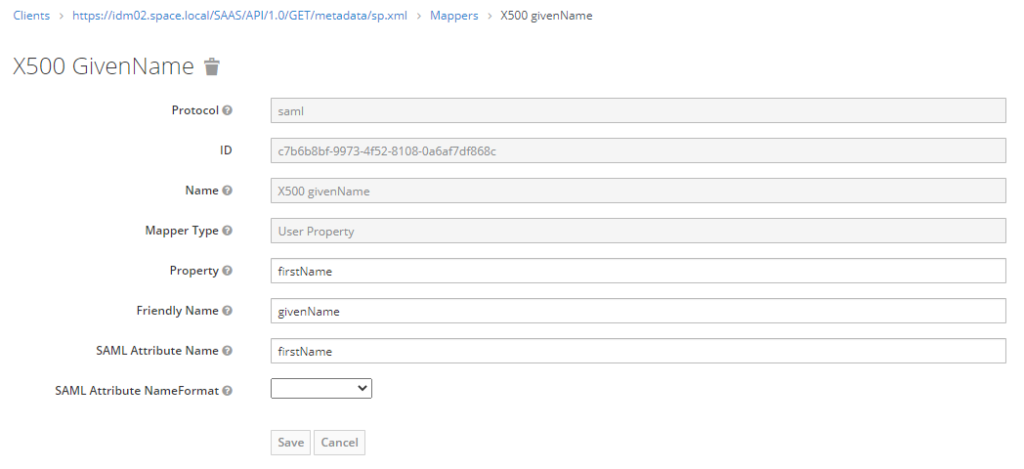
Save new client configuration
Go to realm settings and open the “SAML 2.0 Identity Provider Metadata”
Right click and save it as “descriptor.xml”
Click on Browser URL lock symbol and store CA certificate as Base-64 encoded local file (copy to file)


Import of CA certificate in Identity Manager
Go to Identity Manager à “Appliance Settings” à “VA Configuration” à “Manage Configuration” and log on to the interface.

Go to “Install SSL Certificates” à Trusted CAs and copy the content of the downloaded certificate file into the “Root or Intermediate Certificate” box
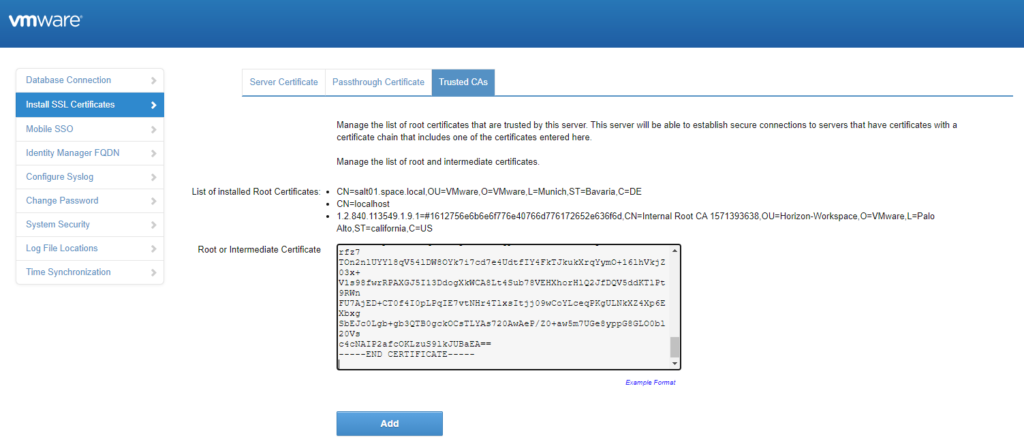
Add the new certificate and wait for it to be finished
Modification of descriptor.xml
As Identity Manager can’t work with md:EntitiesDescriptor section, open the descriptor.xml file and remove the section headers and footers, see screenshots below.
Before removal:

After removal:

Identity Provider configuration in Identity Manager
Go to “Identity & Access Management” à “Identity Providers” à “Add Identity Provider” à “Create Third Party IDP”
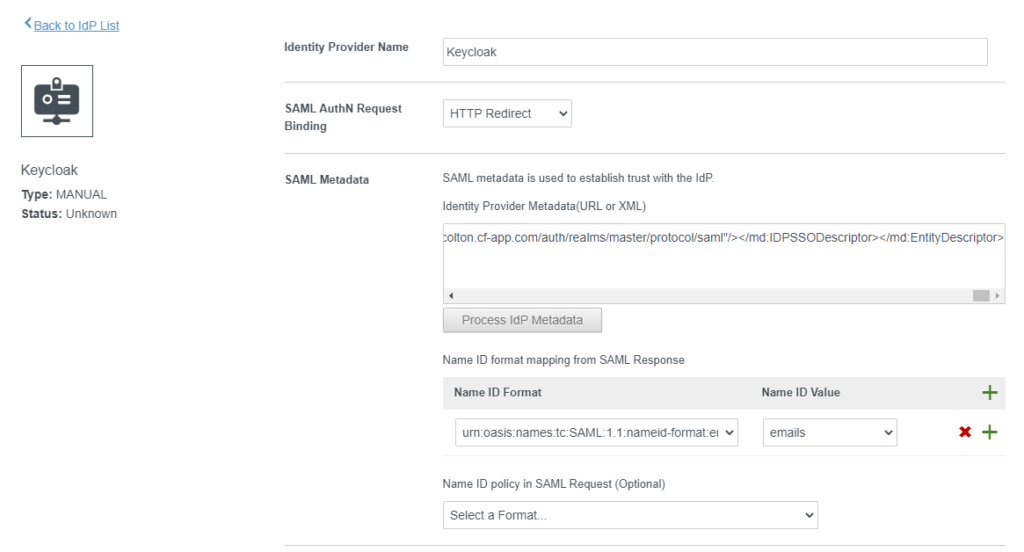
Insert data as per below screenshots and copy the content from the modified descriptor.xml file into the SAML Metadata box.
Use urn:oasis:names:tc:SAML:1.1:nameid-format:emailaddress as Name ID Format
Use urn:oasis:names:tc:SAML:2.0:ac:classes:unspecified as SAML Context
Make sure you enable Just-in-Time User Provisioning and enable networks for ALL RANGES


Enable Keycloak authentication in policy
The Identity Manager policy by default has not enabled new identity providers. To enable Keacloak for authentication, following steps must be performed:
Go to “Identity & Access Management” à “Policies”
Edit default_access_policy_set


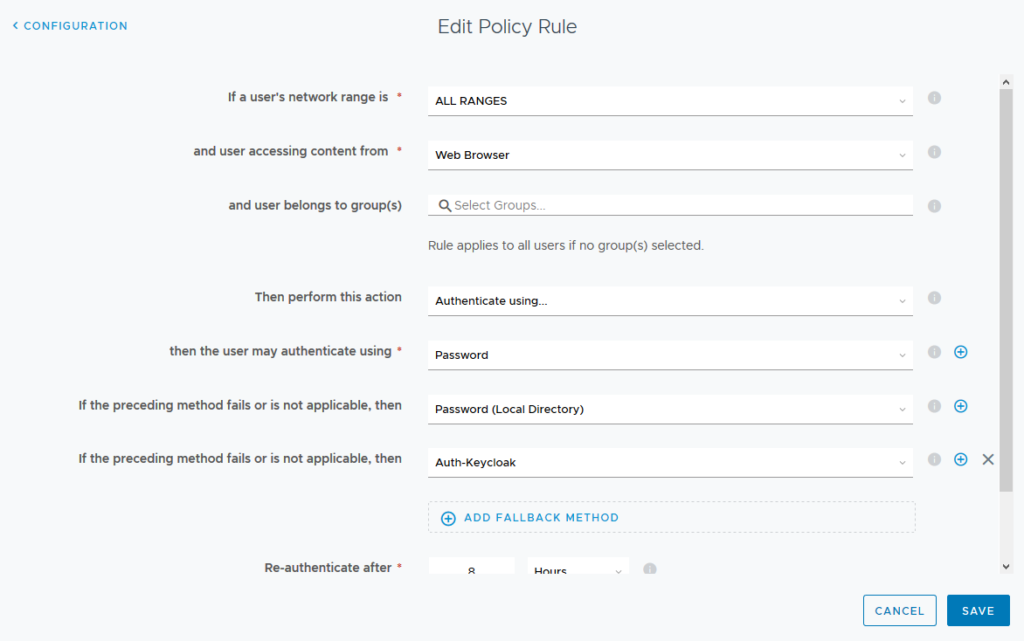
Go to “Configuration” à “ALL RANGES” (Web Browser)
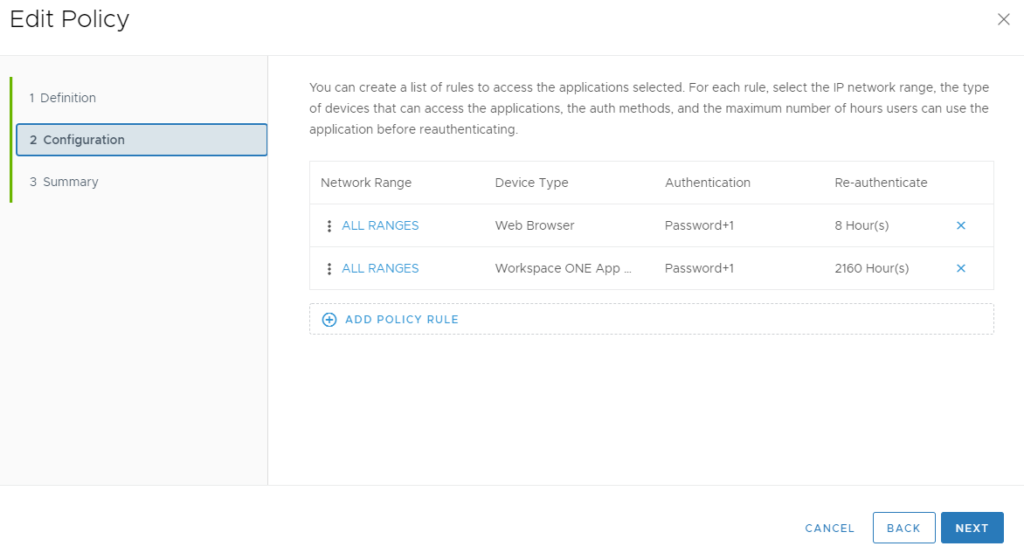
Select “ADD FALLBACK METHOD” and select your Keycloak authentication entry in the dropdown.
Note: Make sure you are not using the + sign behind an existing method as this will add a “AND” correlation which won’t work.
Authorize Keycloak users on vRealize Automation
VRealize Automation leverages users and groups from Identity Manager to assign permissions to them. Keycloak authentication is based on a just-in-time-user-provisioning principle where users are created in Identity Manager database automatically once they have logged on. Therefore, a way is required to authorize them on vRA automatically. This can be done by creating a local group on Identity Manager which is given the appropriate roles and permissions on vRA side. Identity Manager supports adding users based on policies which means that a rule must be put in place that automatically adds Keycloak users into a distinct group once they are created after successful logon.
To achieve this, first a group on Identity Manager is created:
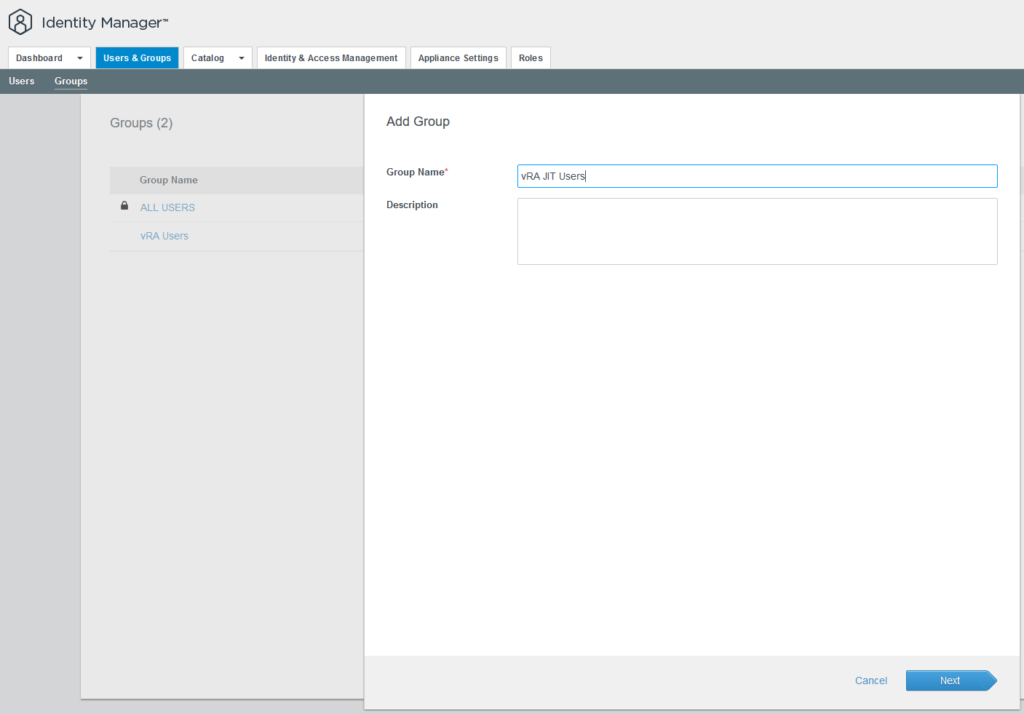
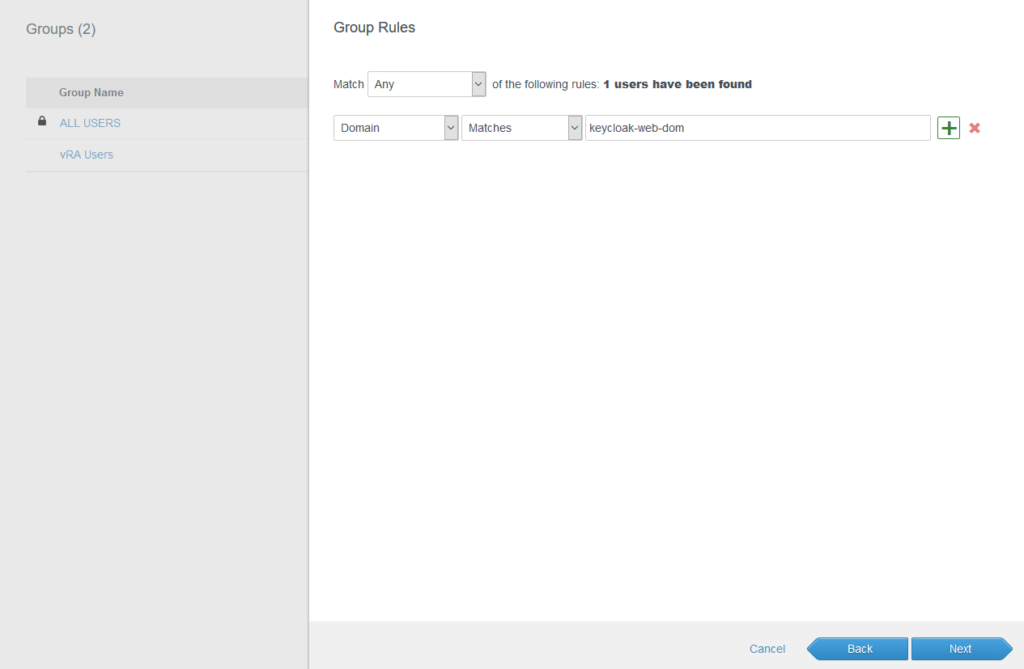
Under group rules create a rule that adds all users from Keycloak. This can be done by a criterion matching the domain name for the Keycloak domain that has been created before.
Finally, the group is added to vRealize Automation Identity & Access Management with the required roles. Additional permissions might be added on a project level or at other points in the product.

Testing the configuration
At vRealize Automation login you now will see the selection of your different authentication providers where Keycloak is one of them.

Once selected you will be directly forwarded to the Keycloak authentication page. After successfully adding your credentials, the user is created in local Identity Manager database, it is added to the group by the rule created before and vRealize Automation logs you in with the pre-defined permissions.

Have fun!
- 1-node Kubernetes Template for CentOS Stream 9 in VCF Automation - 30. September 2024
- Aria Automation custom resources with dynamic types - 9. August 2024
- Database-as-a-Service with Data Services Manager and Aria Automation - 4. July 2024
