


We sometimes get the question how to install a standalone VCF Operations and VCF Operations for Logs without the VCF installer. Some customers want to use the OVAs in their environments and configure them without Fleet Management. So only for monitoring purposes without additional overhead for management. I have therefore reproduced the necessary steps and documented them in this blog.
These instructions only work with a VVF license. Check out my other blog which explains the behavior in a VCF scenario.
VCF9 – VCF Operations and VCF Operations for Logs installation/configuration without VCF Installer
Deploy VCF Operations Appliance:
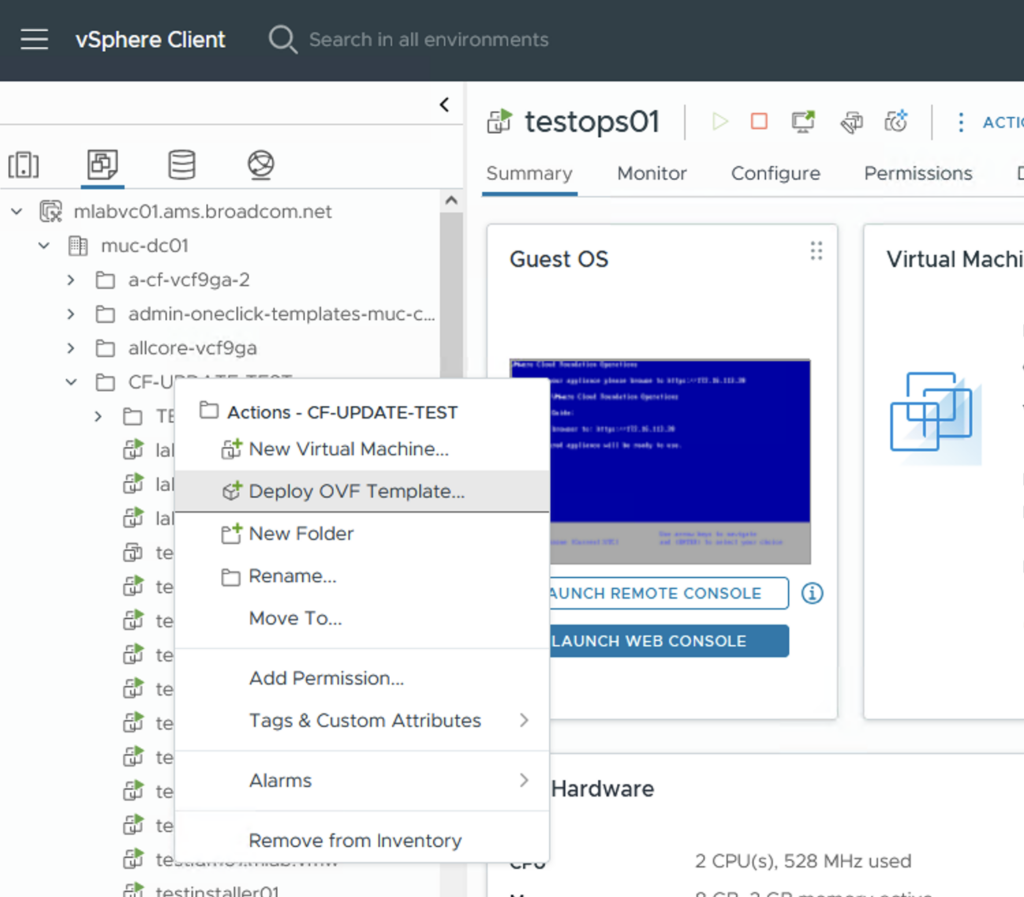
Search for the appropriate location in the vCenter, right-click on it and select the menu item “Deploy OVF Template”
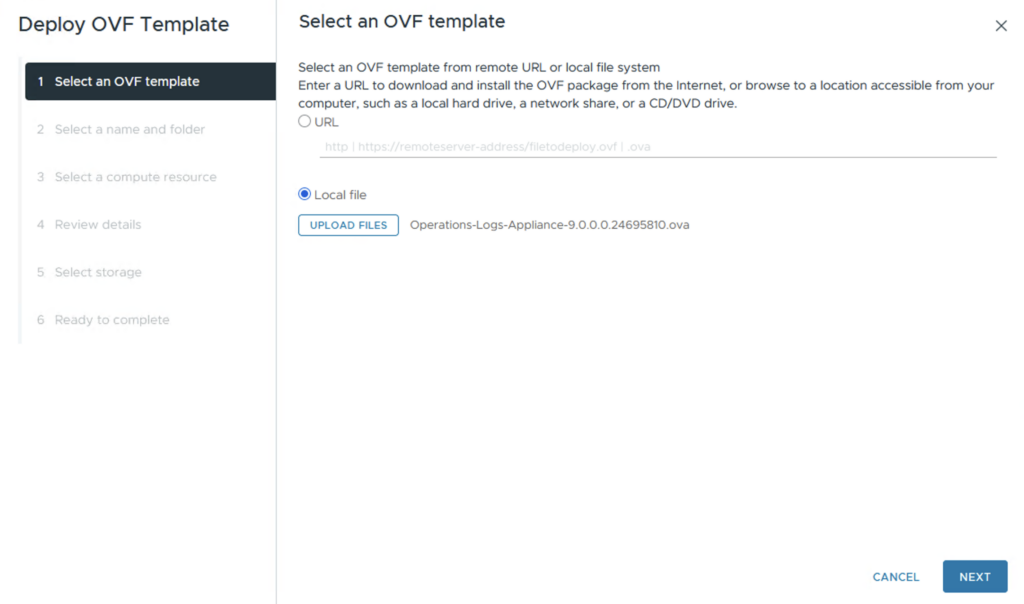
Select Local Files and click on Upload Files. Select the VCF Operations OVA and click NEXT
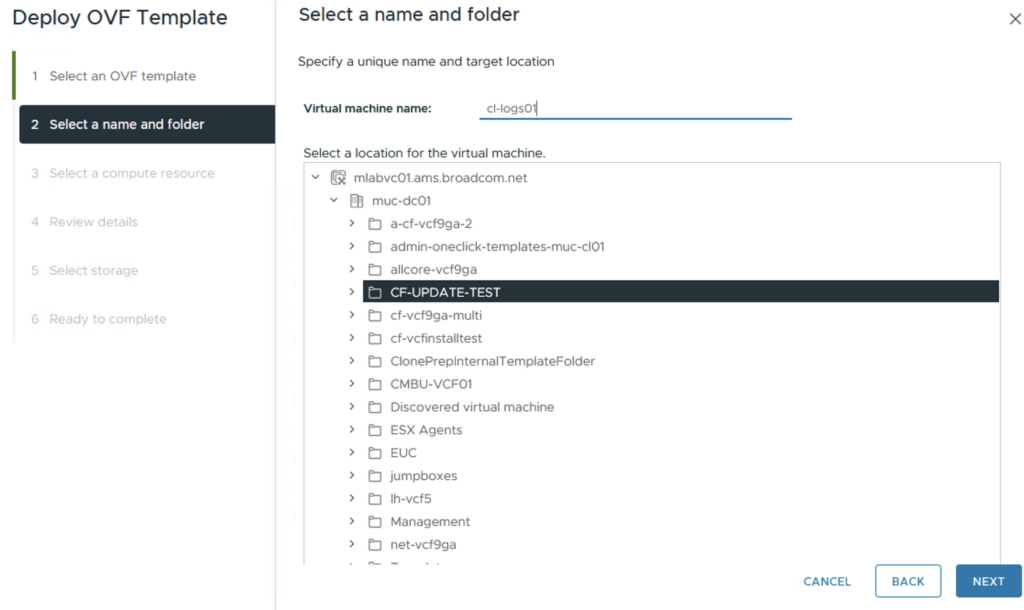
Choose a name for the VM and a folder. Click NEXT
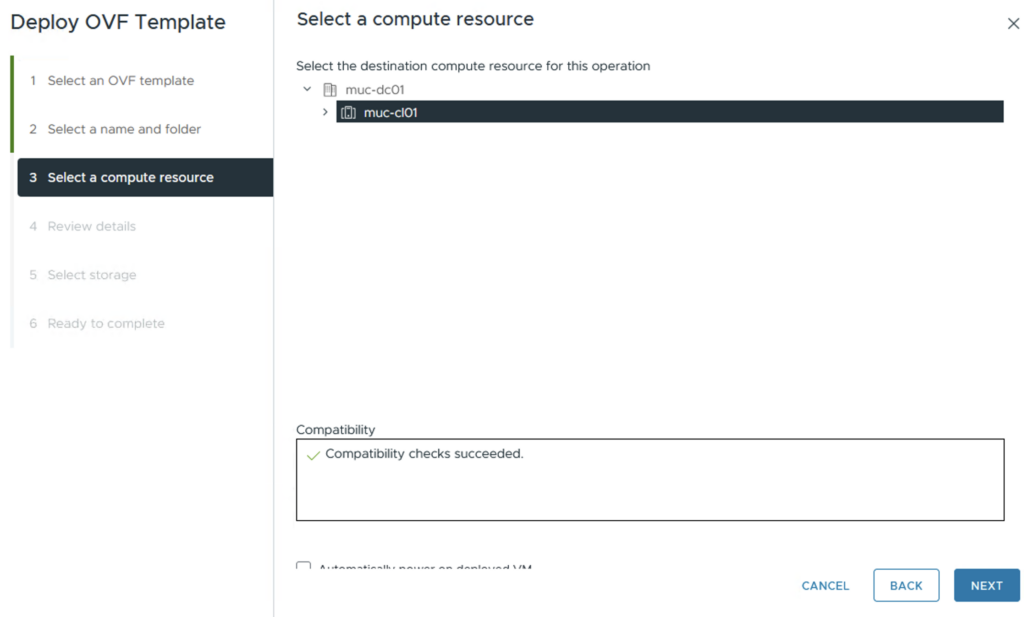
Select a compute resource. Click NEXT
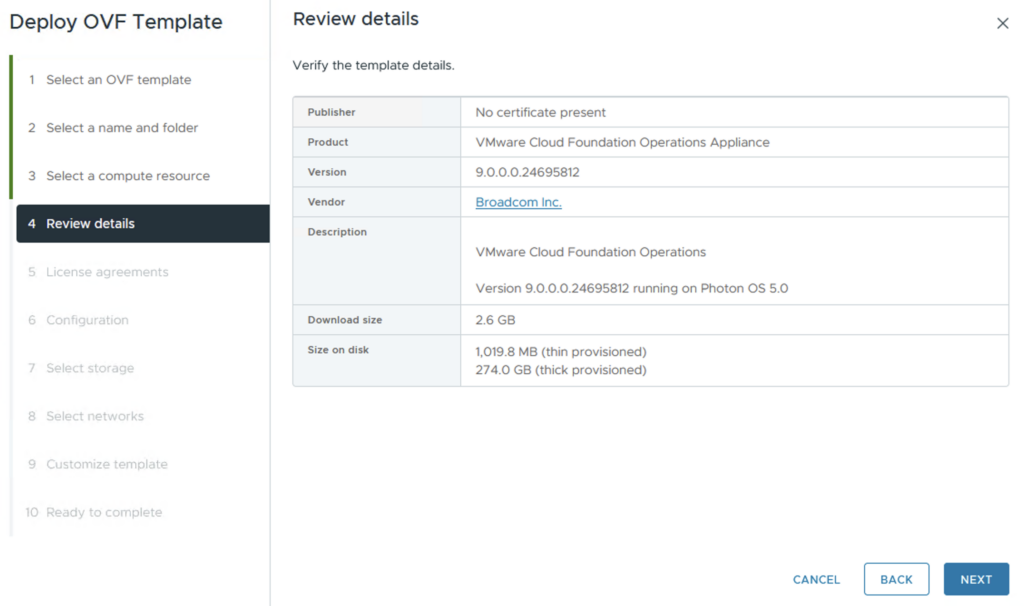
Review details. Click NEXT
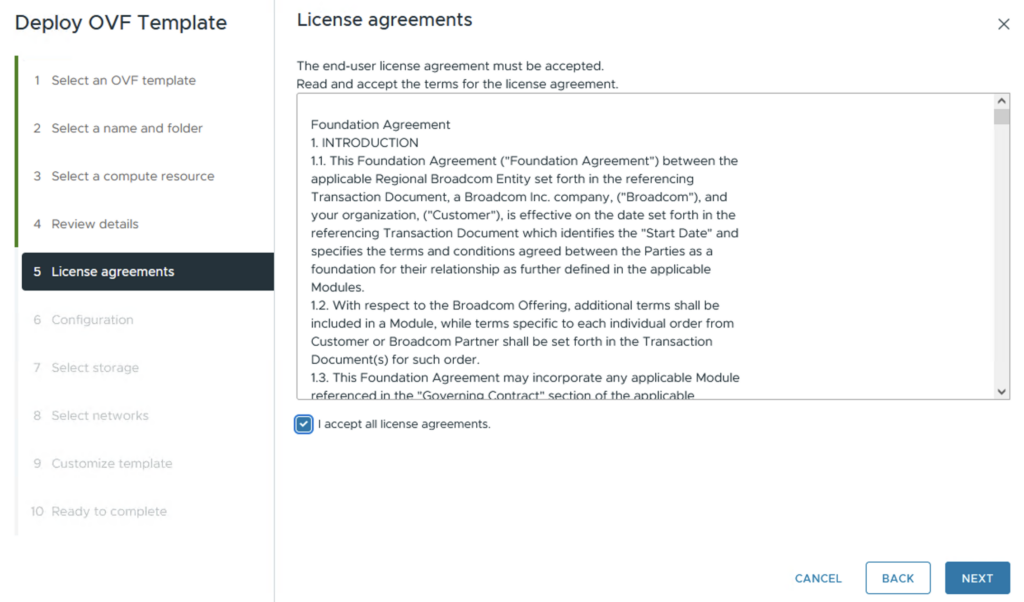
Accept all license agreements. Click NEXT

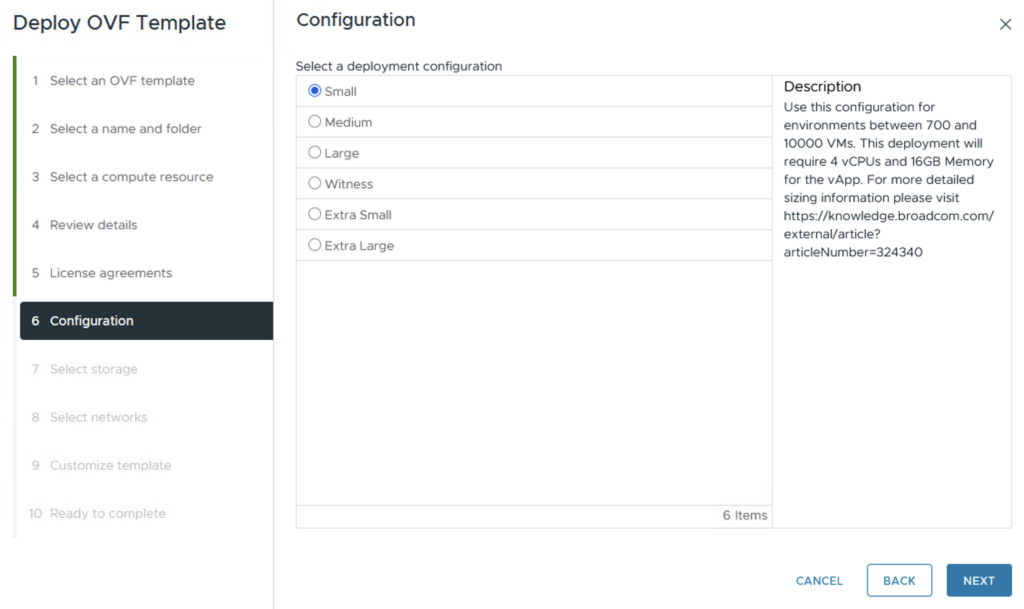
Choose the Size for the Appliance. Click NEXT
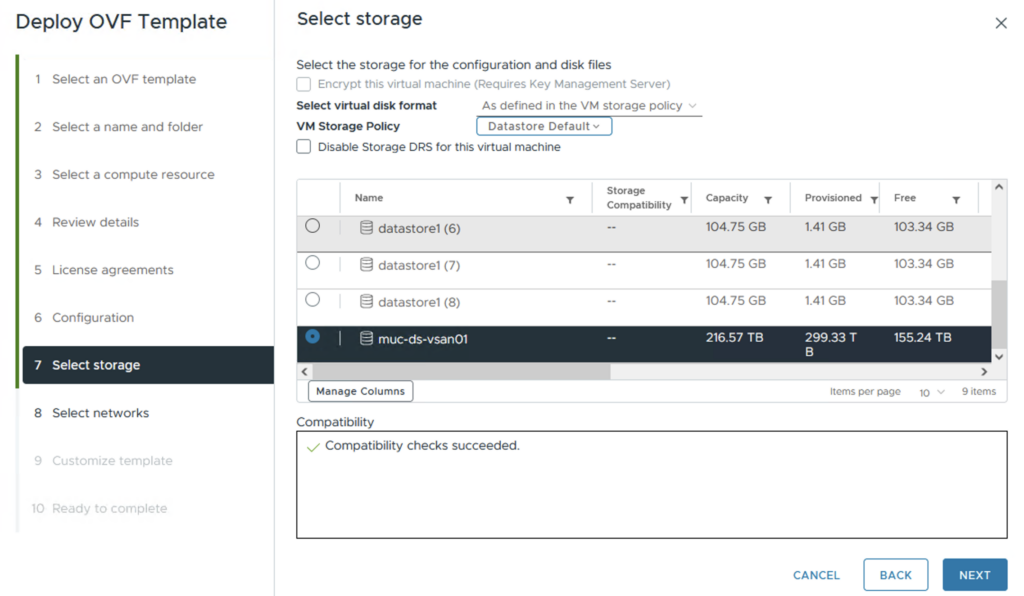
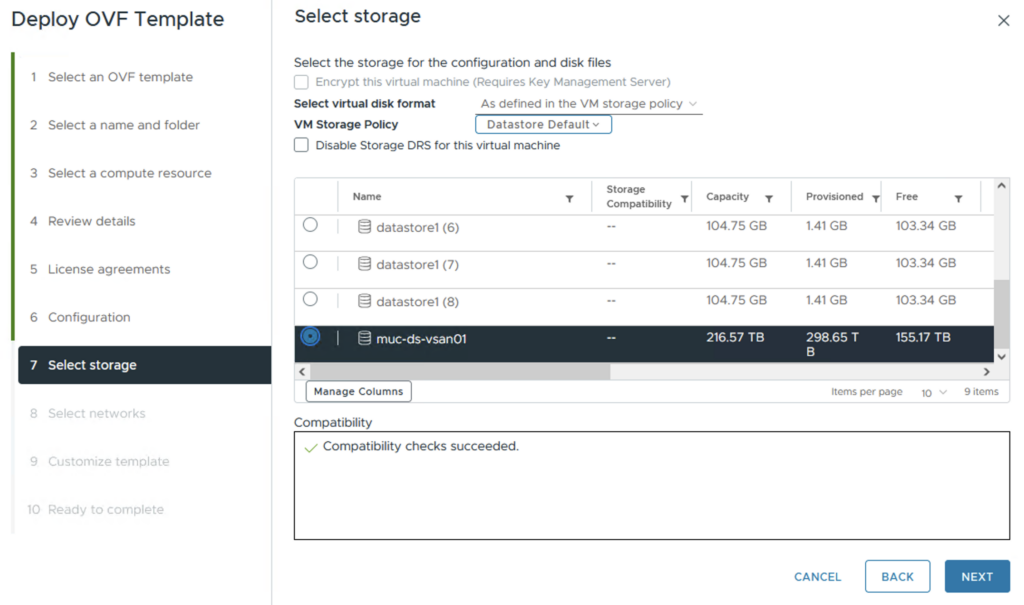
Select the storage. Click Next
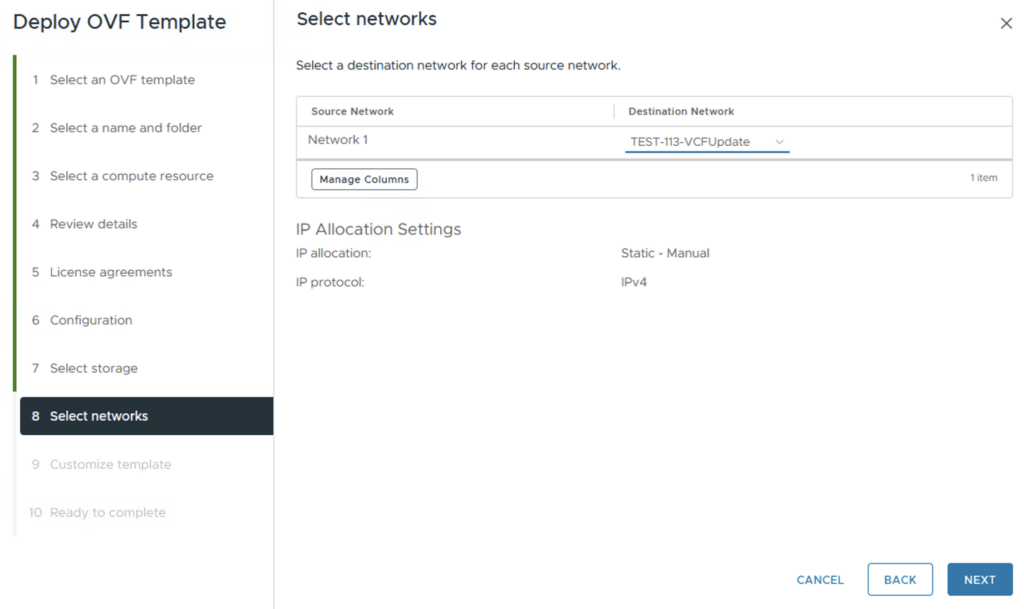
Select the Destination Network. Click NEXT
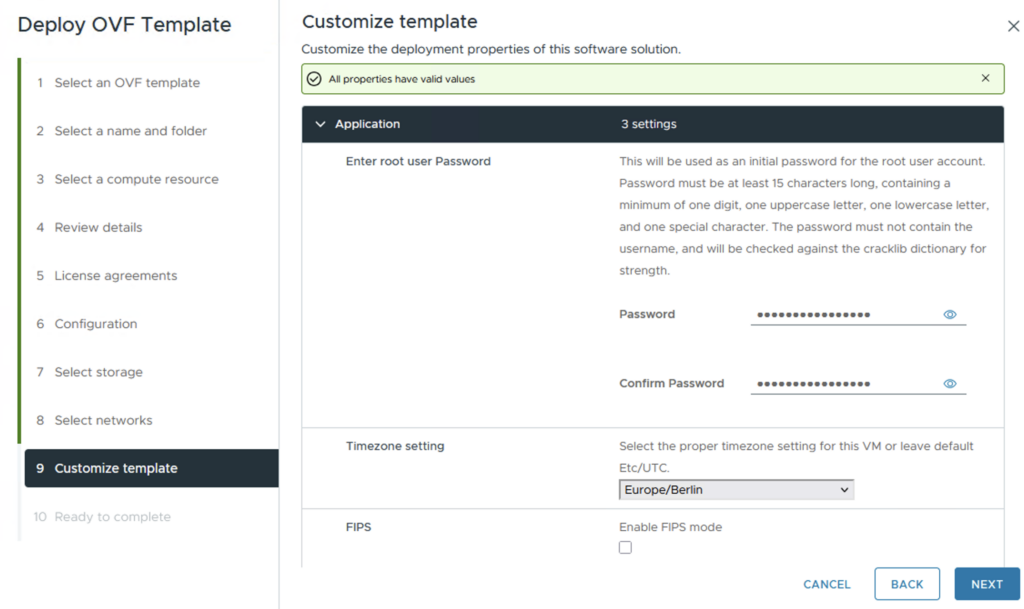
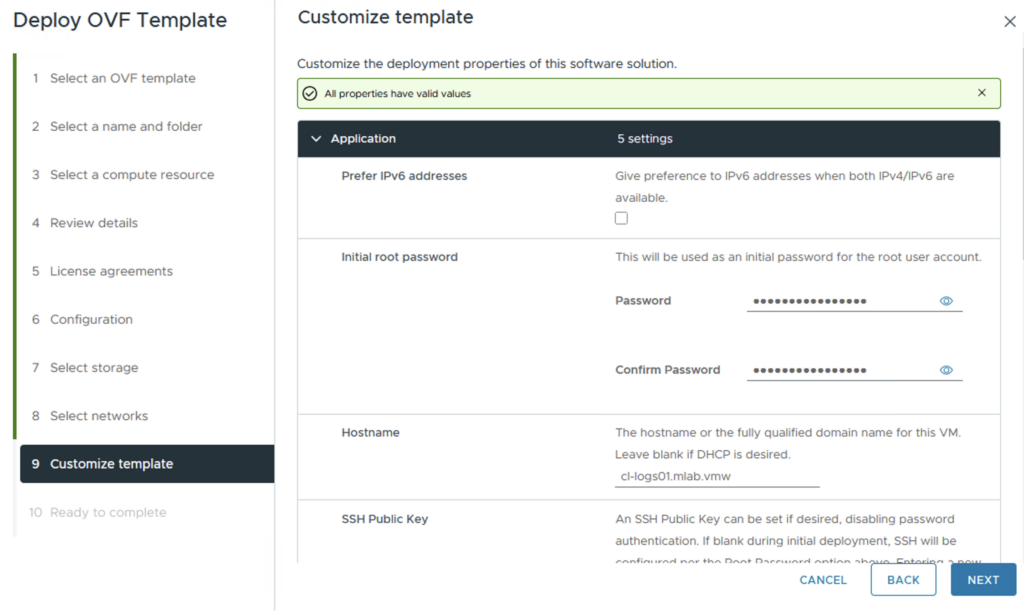
Define a password for the root user and choose the right timezone and scroll down
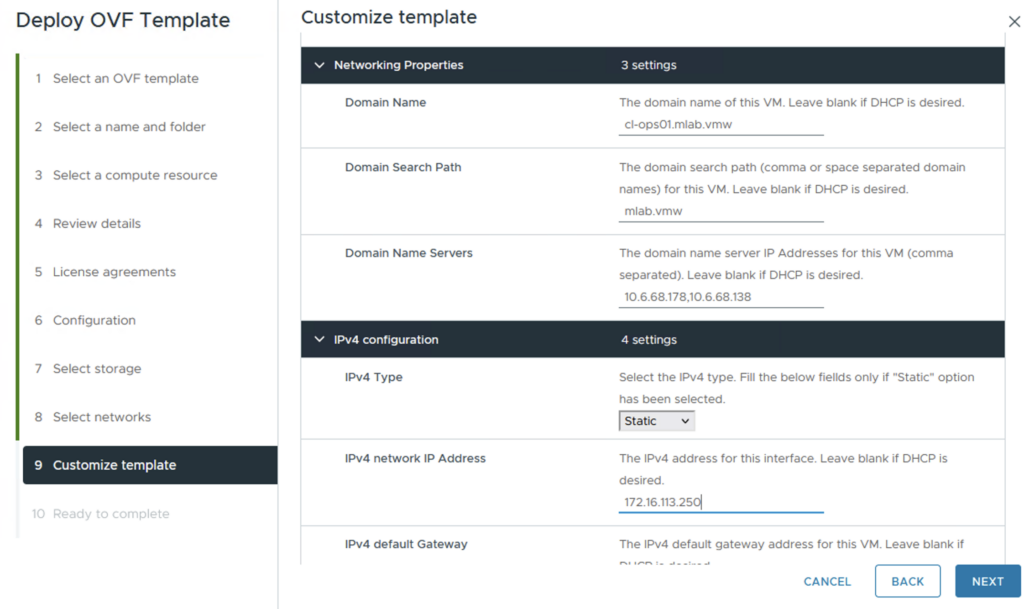
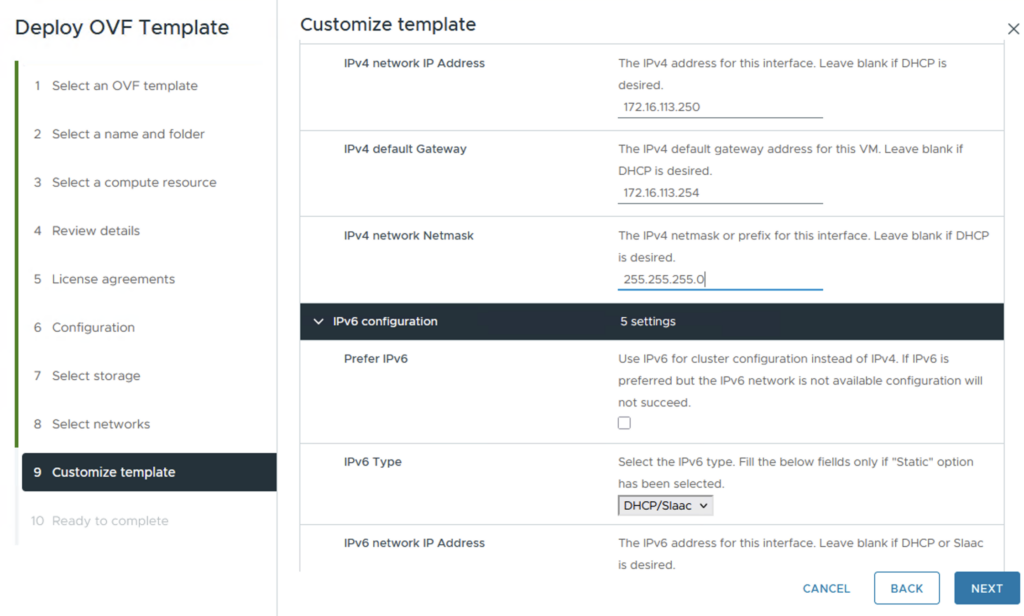
Define the network properties and the IPv4 configuration and scroll down
The IPv6 configuration is not mandatory. Click NEXT
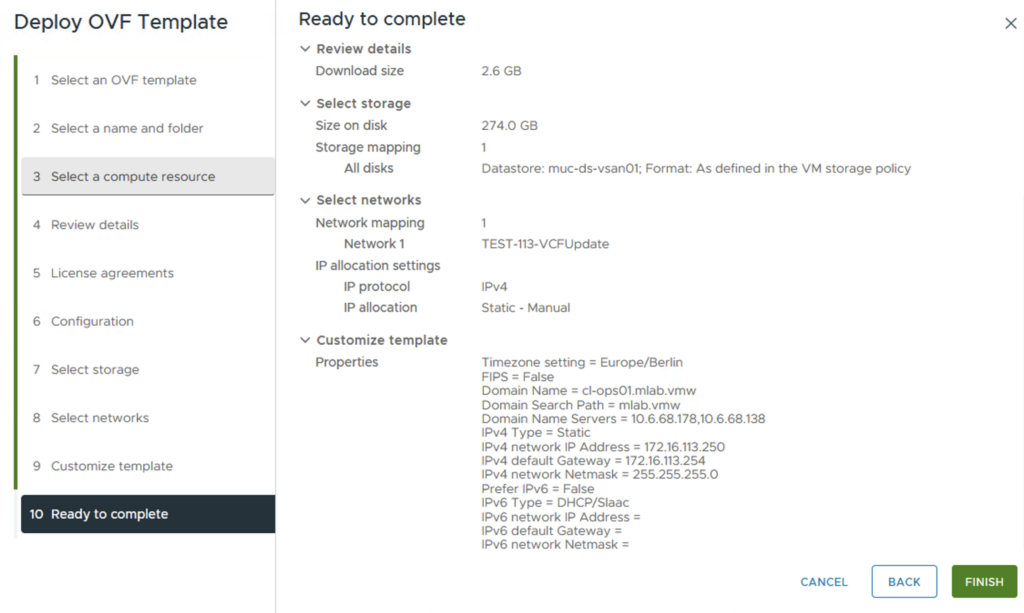
Check all parameters. Click FINISH
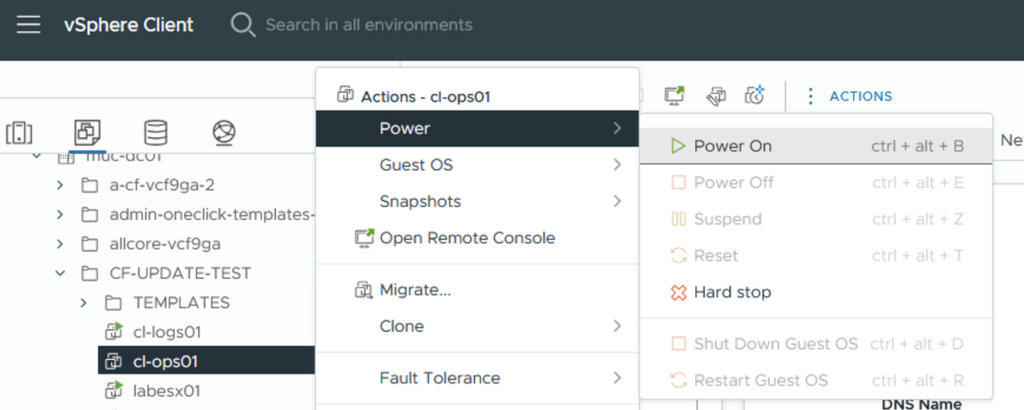
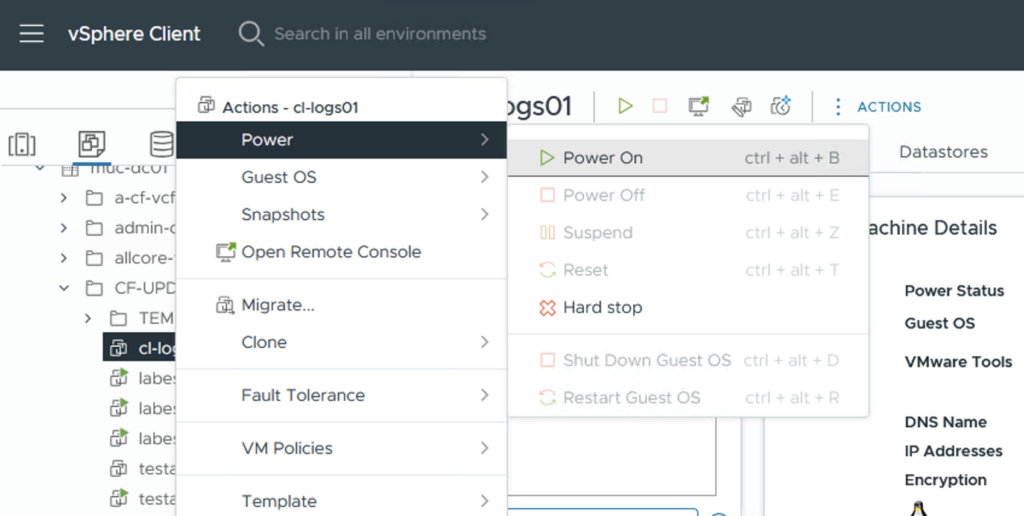
Wait until the deployment is finished and power on the virtual machine
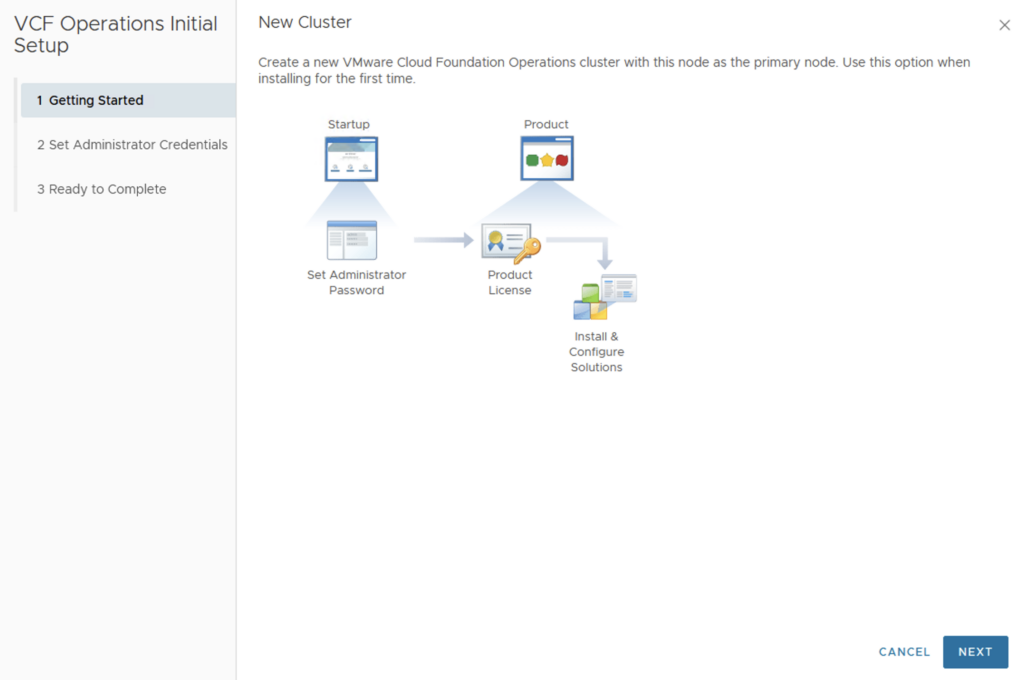
Open a browser window and connect to the url of the Operations Appliance via https. The inital setup wizard will come up. Click NEXT
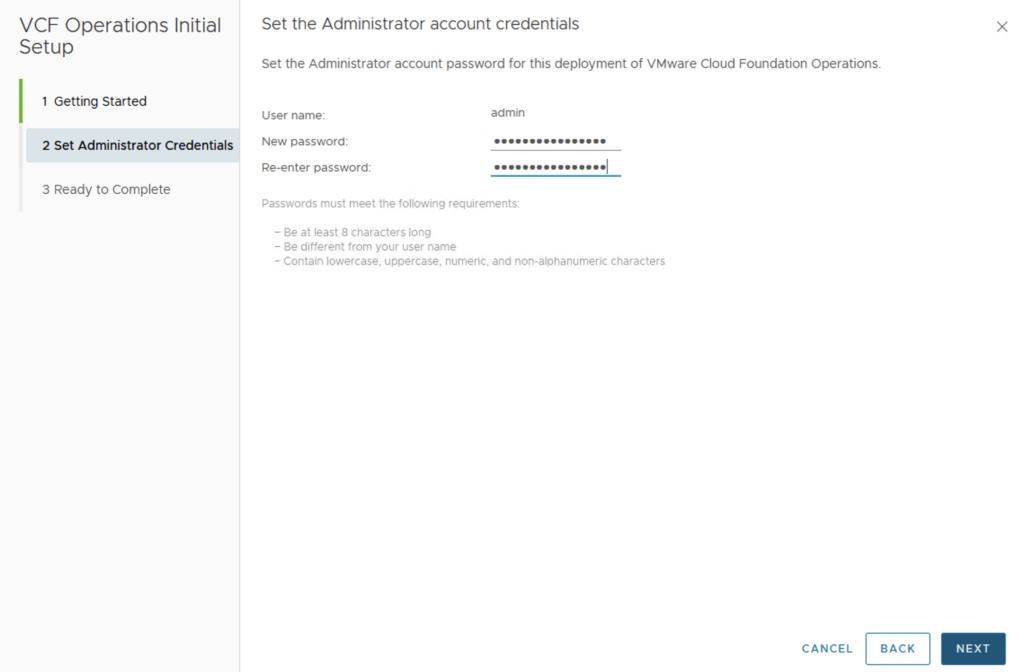
Define a new password for the admin user. Click NEXT and then FINISH
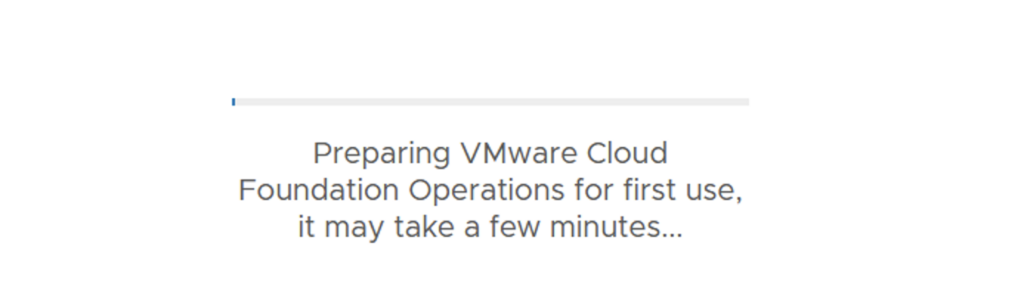
The preparation takes some time and then you are automatically taken to the login page
Configure the VCF Operations Appliance:
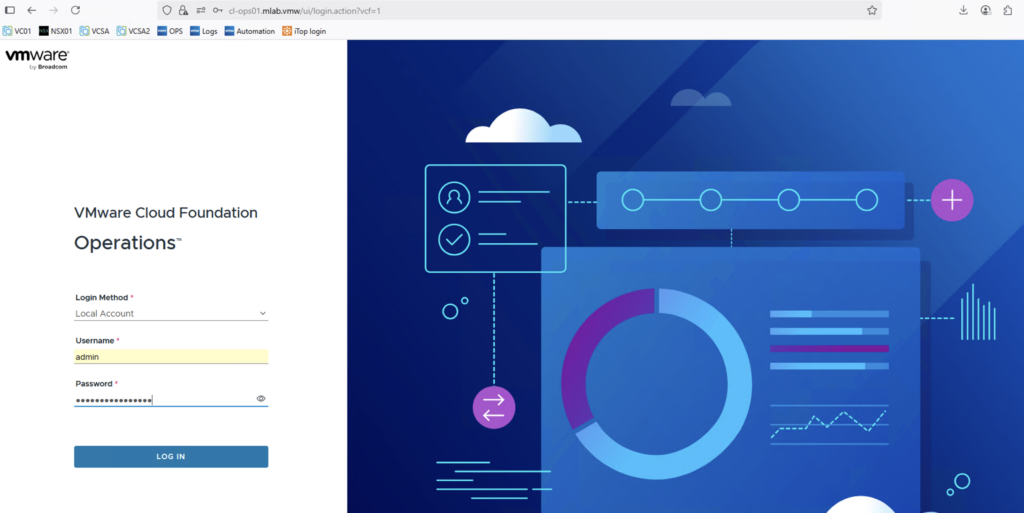
On the login page enter the admin credentials and click LOG IN
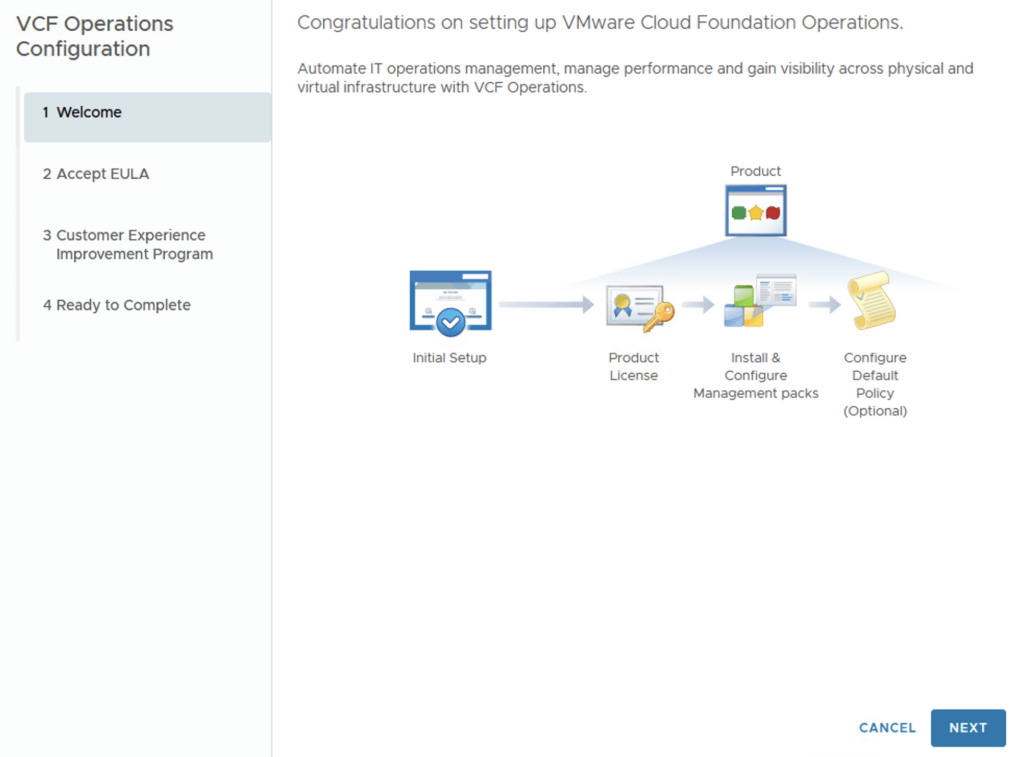
Click on EXPRESS INSTALLATION

Click NEXT
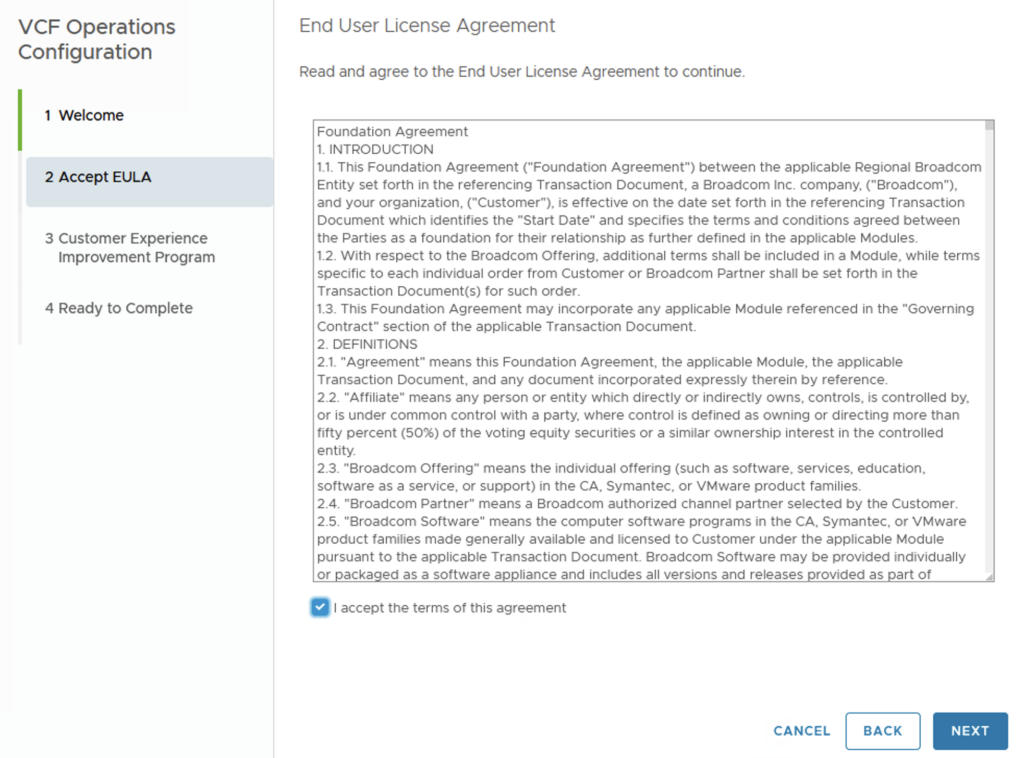
Accept the license agreement. Click NEXT
Click NEXT and FINISH
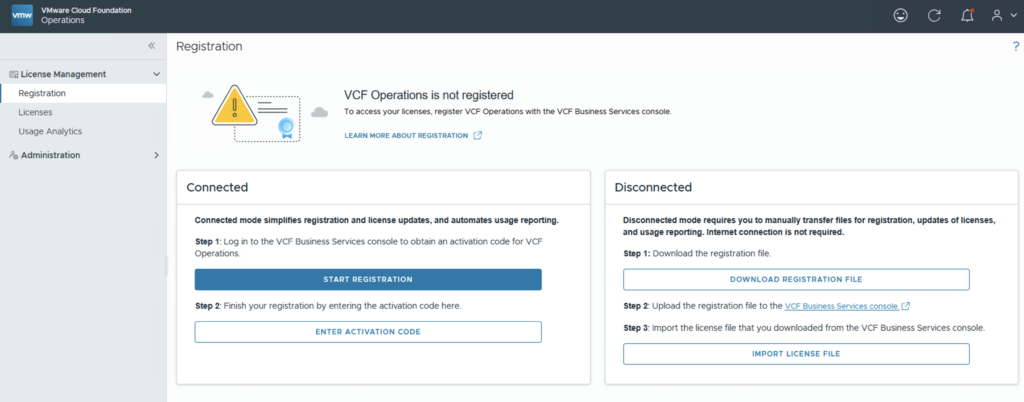
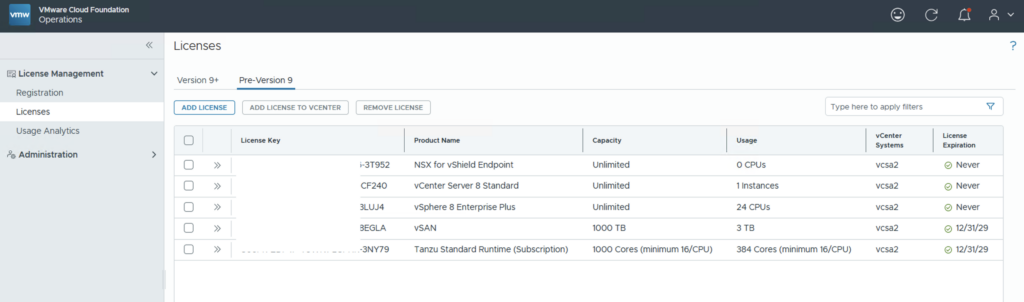
You now land on License Management in the VCF Operations UI. You can also see that only the menu items for License Management and Administration are available. This is because our VCF Operations is not yet registered.
Go to License Management > Registration and do the registration in a connected or disconnected way
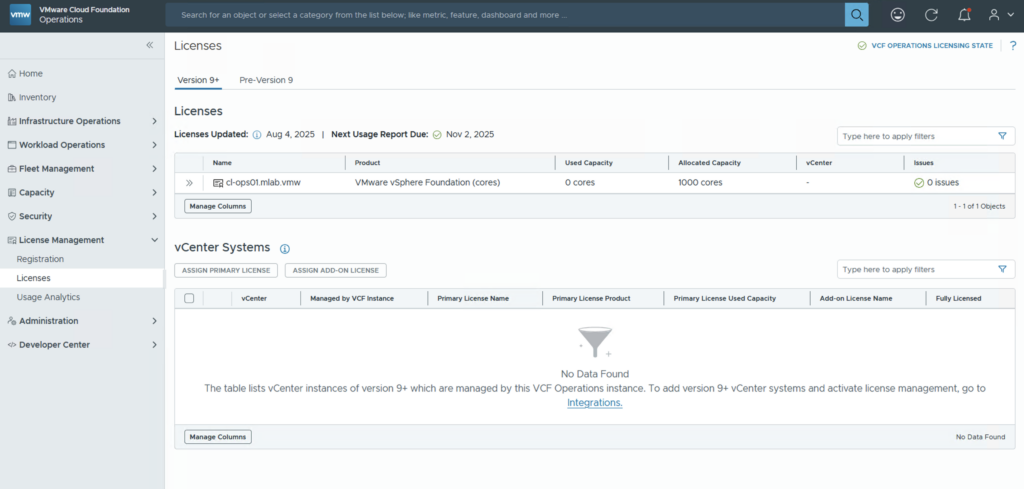
After registration, the VVF license appears and the remaining menu items are now activated.
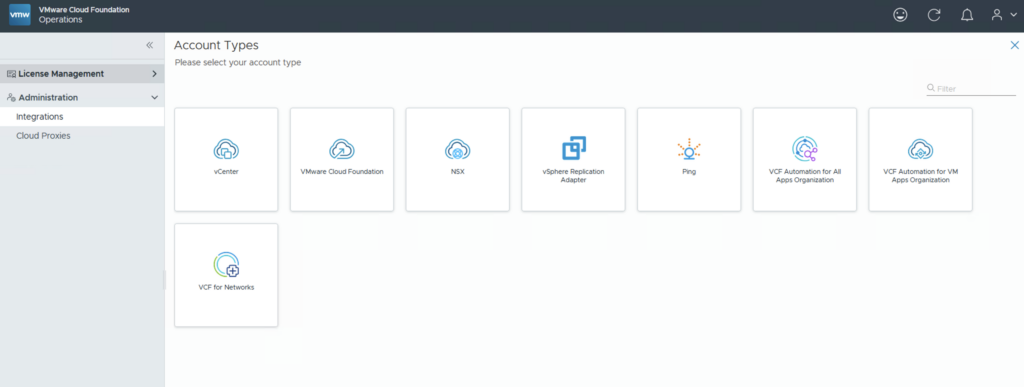
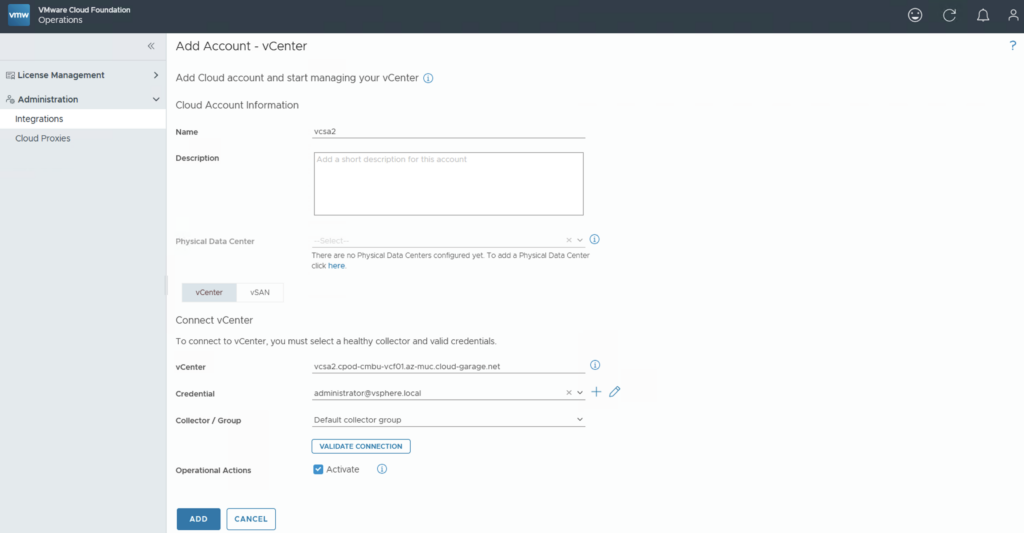
We can now integrate our vCenter. Go to Administration > Integration and click ADD

Click on vCenter
Insert the required parameters for the vCenter

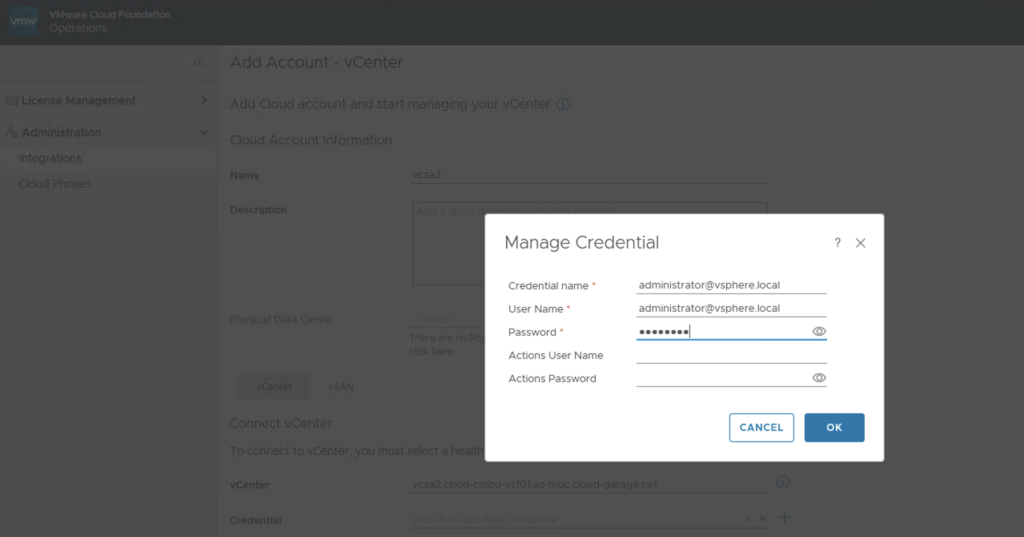
We still need to create new credentials. Click on the plus symbol and insert the credentials for the vCenter User. The Action User is not mandatory and only needed if you want to execute actions over Operations. Click OK
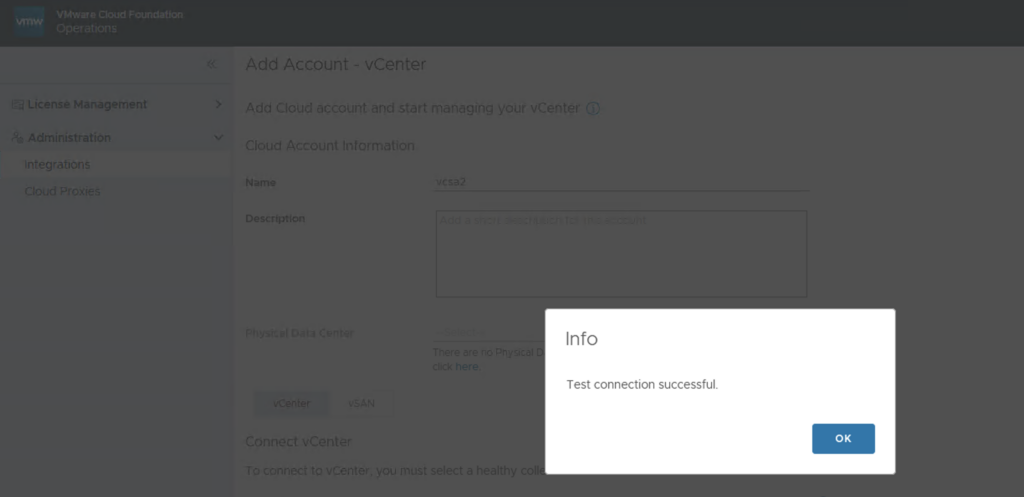
Click on VALIDATE CONNECTION
Accept the Certificate

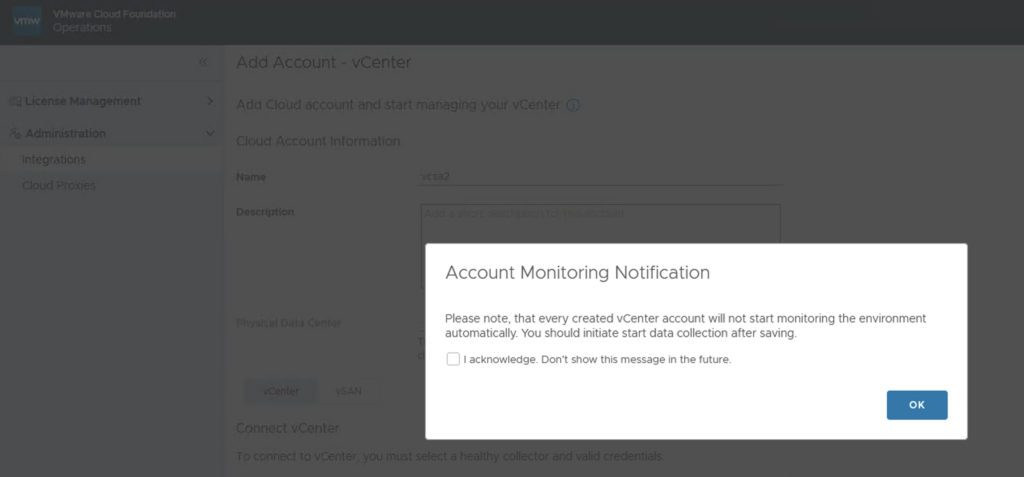
Click OK and then ADD
On the Account Monitoring Notification click OK (we start the collection in the next steps)
The vCenter account is now available but in “Stopped” status

Click on the 3 vertical dots and then on „Start Collecting“

The status changed from „Stopped“ to „Collecting“

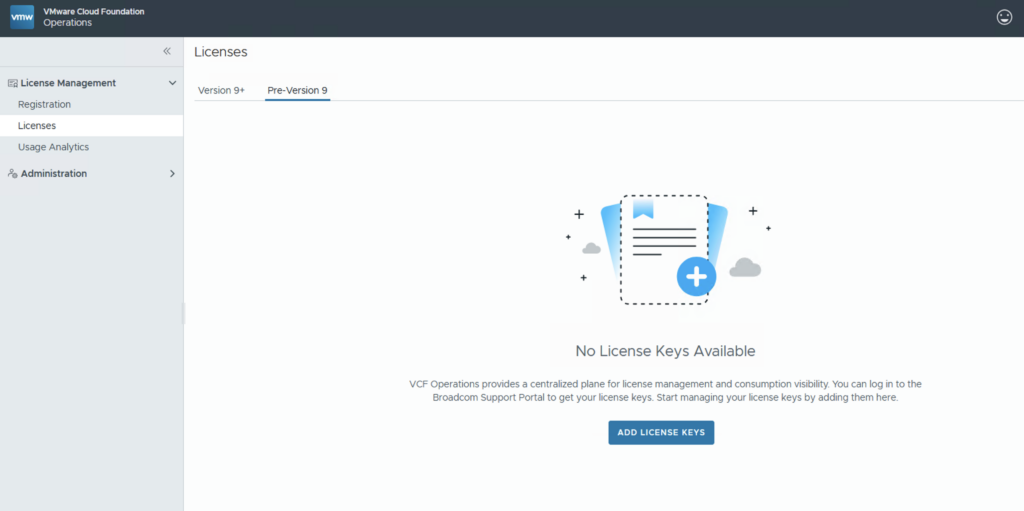
Since I have integrated a vCenter 8 in my environment, the corresponding Pre-Version 9 licenses are now also displayed automatically under License Management > Licenses > Pre-Version 9
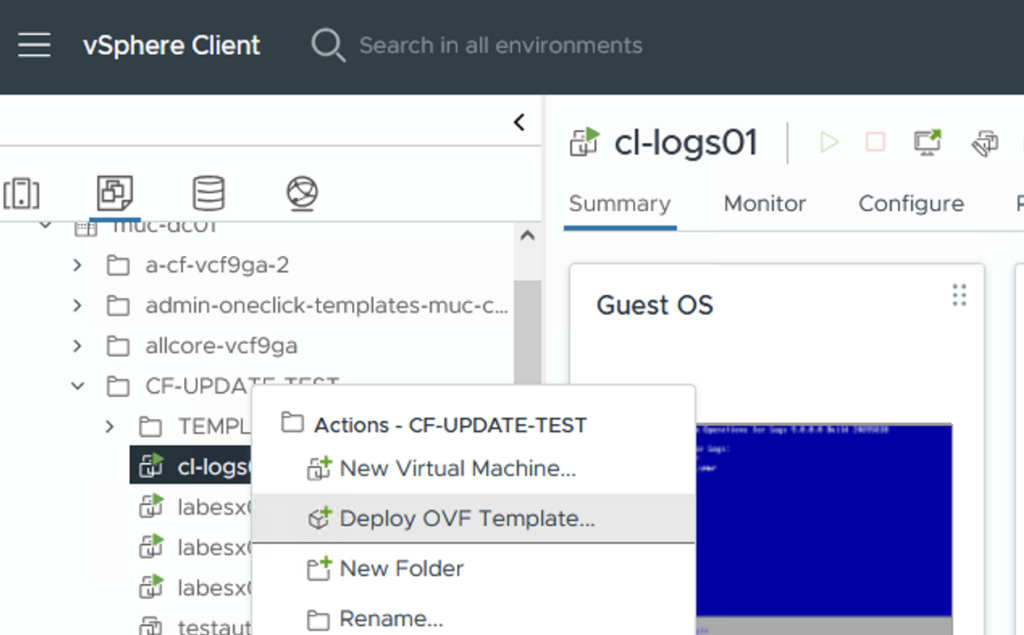
Deploy VCF Operations for Logs Appliance:
Search for the appropriate location in the vCenter, right-click on it and select the menu item “Deploy OVF Template”
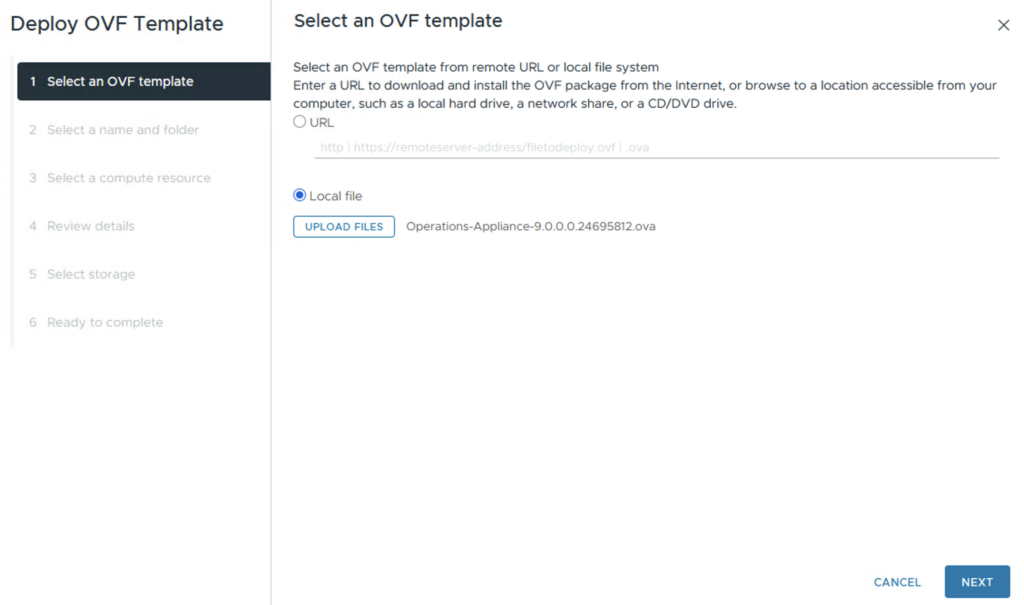
Select Local Files and click on Upload Files. Select the VCF Operations for Logs OVA and click NEXT
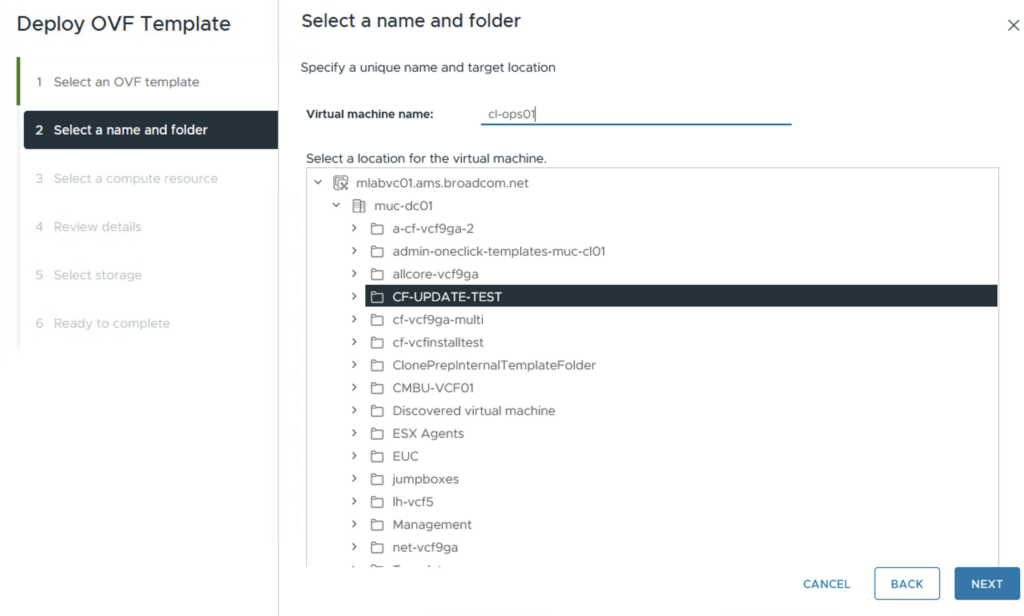
Choose a name for the VM and a folder. Click NEXT
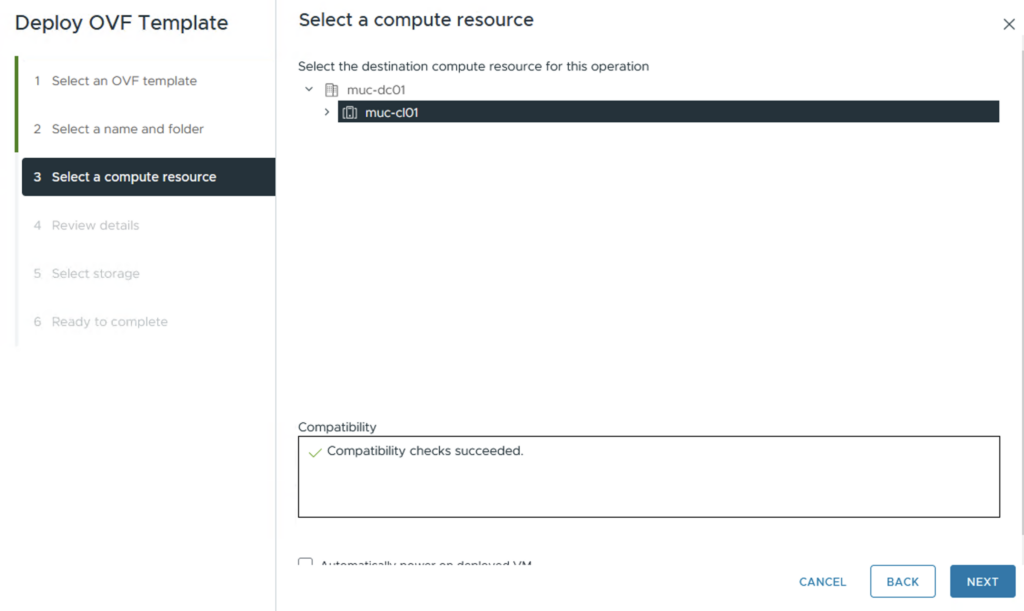
Choose a compute resource. Click NEXT
Review details and click NEXT

Accept all license agreements. Click NEXT
Choose the right size for the Appliance. Click NEXT

Select the storage. Click NEXT
Select the network. Click NEXT

Define the root password and the hostname and scroll down
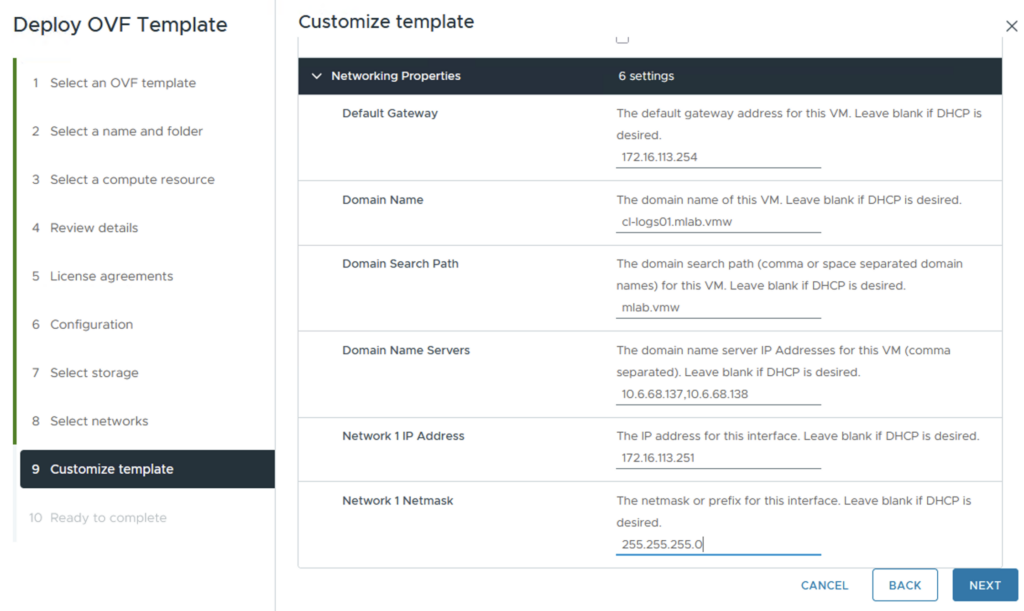
Define the network properties. Click NEXT
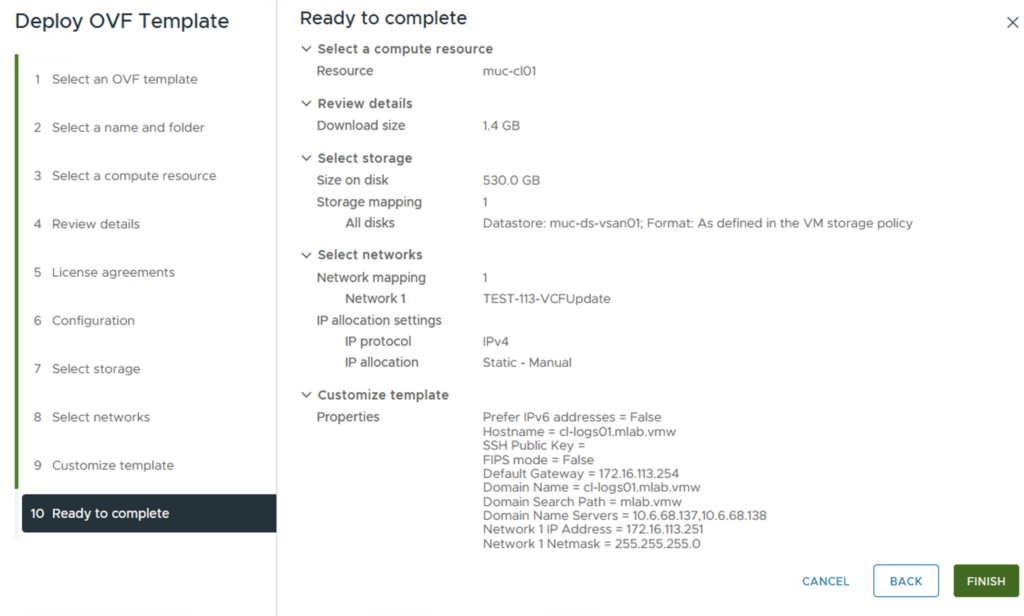
Check all parameters. Click FINISH
Wait until the deployment is finished and power on the machine
Configure VCF Operations for Logs:
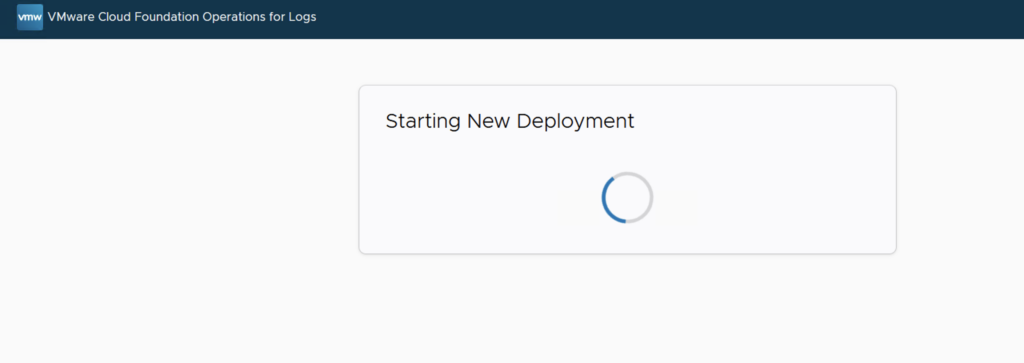
Open a browser window and connect to the url of the Operations for Logs Appliance via https. The inital setup wizard will come up. Click NEXT

Click on START NEW DEPLOYMENT

This could take some time
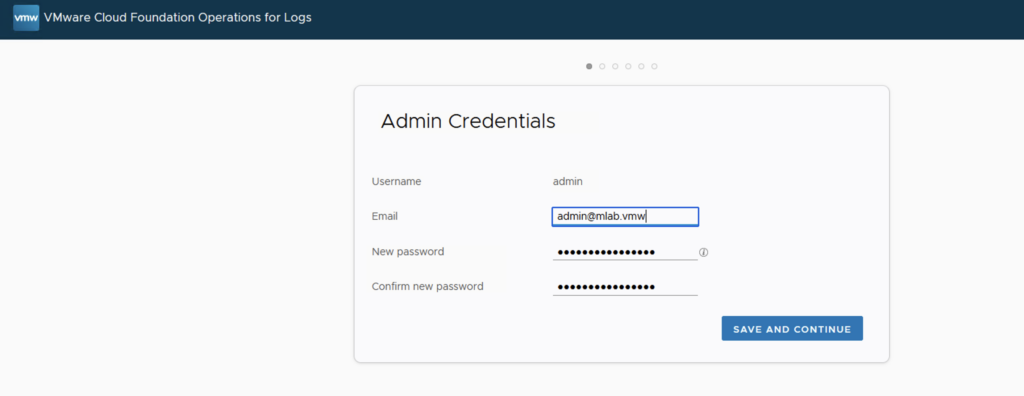
Define a new password for the admin account. Click SAVE AND CONTINUE
Click SAVE AND CONTINUE

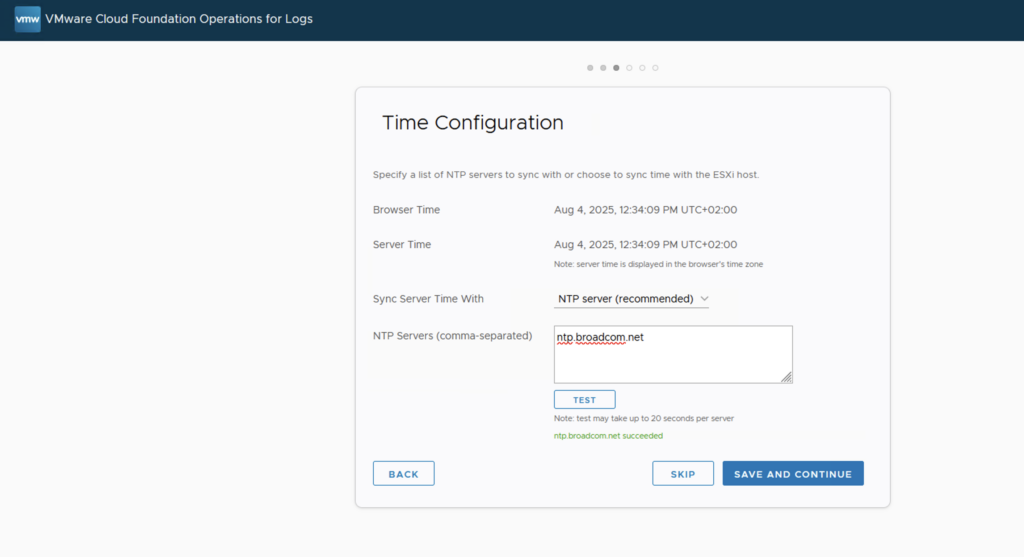
Define a NTP server. Click TEST and then SAVE AND CONTINUE
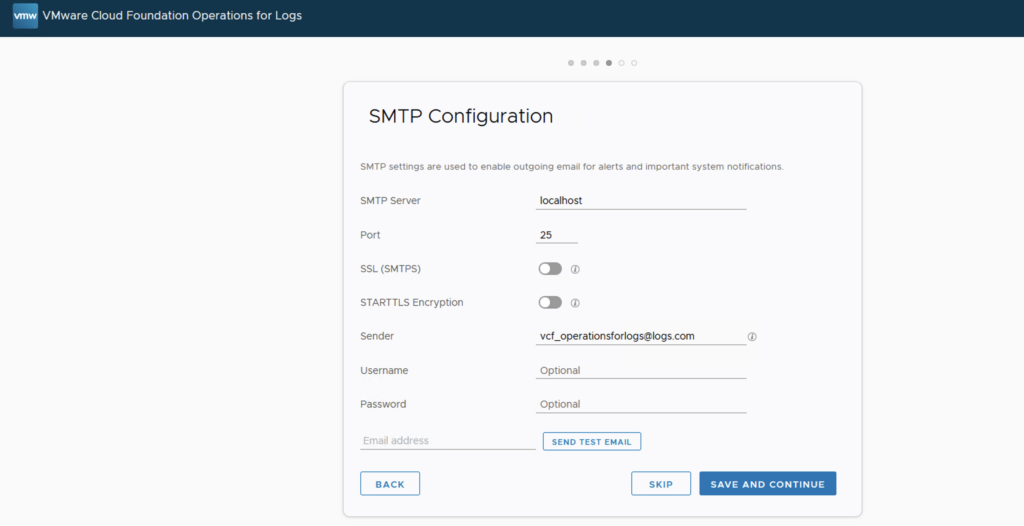
Configure SMTP (in my case I skipped the SMTP Configuration)
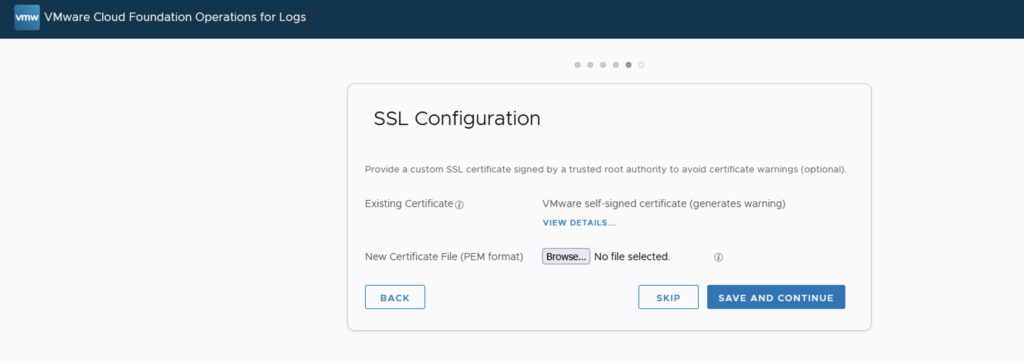
Configure SSL (in my case I skipped the SSL Configuration)
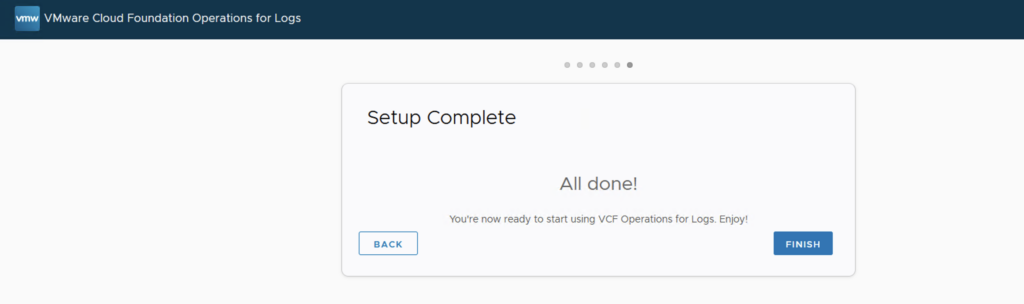
On the Setup Complete page click FINISH
Operations for Logs is now configured. No further steps need to be carried out as the rest is configured via VCF Operations.
Integrate VCF Operations for Logs in VCF Operations:
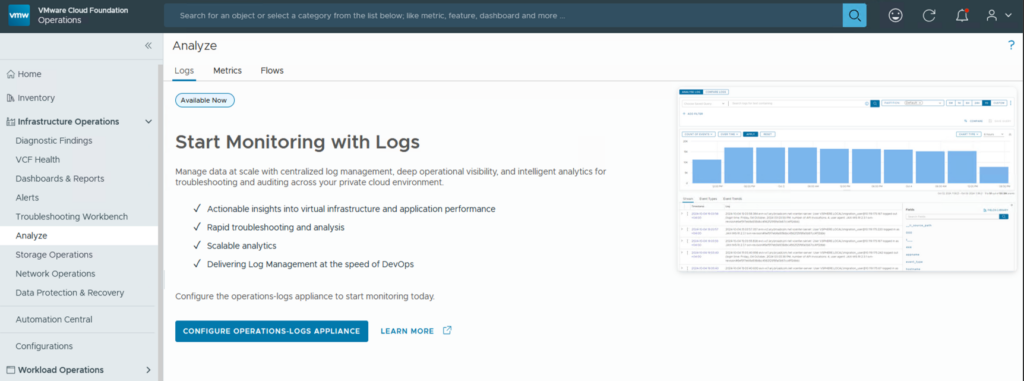
There are two ways to integrate VCF Operations for Logs into VCF Operations. Either go to Infrastructure Operations > Analyze and click on CONFIGURE OPERATIONS LOGS APPLIANCE
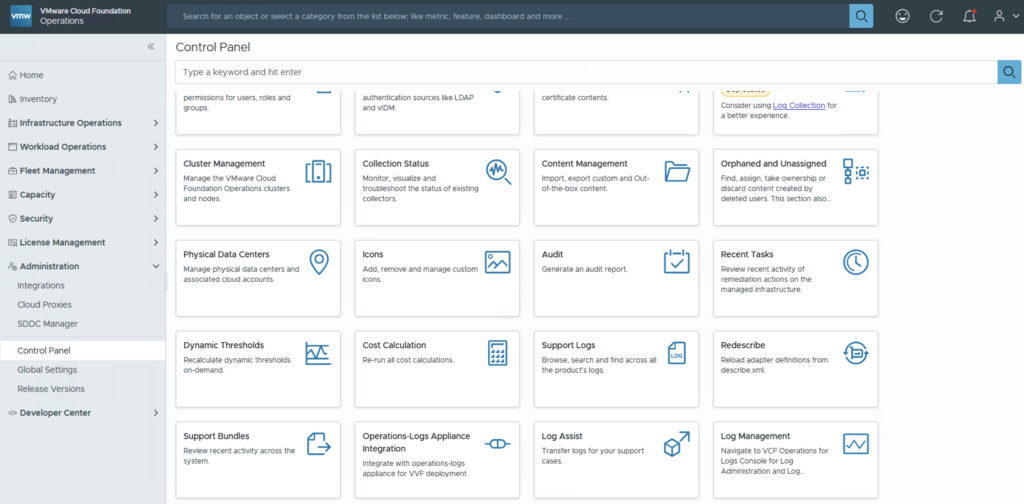
Or you can go to Administration > Control Panel and select Operations Logs Appliance Integration
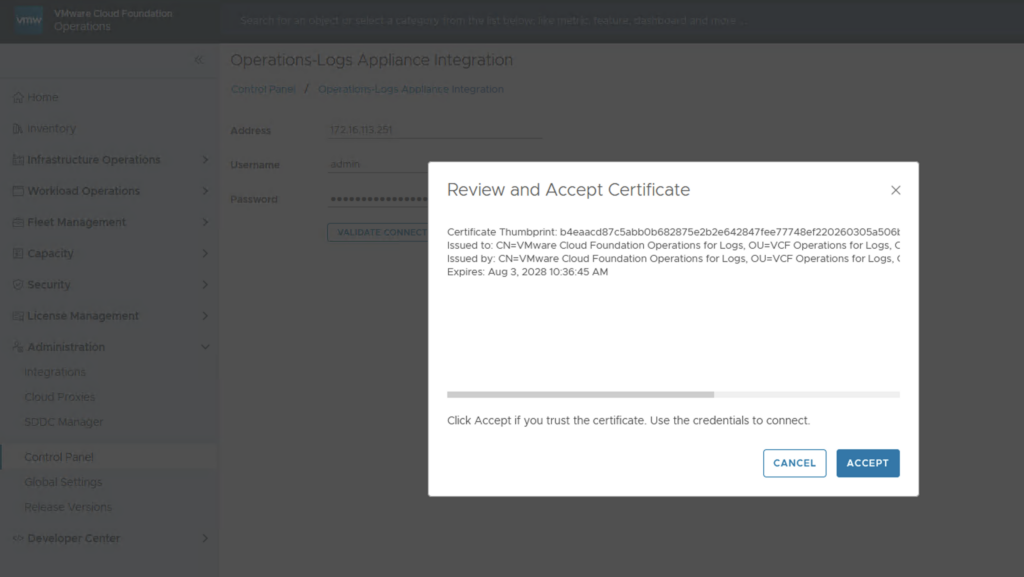
Enter the IP/DNS name of the VCF Operations for Logs appliance and the credentials. Click VALIDATE CONNECTION
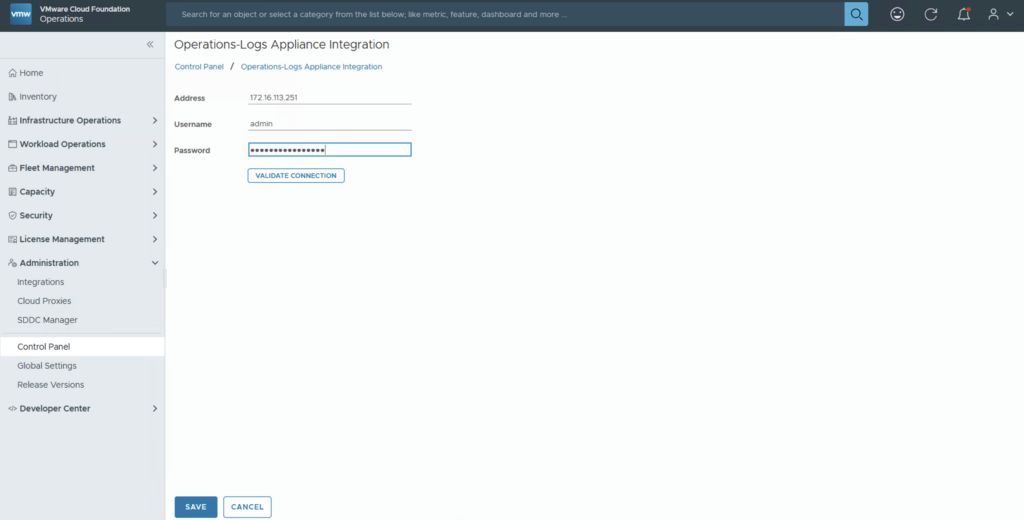
Accept the Certificate
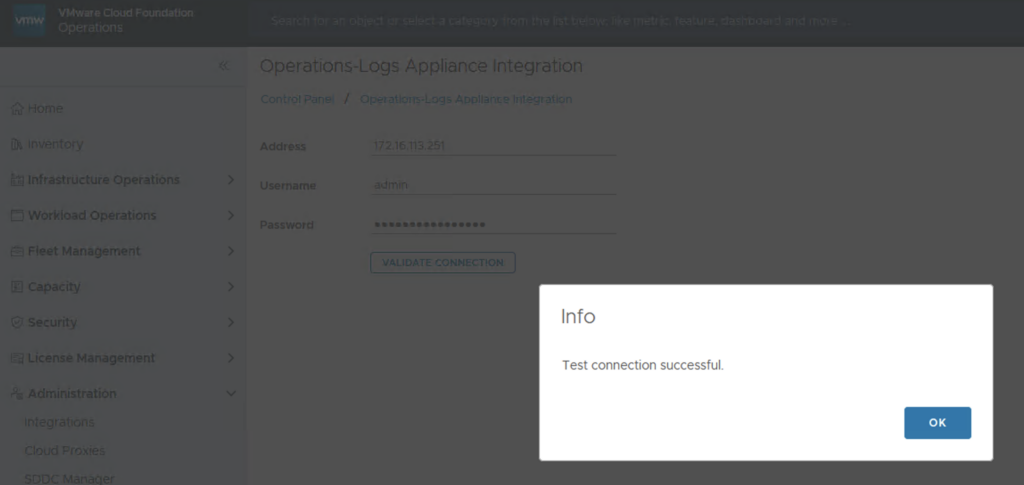
On the Info page click OK and then Save
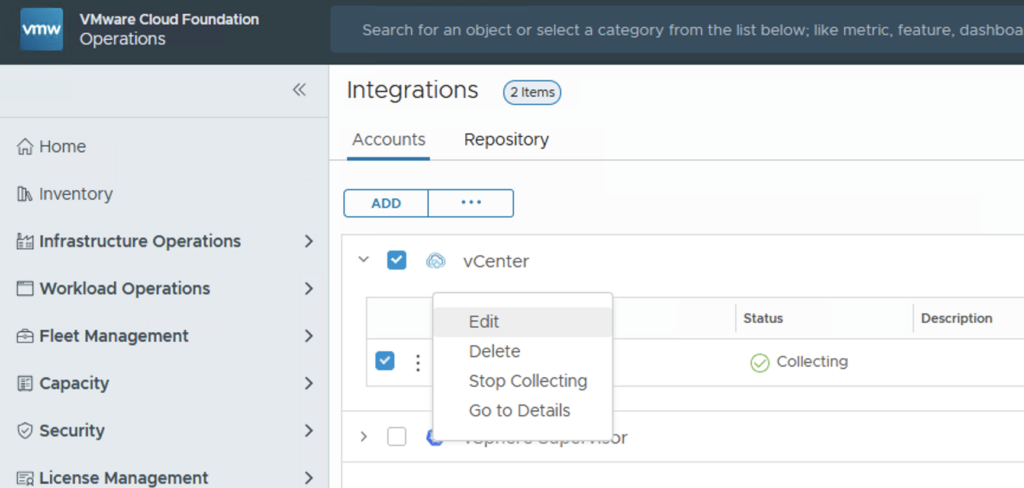
We now only have to activate the log collection on the vCenter account. To do this, we go to Administration > Integrations and click on the three vertical dots next to the vCenter and then on Edit.
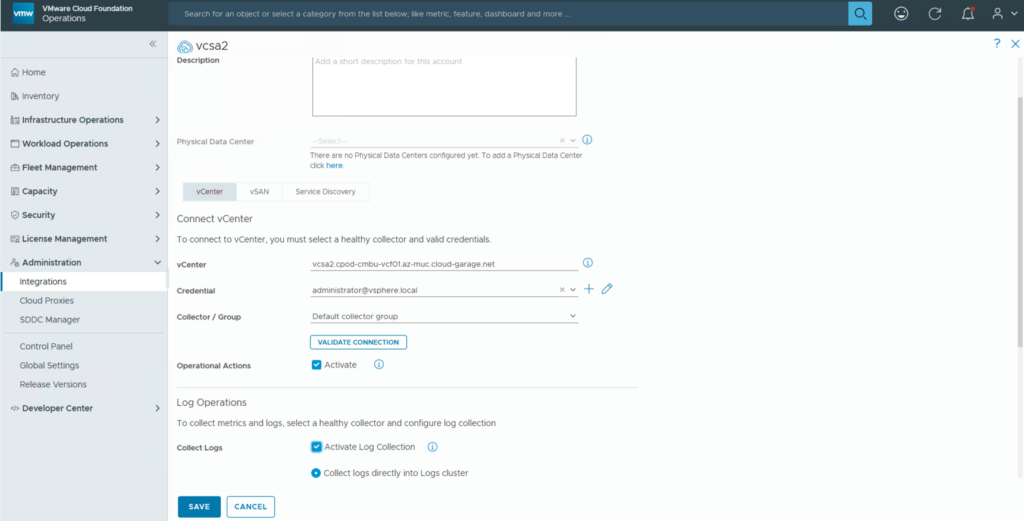
In the Log Operations section, we now need to activate the Activate Log Collection checkbox. Click SAVE
The Integration is done and now we can analyze the logs under Infrastructure Operations > Analyze

Only one VCF Operations for Logs can be integrated into VCF Operations at a time!
Have Fun!

- VCF Automation 9 – Automating Microsoft DNS Entries for VMs via ExternalDNS Service in Supervisor - 6. February 2026
- Installing and Configuring VMware Data Services Manager 9.0.1 on VMware Cloud Foundation 9.0.1 with VCF Automation Integration. - 31. October 2025
- VCF9 – VCF Operations and VCF Operations for Logs installation/configuration without VCF Installer - 6. August 2025