


This post is intended to show a very basic setup of VMware NSX Cloud to demonstrate the capability to enforce consistent microsegmentation policy for hybrid cloud environments. I will describe the setup of NSX Cloud and the operation of the Native Cloud Enforced Mode which relies on firewall functions delivered natively by AWS (or Azure). I’ll not cover HA or multi VPC setup using Transit VPC.
With this setup you can also switch to NSX Enforced Mode offering firewalling capabilities up to L7 by using NSX Tools deployed in your workload VMs.
Main components:
NSX Manager: Management / Control Plane component for on-premises Environment
NSX Cloud Services Manager (CSM): Additional on-premises component. Connected to NSX Manager. Maintains your Public Cloud Accounts
NSX Public Cloud Gateway: NSX local control plane for public cloud. Responsible for collecting public cloud inventory.
Pre-Setup Architecture View

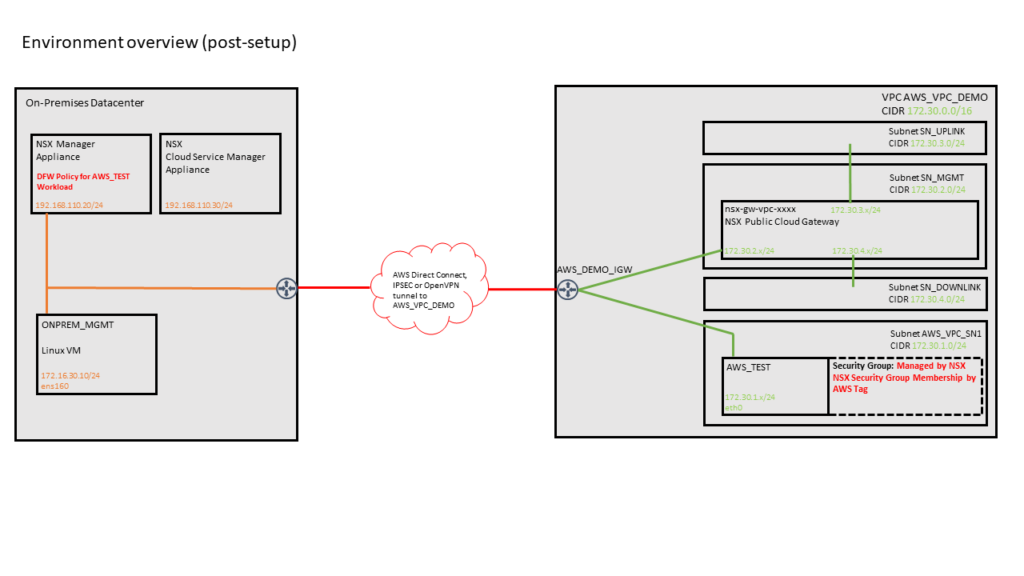
Post-Setup View
Pre-Requisites
You need access to an AWS Account with the ability to create IAM profiles and roles. Have your Access Key / Secret Access key ready.
In case you are a VMware internal user with CloudGate Account access just ping me 😉
Your on-premises environment should have NSX-T 3.1 installed and configured. In my environment I’ve created an overlay-backed segment within 172.16.0.0/16 CIDR for my Linux based management VM (Ubuntu 18.04) . NSX Manager is connected to a VDS based Port Group within 192.168.110.0/24 Network. To connect NSX-T Cloud Service Manager to you NSX Manager you’ll need NSX-T admin credentials.
North-South traffic for the overlay segment using T0 / Edge-Cluster should work.
Connect your on-premises environment with a AWS VPC [referenced now as AWS_VPC_DEMO]. This can be done using AWS Direct connect, NSX IPSEC VPN or OpenVPN as descibed here.
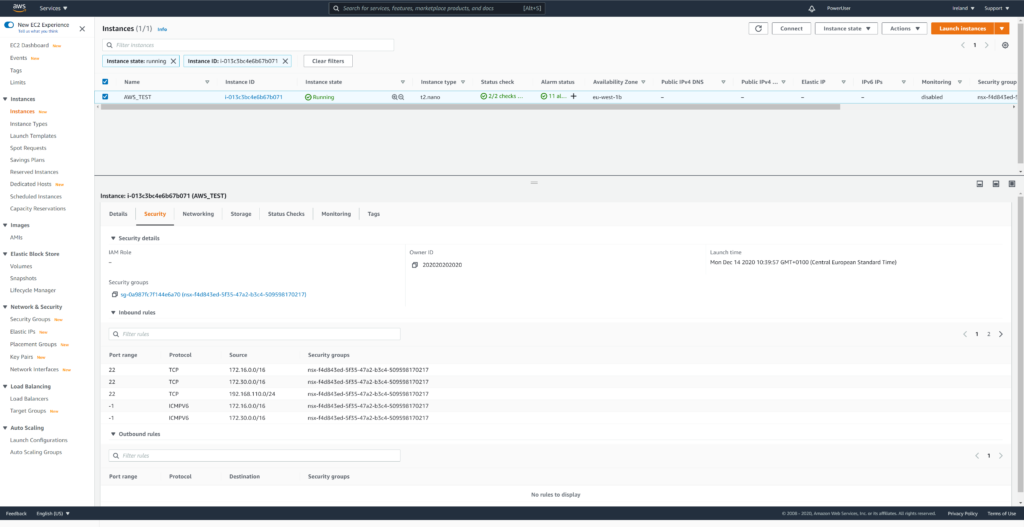
Prepare a EC2 testing instance AWS_TEST with proper AWS security group settings. I’ll later refer to the following setup (Linux VM, part of AWS_VPC_SN1 subnet, Security Group settings allow ICMP and SSH from on-premises CIDRs). Firewall settings for this testing instance will later be managed by NSX Cloud. Your testing instance should now be accessible from your on-premises environment as allowed by AWS security group settings (in my case SSH and ICMP from on-premises CIDRs)
Preparation on AWS Cloud
AWS_VPC_DEMO must have an Internet Gateway (IGW) attached and a routing table with destination 0.0.0.0/0 targeting the attached IGW.
DNS Resolution and DNS Hostnames must be enabled.
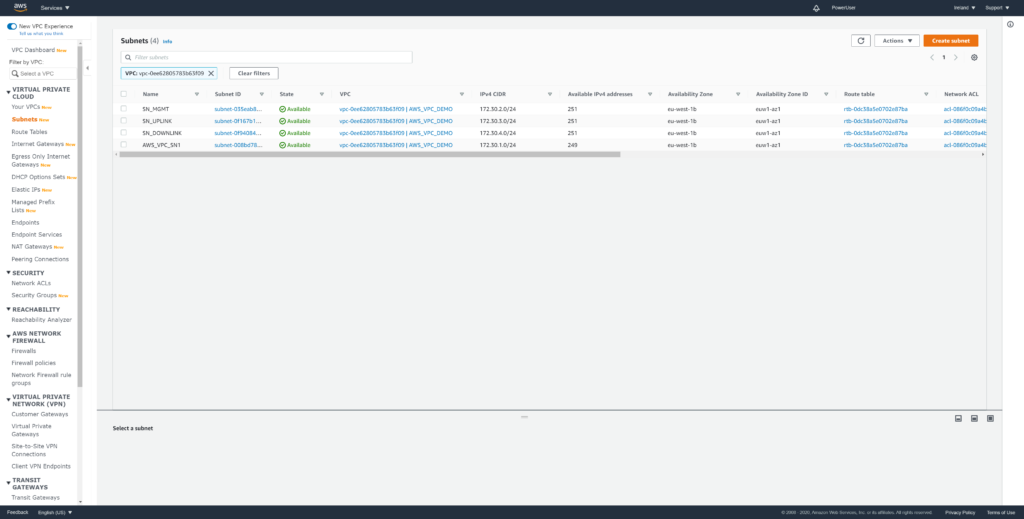
Create 3 subnets inside your VPC and label appropriate.
SN_MGMT (recommended range /28, for simplicity I’m using 172.30.2.0/24)
SN_UPLINK (172.30.3.0/24)
SN_DOWNLINK (size accordingly to the needs of your workload VMS. I’m using 172.30.4.0/24 )

On-Premises preparation steps
Reserve an IP Address and DNS Entry for NSX Cloud Service Manager (CSM). In my case its nsxcsm.corp.local with IP 192.168.110.30
Download NSX Manager Virtual appliance from my.vmware.com. Please also download “VMware NSX Cloud Scripts for Adding Public Cloud Accounts” (can find it on “Drivers & Tools” Tab on NSX-T Downloads) and store “NSXCloudScriptsforAddingPublicCloudAccounts_310.tar.gz” on your Linux Management VM.
Deploy the NSX Manager appliance and select “nsx-cloud-service-manager” as VM role. Extra Small size should fit for a testing environment.
After starting up the appliance login to its web interface and connect it to your existing NSX Manager Instance by providing Username / Password.
Login to your Linux Management VM and install awscli & jq
vm@mgmt:~$ sudo apt-get install awscli jq -y
Configure AWS cli with your AWS Access Key:
vm@mgmt:~$ aws configure
AWS Access Key ID [********KRPV]:
AWS Secret Access Key [********0To4]:
Default region name [eu-west-1]:
Default output format [None]:
Extract previously downloaded “NSXCloudScriptsforAddingPublicCloudAccounts_310.tar.gz” and execute the script to create the IAM profile / PCG role.
vm@mgmt:~$ ./NSXCloudScripts/AmazonAWS/nsx_csm_iam_script.sh
AWS Profile is set as default
AWS CLI configuration verified successfully.
AWS Cloud configured
openssl installation verified successfully.
JSON parser 'jq' installation verified successfully.
Do you want to create an IAM user for CSM and an IAM role for PCG? [yes/no] yes
What do you want to name the IAM User? nsx-csm-user
Creating IAM user nsx-csm-user and IAM role nsx_pcg_service …
IAM user and role creation successful. Please check file ./aws_details.txt for user credentials and role name information.
Do you want add trust relationship for any Transit VPC account? [yes/no] no
Script execution successful! Detailed script logs are generated in file ./nsx_csm_iam_script.log
Now note the output of aws_details.txt
vm@mgmt:~$ cat aws_details.txt
"AccessKeyId": "ABCDEFGHIJK9000000AB"
"SecretAccessKey": "secretaccesskeysecretaccesskey123456789"
"RoleName": "nsx_pcg_service"
Review your AWS IAM Users / Roles; you should find nsx-csm-user and nsx_pcg_service
NSX Cloud Service Manager Setup
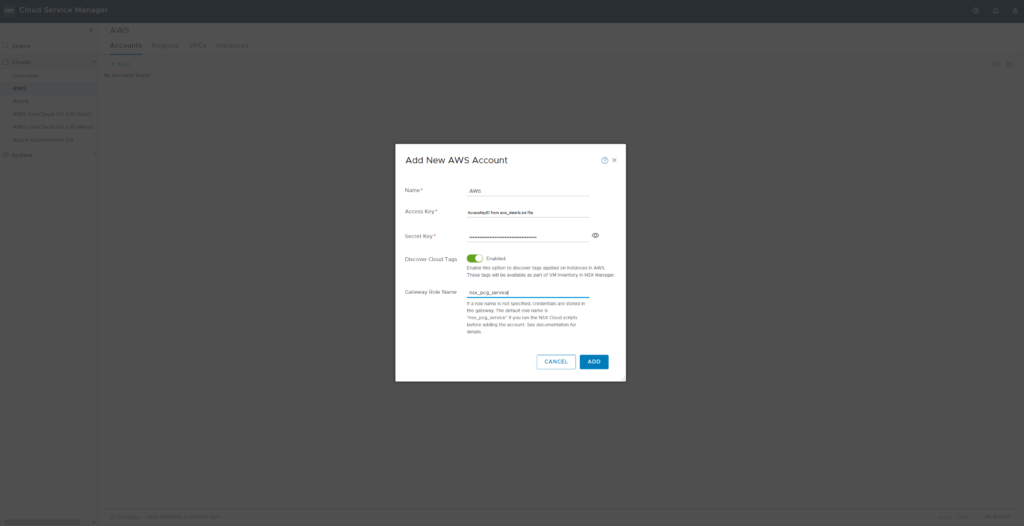
Open the CSM web interface and “Clouds” -> “AWS” -> “Accounts” -> “Add”. Provide the credentials from aws_details.txt to allow CSM to connect to your AWS account using the newly created IAM Profile.
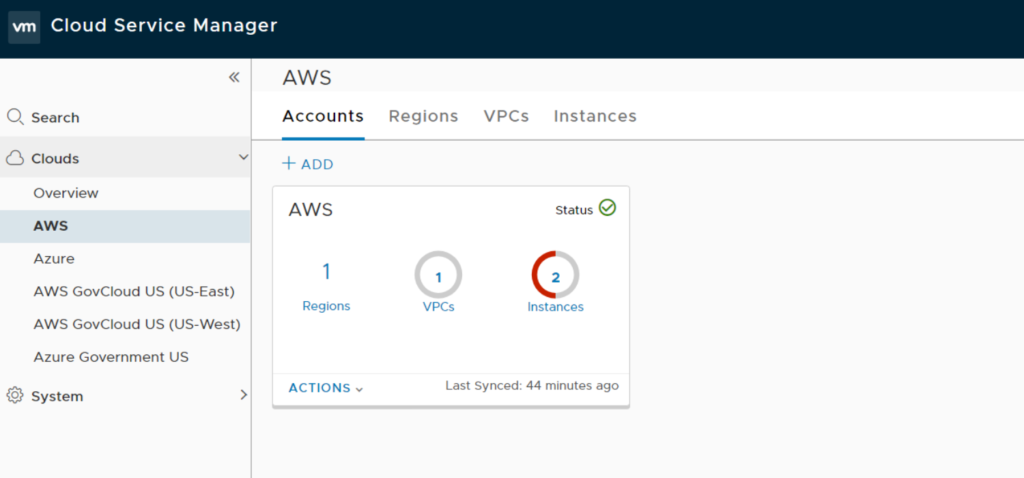
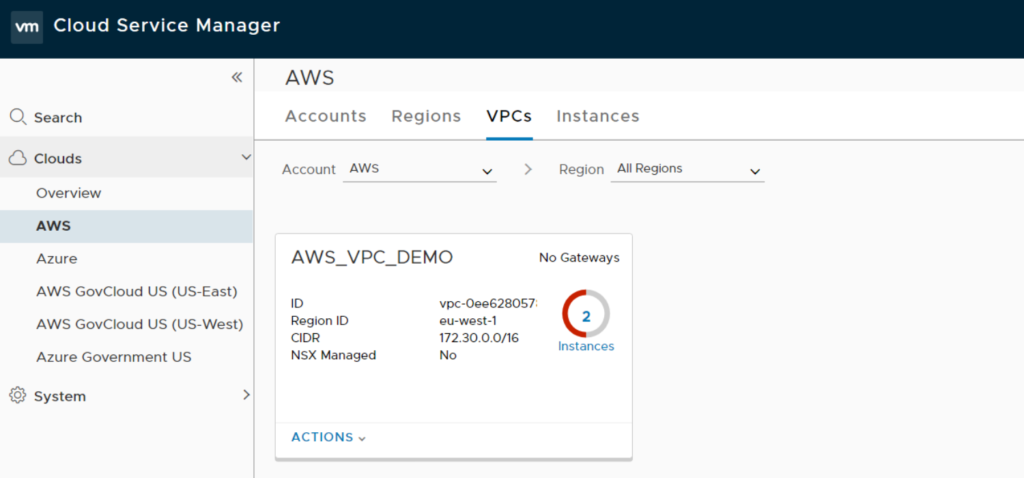
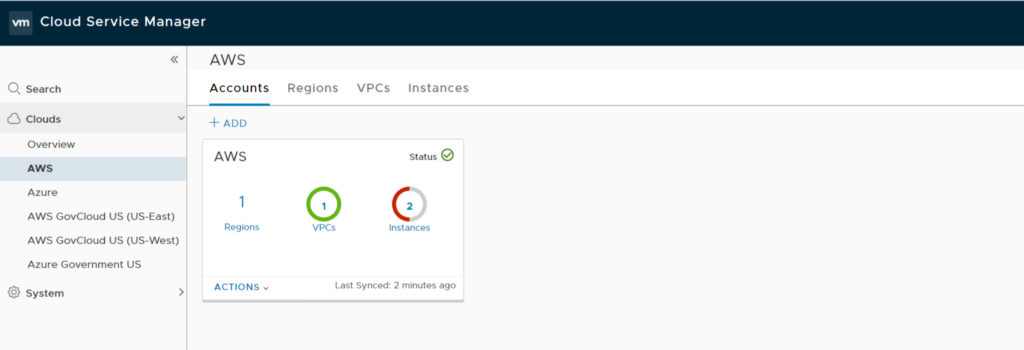
After successfully adding the Account you should be able to review your Accounts / Regions / VPC / Instances
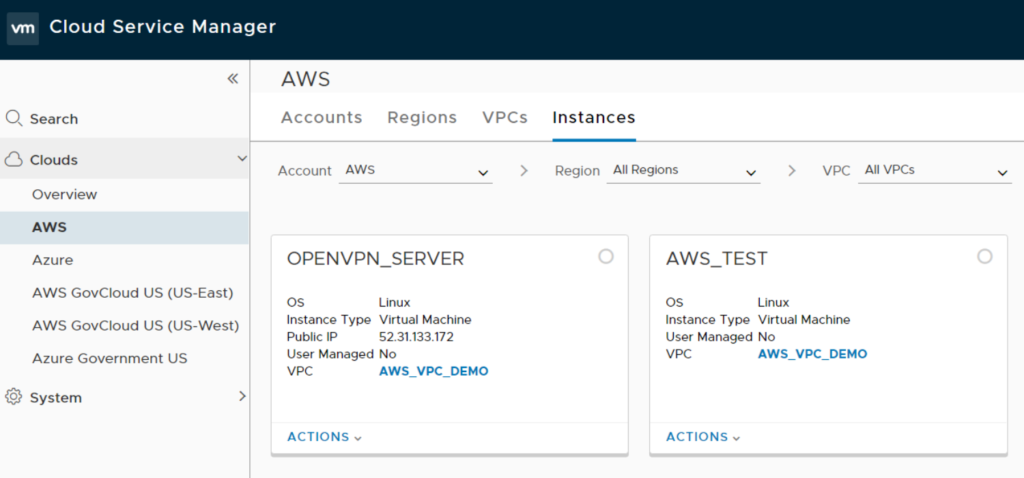
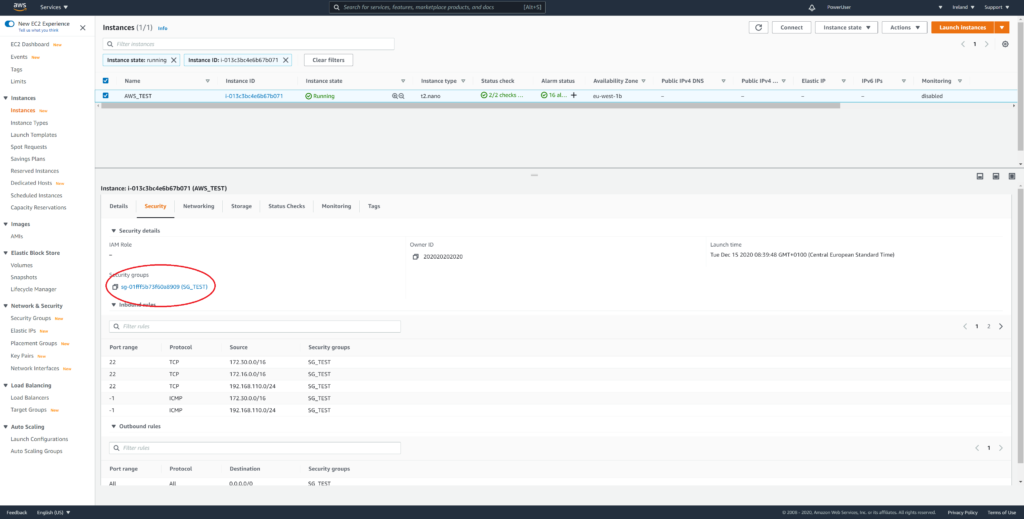
Your AWS EC2 Dashboard should still show (at least) your AWS_TEST instance with security group SG_TEST attached.
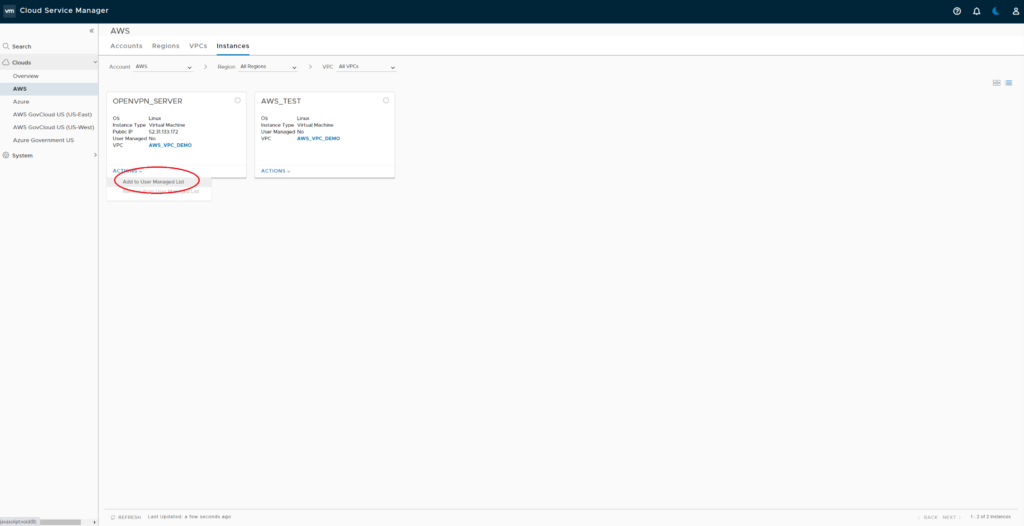
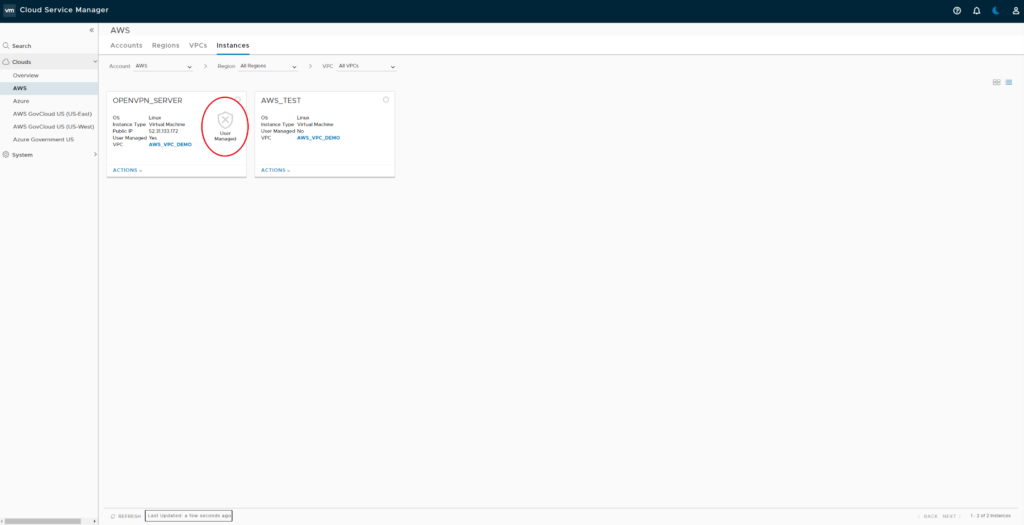
At a later step NSX Cloud will block all networking traffic not being allowed by NSX DFW rules. To prevent EC2 instances from being protected by NSX DFW you need to put them onto the User Managed List. In my environment I’ll exclude my OpenVPN Server from NSX DFW.
NSX Cloud Gateway Setup
Before deploying NSX Cloud Gateway review your AWS Subnet settings and note their availability zone.
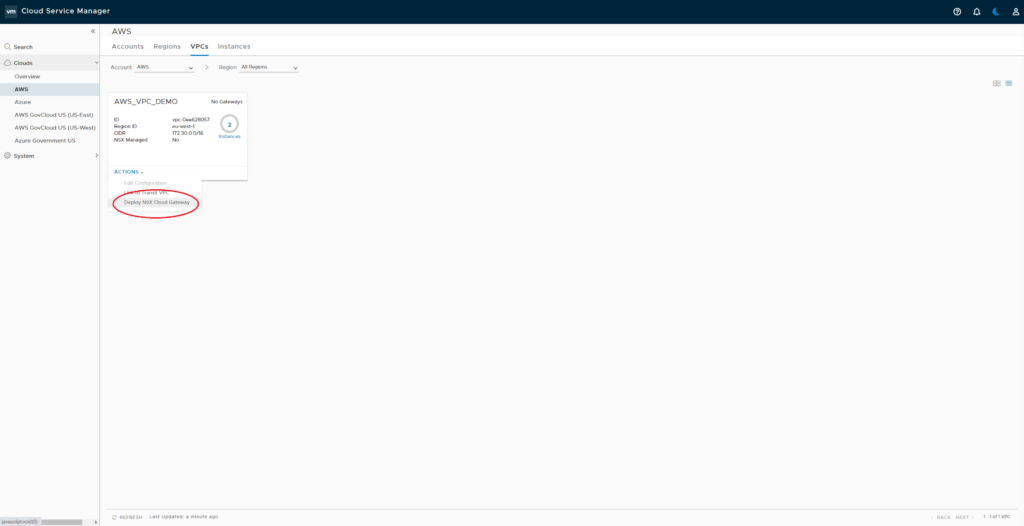
Now select AWS_VPC_DEMO in NSX CSM and click on “Actions” -> “Deploy NSX Cloud Gateway”
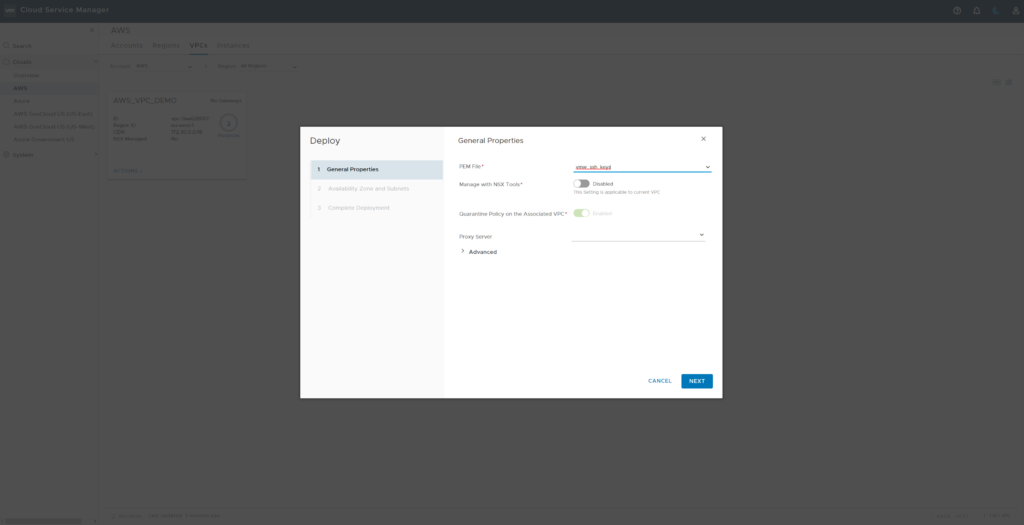
Select your pem file. On “Advanced” you could modify DNS settings.
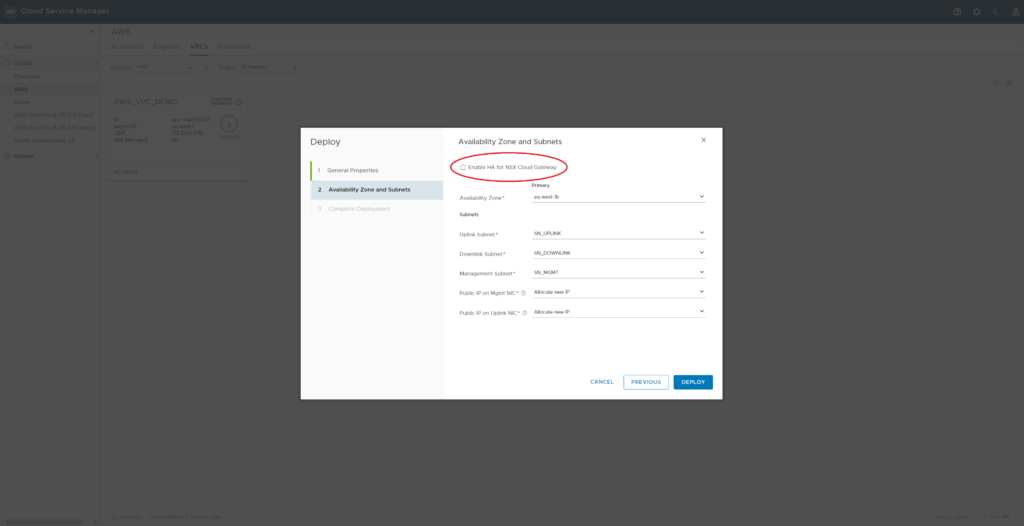
De-select “enable HA …” , select matching Subnets and set Public IP Settings to “Allocate New…”
NSX cloud gateway will now be deployed.

Time to review NSX CSM Cloud. VPC now marked as “green”, “Self managed” and displays “Deployed Gateways”. AWS_TEST Instance shows “No NSX Policy is configured”


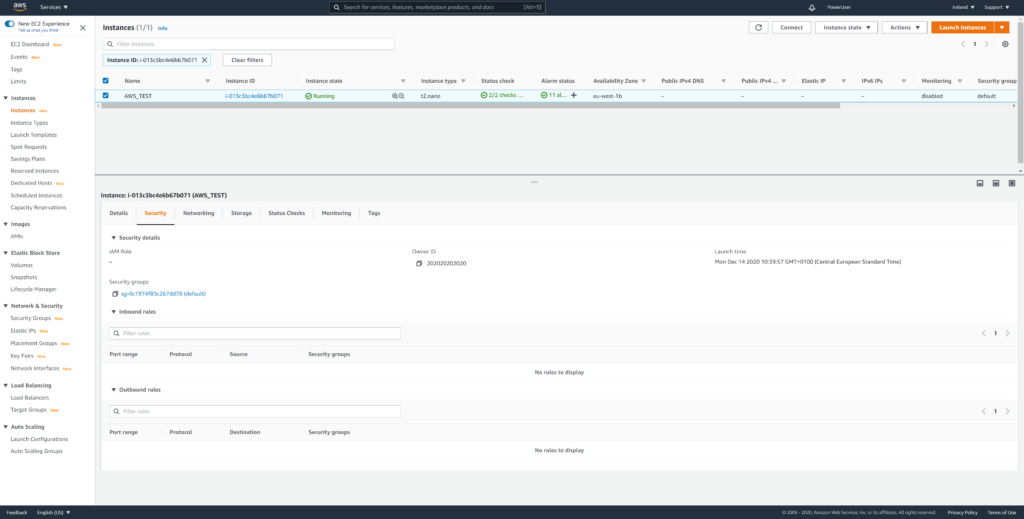
As there is no matching NSX Policy for AWS_TEST now all traffic will be blocked. If you review AWS_TEST Security Group settings you will see there is new NSX Generated “default” Security Group applied which contains no rules.
Create NSX Security Policy for AWS_TEST Instance
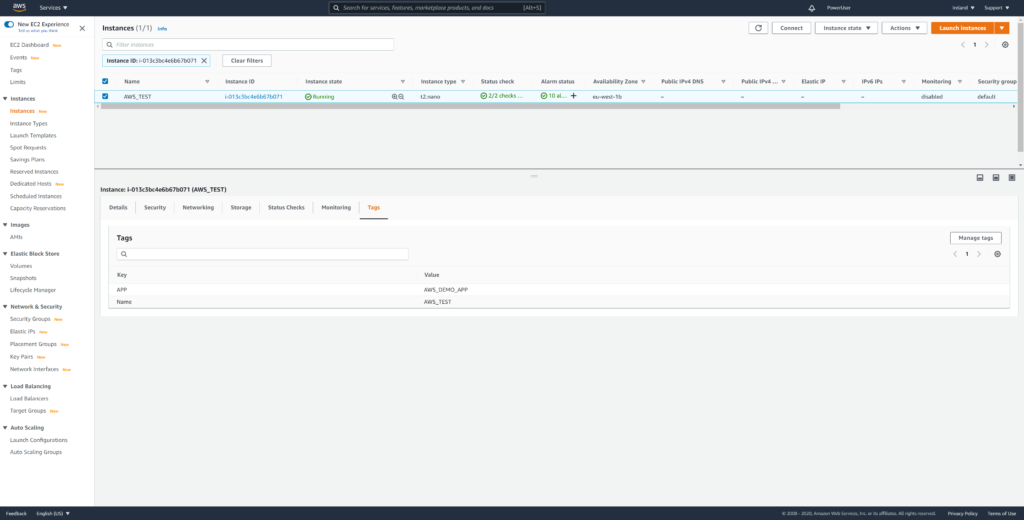
I recommend to use tagging for NSX Security Group Membership. NSX Cloud automatically imports AWS Tags into NSX Inventory. So first of all you should tag the AWS_TEST Instance. So add Key “APP” and Value “AWS_DEMO_APP”
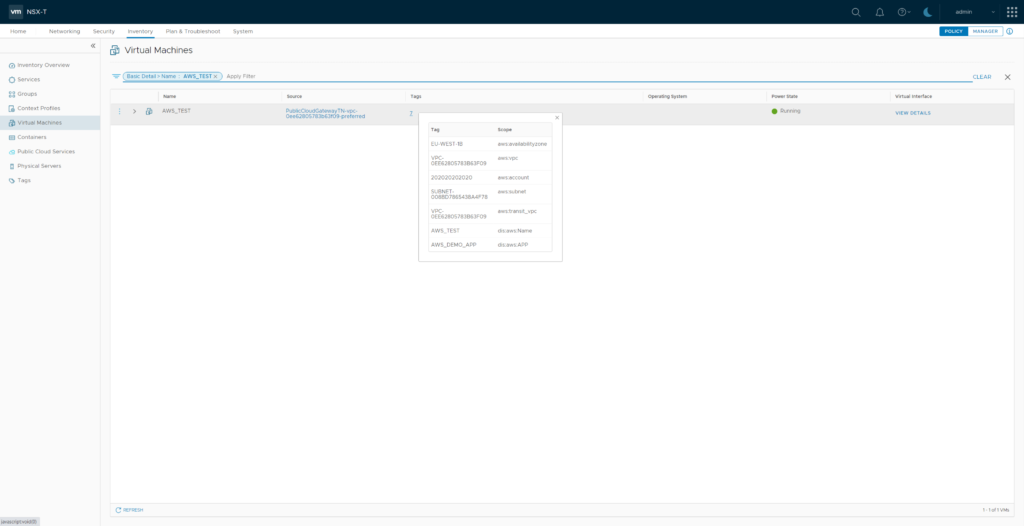
Now your NSX-T Inventory will show the AWS_TEST VM with several automatically created Tags and the newly created Tag “AWS_DEMO_APP”. So AWS Tag Value matches NSX Tag, AWS Tag Key will match NSX Scope (with prepended “dis:aws:”)
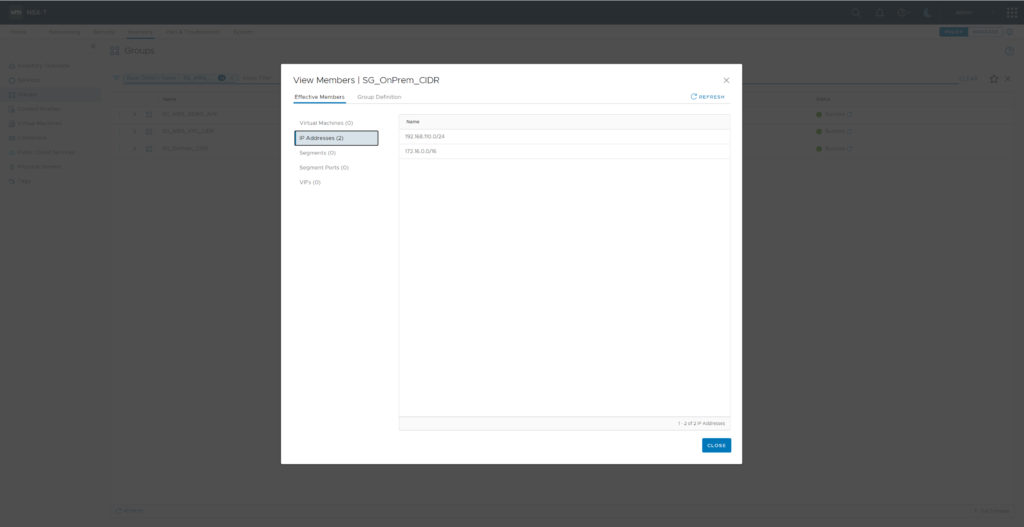
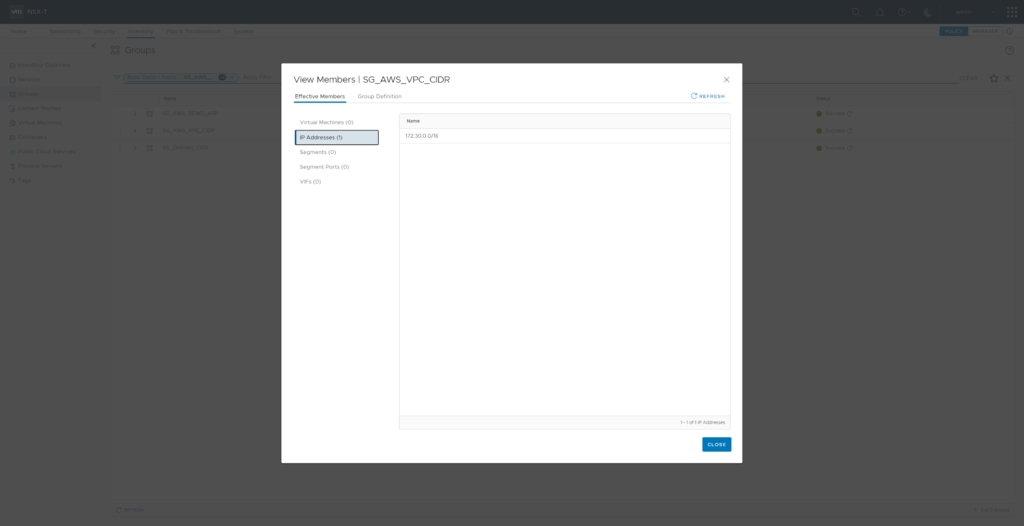
In case you did not already create NSX Security Groups for your uses IP Address ranges you should now do so. I’ve added SG_OnPrem_CIDR (member “IP Adresses 192.168.110.0/24 and 172.16.0.0/16) and SG_AWS_VPC_CIDR (member IP Address 172.30.0.0/16)
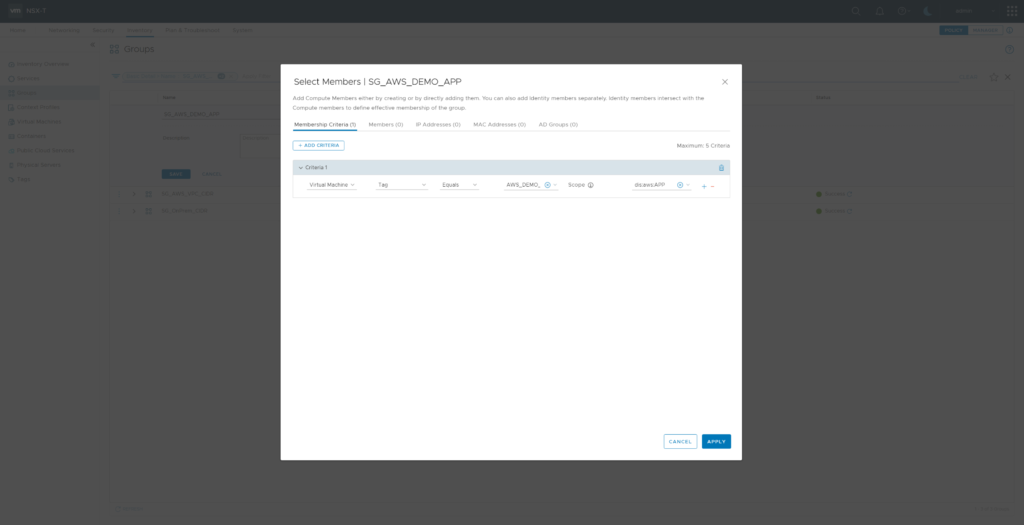
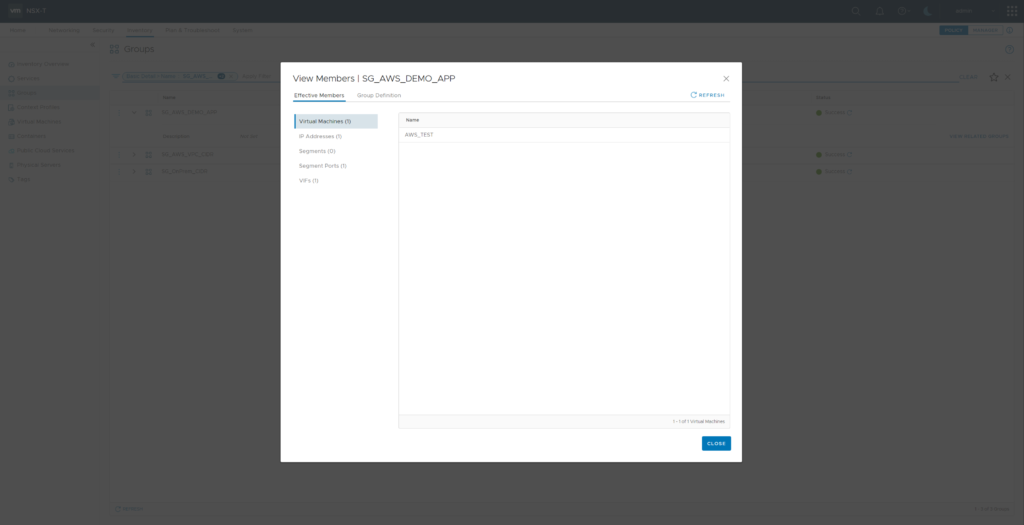
Now its time to create a NSX Security Group for the AWS_TEST workload. Create SG_AWS_DEMO_APP with Membership Criteria “Virtual Machine” “Tag” “Equals” Tag “AWS_DEMO_APP” Scope “dis:aws:APP”. Reviewing members of Security Group “SG_AWS_DEMO_APP” now will show VM “AWS_TEST” as member.
Having all NSX Security Groups created you can now create NSX Distributed Firewall Policy “NSX_CLOUD_DEMO” (applied to Security Group SG_AWS_DEMO_APP) with a single rule allowing services “ICMP ALL, SSH” from source Security Groups “SG_AWS_VPC_CIDR” and “SG_OnPrem_CIDR” to destination “SG_AWS_DEMO_APP“.
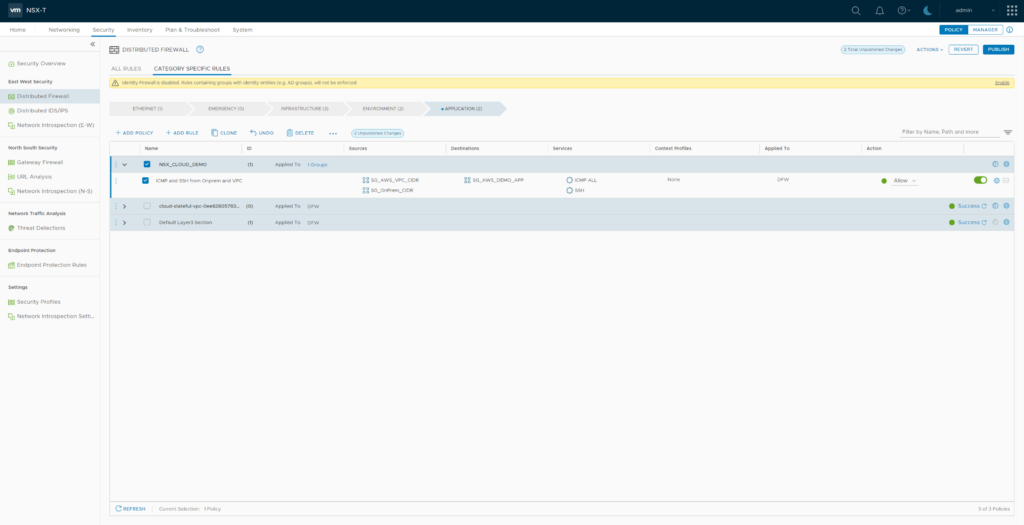
Short time later AWS Security Group settings for AWS_TEST will now show a NSX created Security Group with translated settings from NSX DFW Policy.
Ping and SSH access from on-premises to AWS_TEST should now work again.