


NSX delivers L4-7 State full Firewall Functions and L2/L3 Network Services. But NSX can also be used for Load balancing Functions. The Load balancer Function provide either L4 TCP/UDP Services, or L7 HTTP Services. In my Blog I will explain how to use the NSX Load balancer for L7 HTTP Services.
Let’s have a look at my Network Setup!
LAB Setup
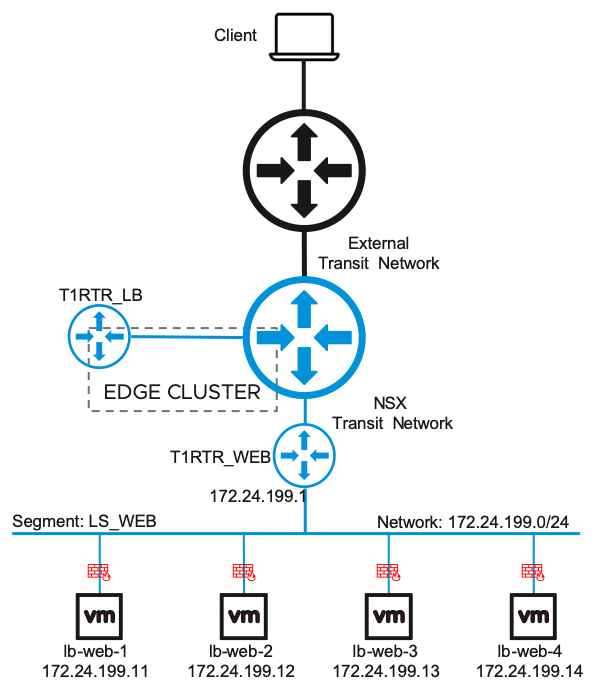
I have my Client connected to an external Router (outside NSX) to access later the WEB Server.
The external Router is connected to my internal NSX T0 Router via BGP. So, Routes will be learned automatically. The T0 Router is connected to my NSX Edge Cluster.
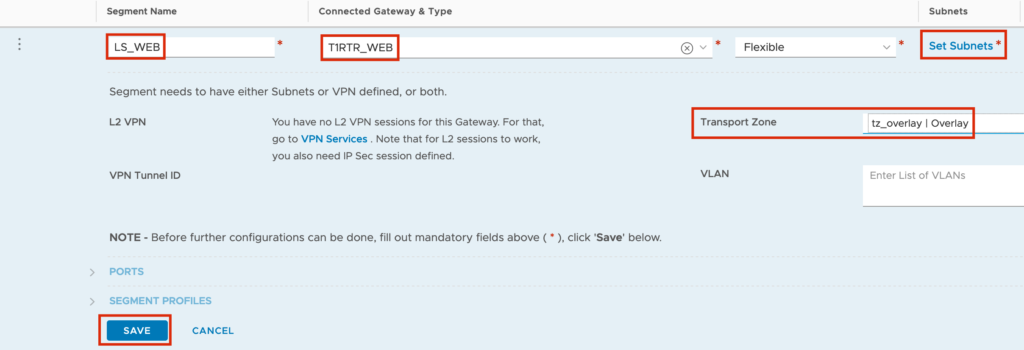
Inside NSX, I have a Segment (aka logical Switch) with the Name LS-WEB, connected to my T1 Router T1RTR_WEB. The T1 Router is connected to my T0 Router and I propagate all connected Networks to my T0 Router.
In Addition, I created a new T1 Router named T1RTR_LB. This Router is connected to my T0 Router and also connected to my Edge Cluster for the Load balancing Services. On this T1 Router I propagate “All LB VIP Routes“.
I my example I am using four Ubuntu Servers with Apache2 and PHP, connect to my Segment LS_WEB.
Logical Load balancer Setup
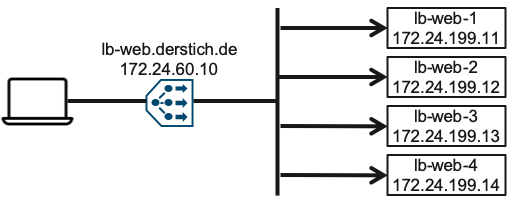
Logically the Client will access the Load balancer via the VIP 172.24.60.10 or via the DNS Name lb-web.derstich.de. The Load balancer will than pick up a Member from his Pool.
Before we can start with the configuration, please make sure that the prerequisites are fulfilled.
Prerequisites:
- NSX Manager is configured
- Overlay Transportzone is configured
- NSX Edge is configured
- T0 Router is configured and attached to an external Router either via BGP or static routes
If the prerequisites done, we can start with the base configuration.
Configure the T1 Router and the Segment for Web Servers
First, we will create a T1 Router with the Name T1RTR_WEB and connect it to the T0 Router. (If you have already a T1 Router you can also use this Router and jump to create a segment)
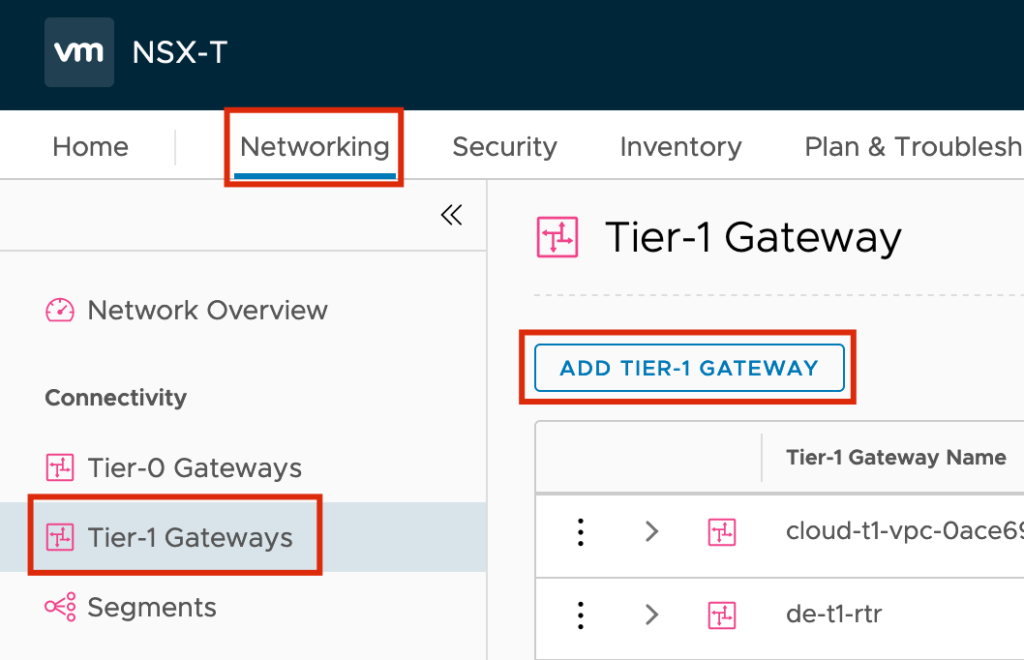
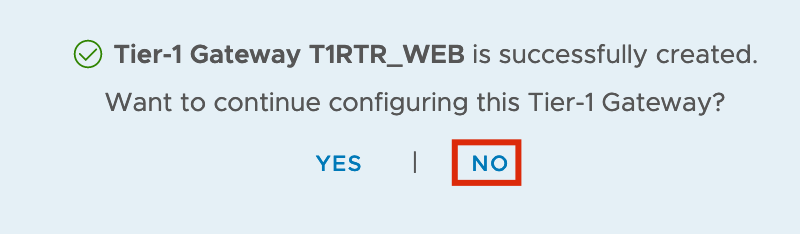
Login to your NSX Manager and jump to “Networking” -> ”Tier-1 Gateways” -> ”Add TIER-1 GATEWAY”
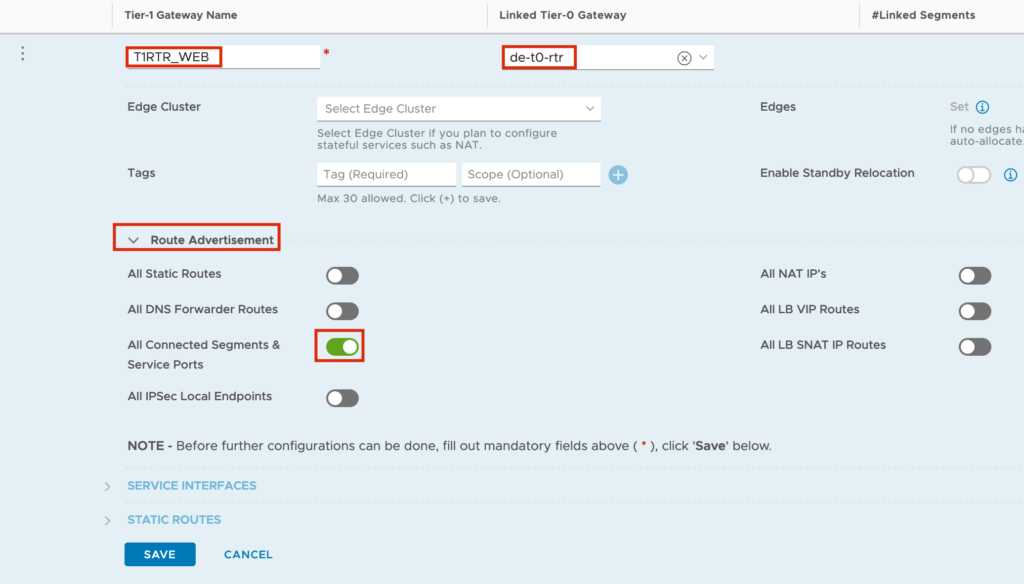
In the Input Screen you need to set a “Tier-1 Gateway Name”, the connection to the T0 Router and the “Route Advertisement” for “All Connected Segments & Service Ports”
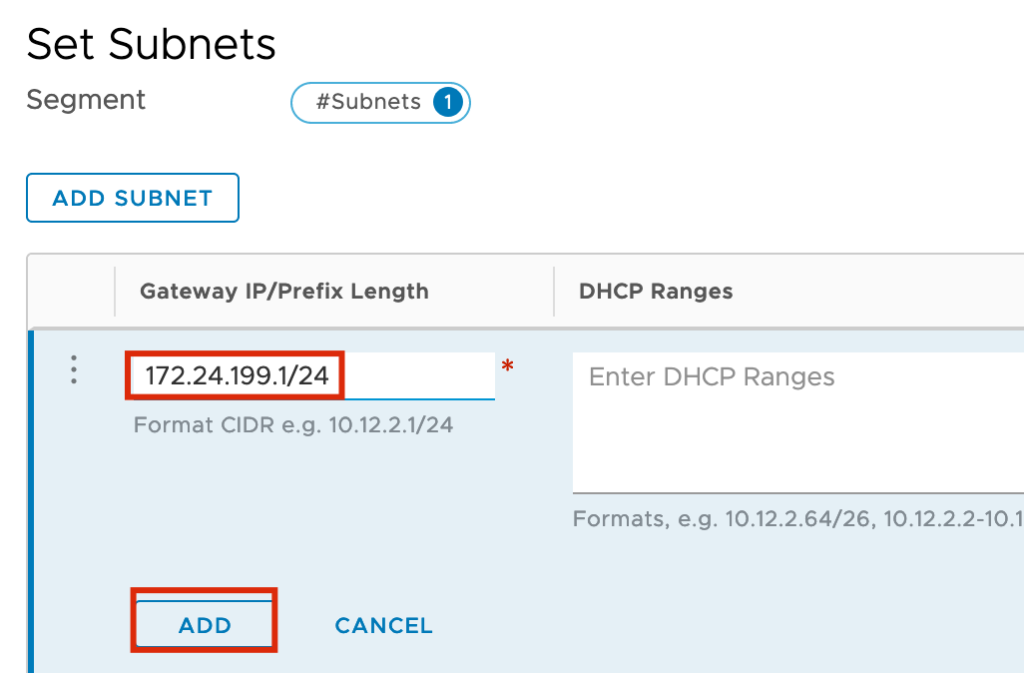
In my Example I am using the Network 172.24.199.0/24 and the Default Gateway should be 172.24.199.1.
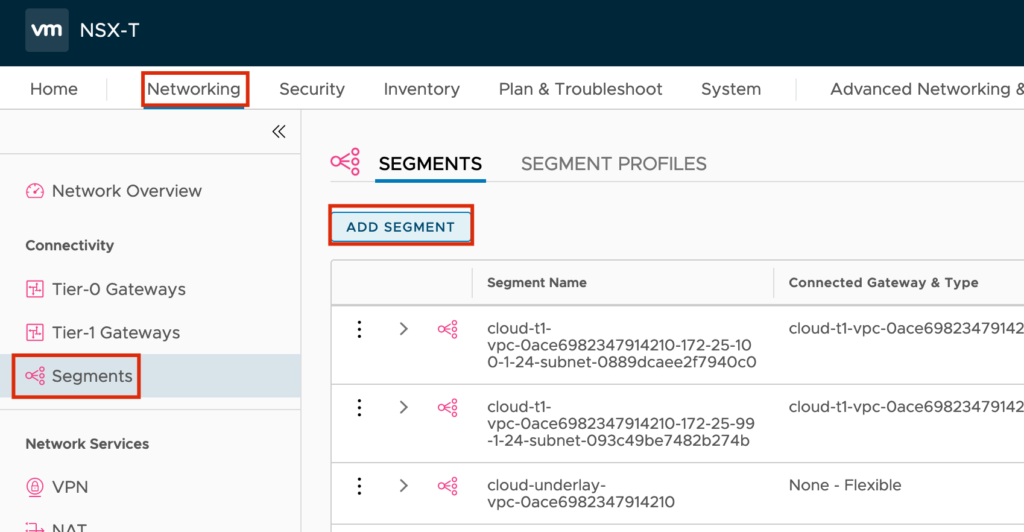
Now we need to setup the Web Servers and connect the Servers to our Segment LS_WEB.
If you have configured Web Servers you can jump directly to next Step (Create T1 Router for Loadbalancing)
Setup the Web Servers
I use a simple Apache Web Server with PHP enabled. The PHP Script will read out the Hostname from the Server, the own IP and the requester IP.
You can use either this script or create your own Script.
First install a Ubuntu Server 16.4. In the Setup chose only the basic setting and ssh to connect later to the Server.
If your Servers are up and running, you need to install some packages and download the PHP Config from Github:
Connect to your Servers via SSH and run the following commands:
sudo apt-get install -y apache2 php libapache2-mod-php
sudo mv /var/www/html/index.html /var/www/html/index.old
sudo wget https://raw.githubusercontent.com/derstich/nsx-lb-demo/master/index.php -P /var/www/html/
sudo wget https://raw.githubusercontent.com/derstich/nsx-lb-demo/master/nsxlogo.png -P /var/www/html/
Now we should check if we can reach all Web servers via HTTP

If we can reach our Webservers, we can start to configure the T1 Router for Load balancing.
Create T1 Router for Loadbalancing
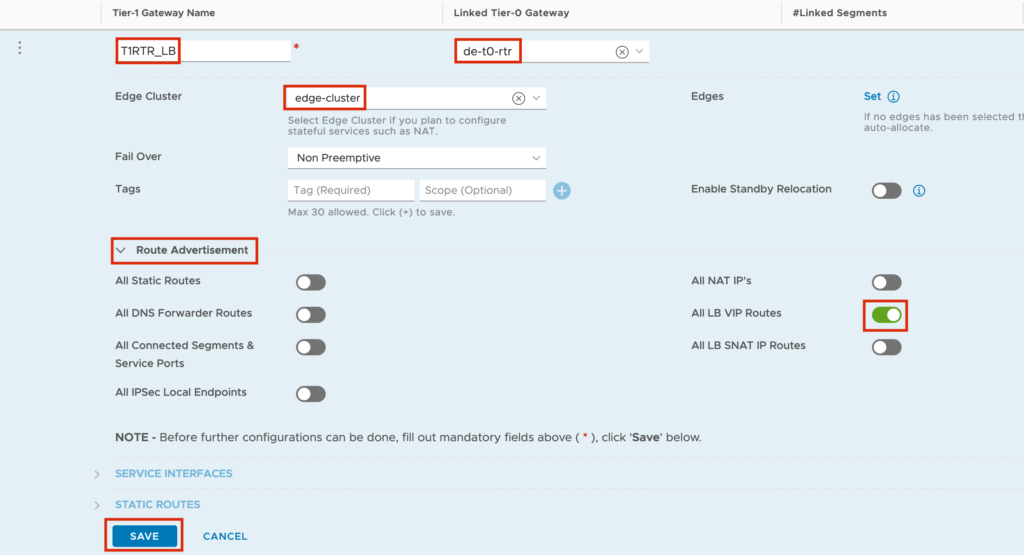
Jump to “Networking” -> ”Tier-1 Gateways” -> ”Add TIER-1 GATEWAY”
In the Input Screen you need to set a “Tier-1 Gateway Name”, the connection to the T0 Router, the Edge Cluster(can be the same you are using for your T0 Router) and the “Route Advertisement” for “All LB VIP Routes”.

Before we create the Loadbalancer, VIP and Server Pool we will need to set Tags on our VMs and create a Group.
Tag the WEB VMs and create a Group
Jump to “Inventory” -> “Virtual Machines” and edit the WEB Server VMs.
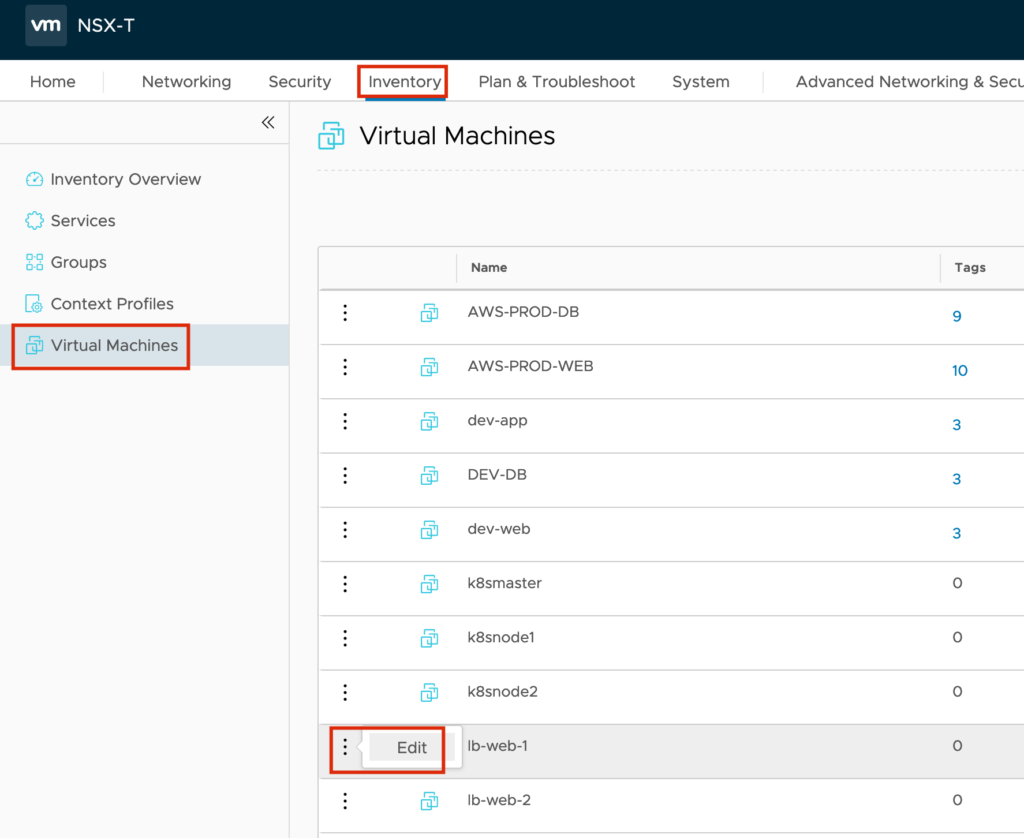
Set a new Tag to the VMs. In my example I use the Tag lb-web.
Don’t forget to press the “+” next to the TAG/SCOPE field. Otherwise the Tag will not be stored…repeat this on all WEB Server

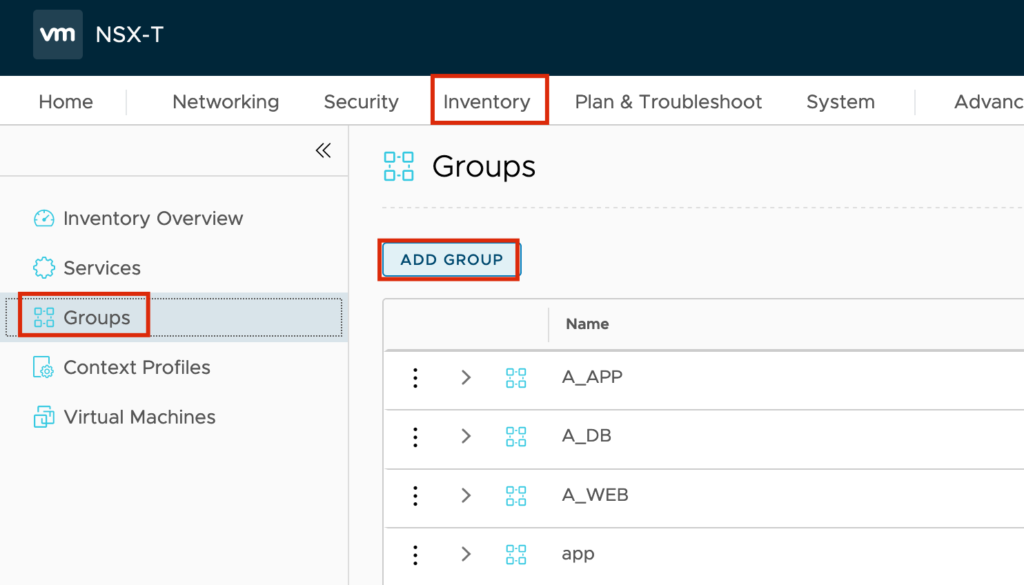
Now we can create a Group
Jump to “Inventory” -> “Groups”-> “ADD GROUP”
I use also “lb-web” as Group name but before we can save the Group we need to set the Member Definitions.
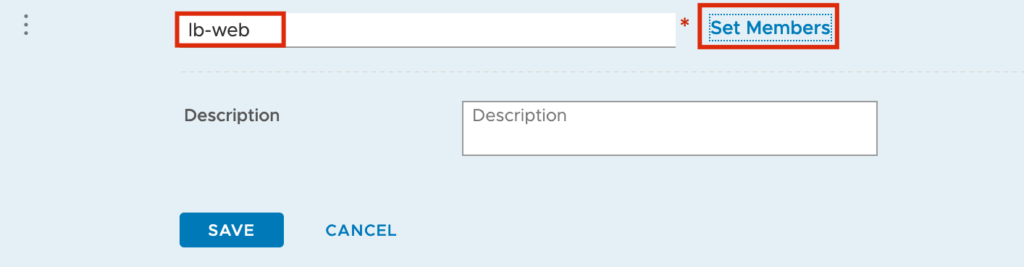
We create a Membership Criteria with Virtual Machine Tag equals lb-web
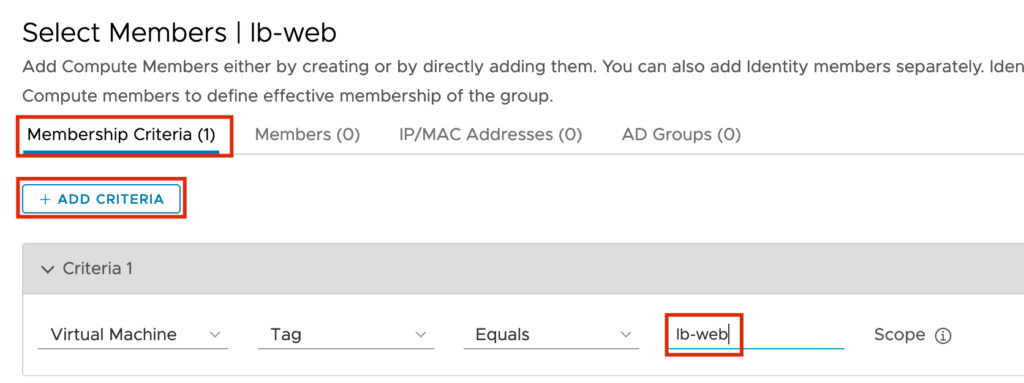
Now we can save the Configuration

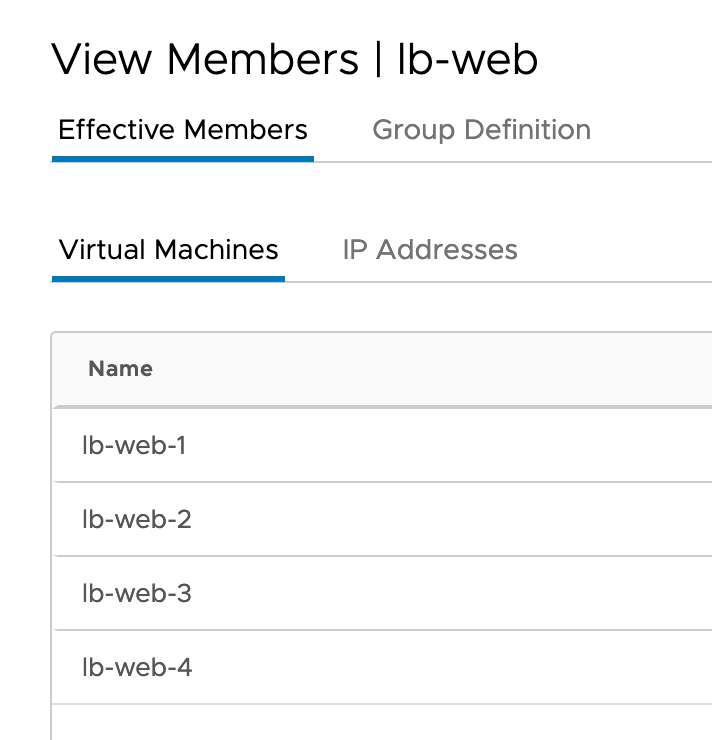
Search for the Group and view the Members.
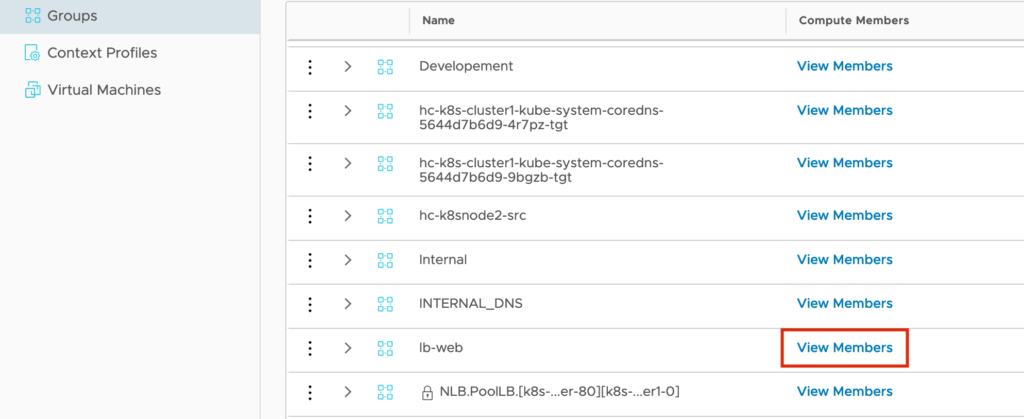
If you made everything correct, you should see the four WEB Servers
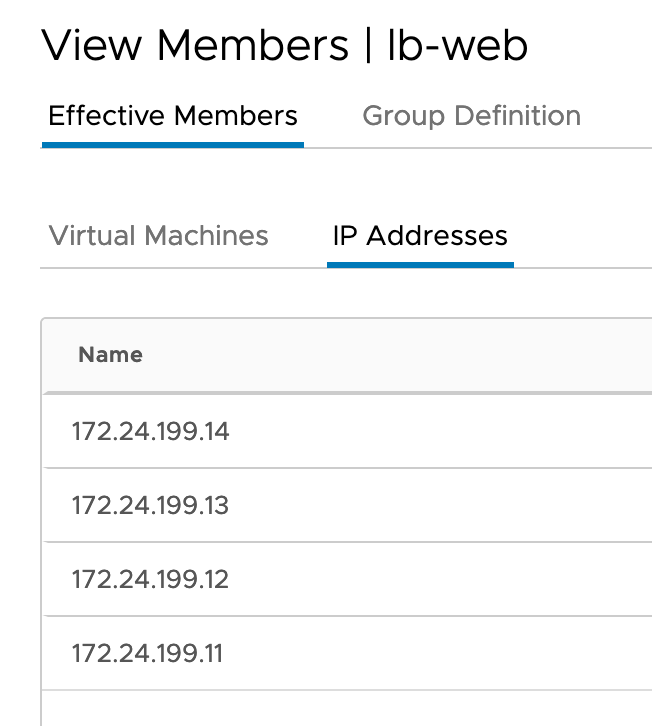
And the belonging IP Addresses
It’s time to create the Load balancer!
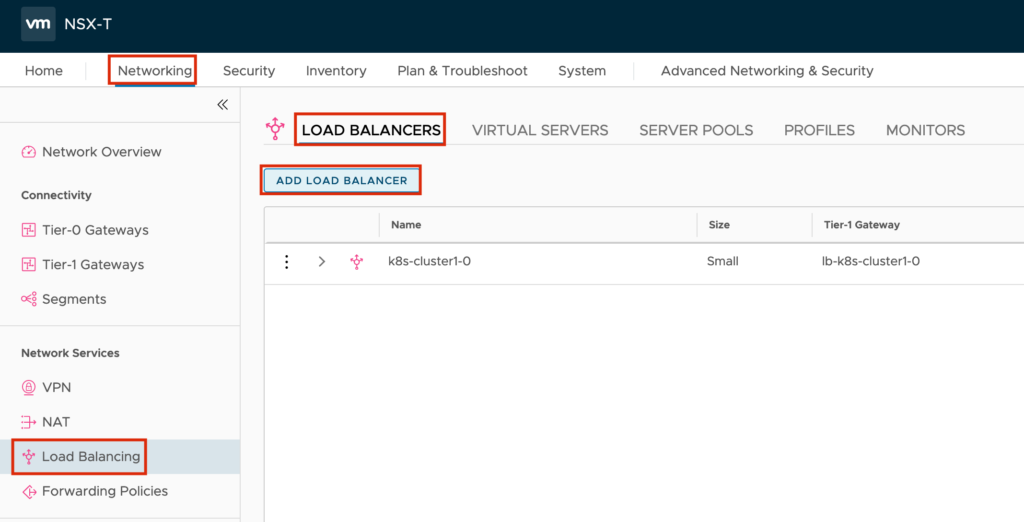
Create the NSX Load balancer
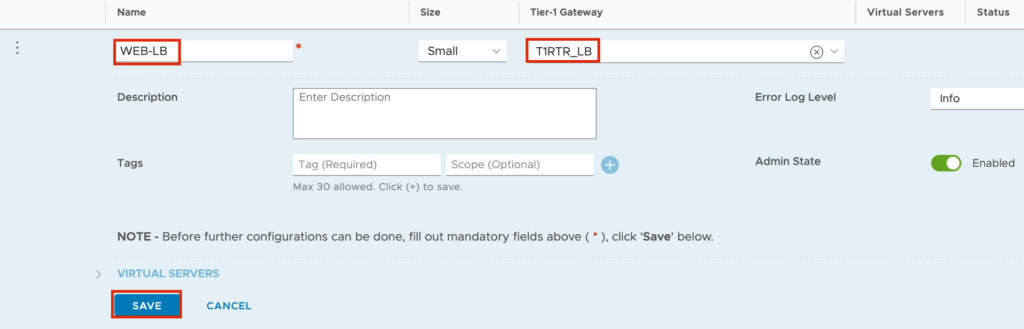
Jump to “Networking” -> “Load Balancing” -> “LOAD BALANCERS” -> “ADD LOAD BALANCERS” to create the new Load balancer.
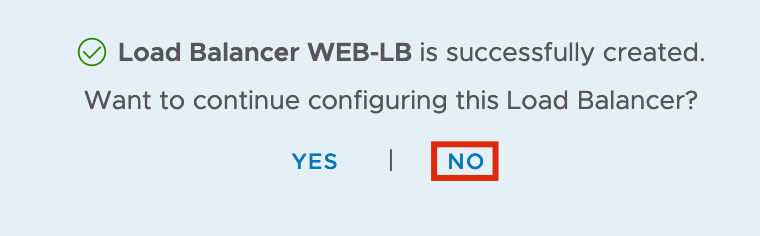
Next we will create the Server Pool.
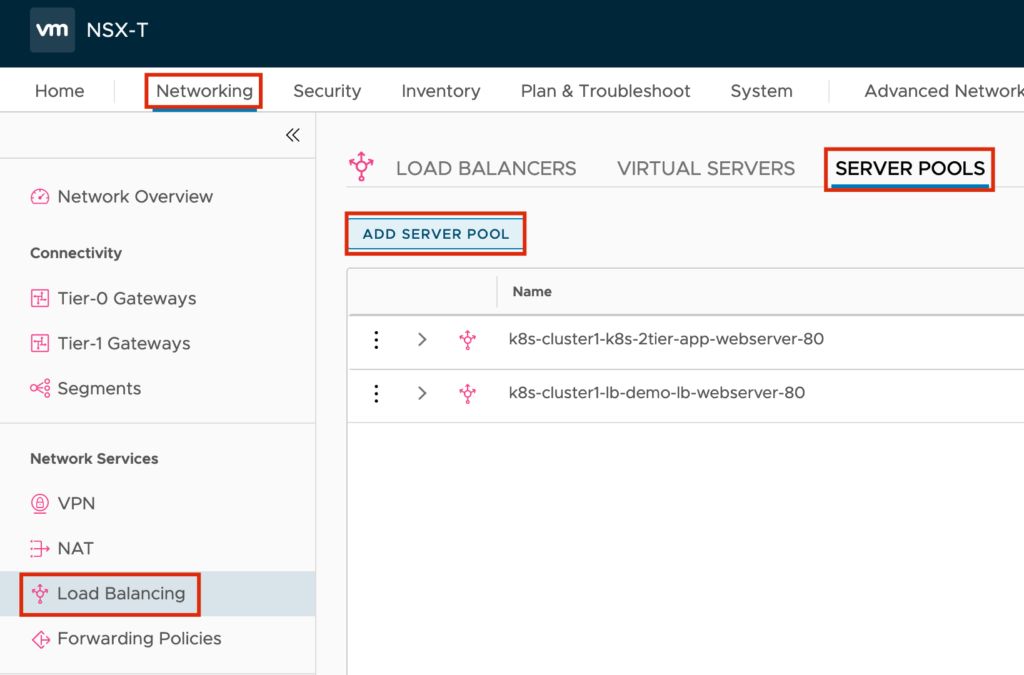
Create a Server Pool
Jump to “Networking” -> “Load Balancing” -> “SERVER POOLS” -> “ADD SERVER POOLS” to create the new Server Pool.
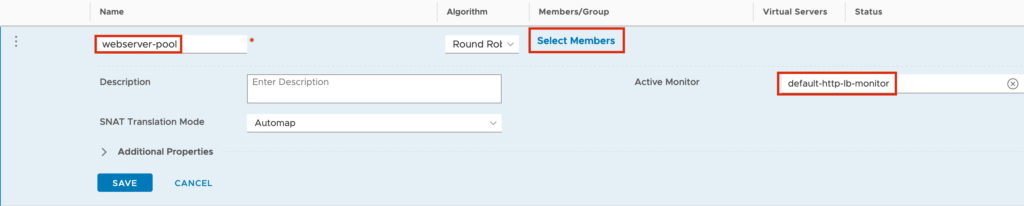
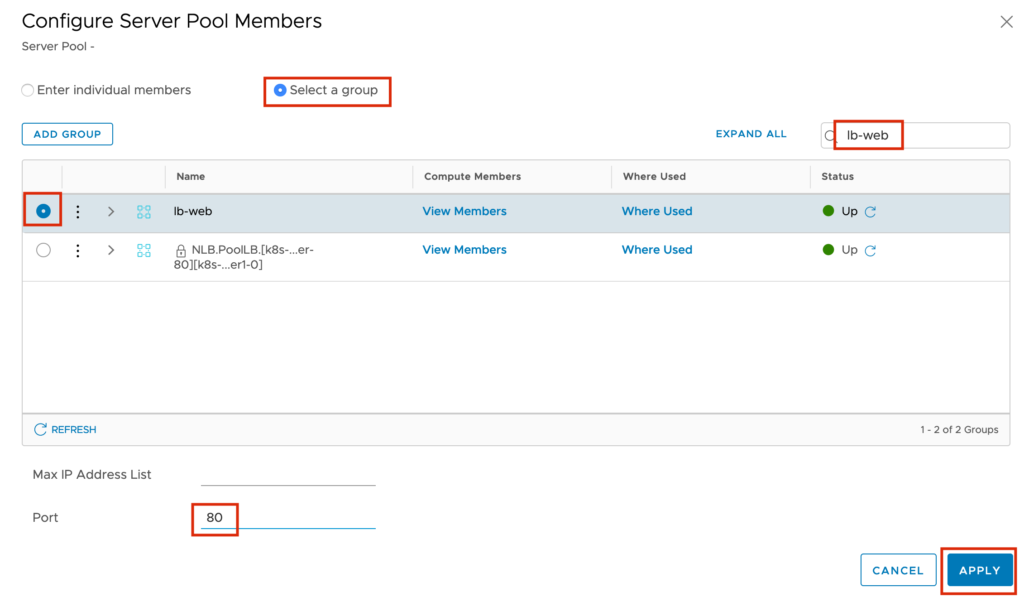
Give a Pool Name e.g. webserver-pool, set the Active Monitor to “default-http-lb-monitor” because the WEB Servers are running on HTTP and before we safe the config we select the Members.
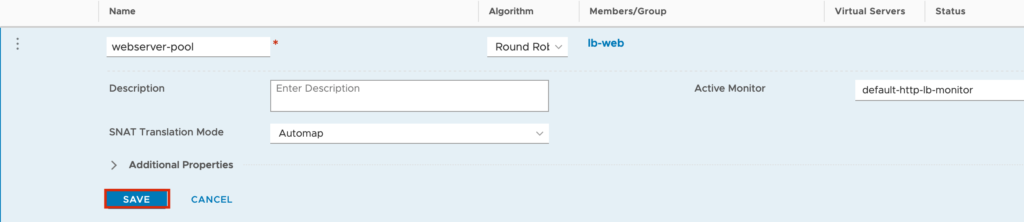
When we finished the configuration for the Server Pool, we can start to create our first VIP.
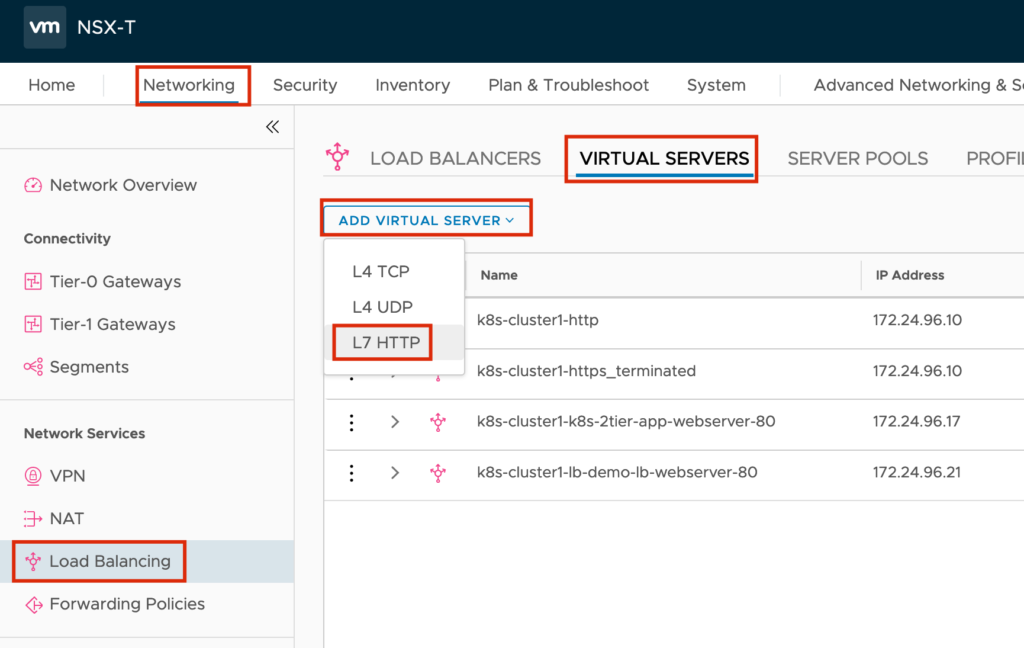
Create a L7 HTTP Virtual Server
Jump to “Networking” -> “Load Balancing” -> “VIRTUAL SERVERS” -> “ADD VIRTUAL SERVER”-> “L7 HTTP” to create the new Virtual Server.
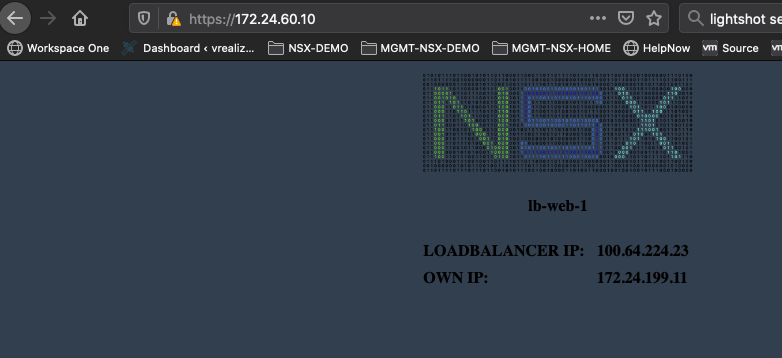
I named the Server http-server and the virtual IP will be 172.24.60.10 (see the logical picture above) Port 80 for HTTP. We will choose the previous configured Load balancer and Server Pool.

After a minute you should be able to access the Web Service over the Load balancer VIP. As you can see, the IP Address in the Browser Field is 172.24.60.10. But the Own IP is 172.24.199.x.

But the Access from external is not encrypted…let us create a HTTPS VIP!
Create a L7 HTTPS Virtual Server
First we need to create a certificate. To create a Certificate you can SSH into one of your Web Servers and do the following:
Change to the /tmp folder
cd /tmpand create a new file with the name “cert.cnf”. Replace the information with your personal information and save the file.
#
[ req ]
default_bits = 2048
distinguished_name = req_distinguished_name
req_extensions = req_ext
prompt = no
[ req_distinguished_name ]
countryName = DE
stateOrProvinceName = DE
localityName = NRW
organizationName = NSX
commonName = lb-web.derstich.de
[ req_ext ]
subjectAltName = DNS:lb-web.derstich.de,IP:172.24.60.10
We need to set some export variables, but with your IP Address and your DNS Name. If you are not using DNS set as COMMONNAME the IP Address.
export IP_ADDRESS=172.24.26.10
export COMMONNAME=lb-web.derstich.de
Now we will create the Certificate and the key with the following command:
openssl req -newkey rsa:2048 -x509 -nodes \
-keyout nsx-lb.key -new -out nsx-lb.crt -subj /CN=$COMMONNAME \
-reqexts SAN -extensions SAN -config <(cat ./cert.cnf \
 <(printf "[SAN]\nsubjectAltName=DNS:$COMMONNAME,IP:$IP_ADDRESS")) -sha256 -days 365
This command will store nsx-lb.crt and nsx-lb.key in your /tmp folder.
You can print the content from the both files with the cat command, because we need the content later in NSX Manager.
cat nsx-lb.crt
cat nsx-lb.key
Now we need to import the certificate into NSX.
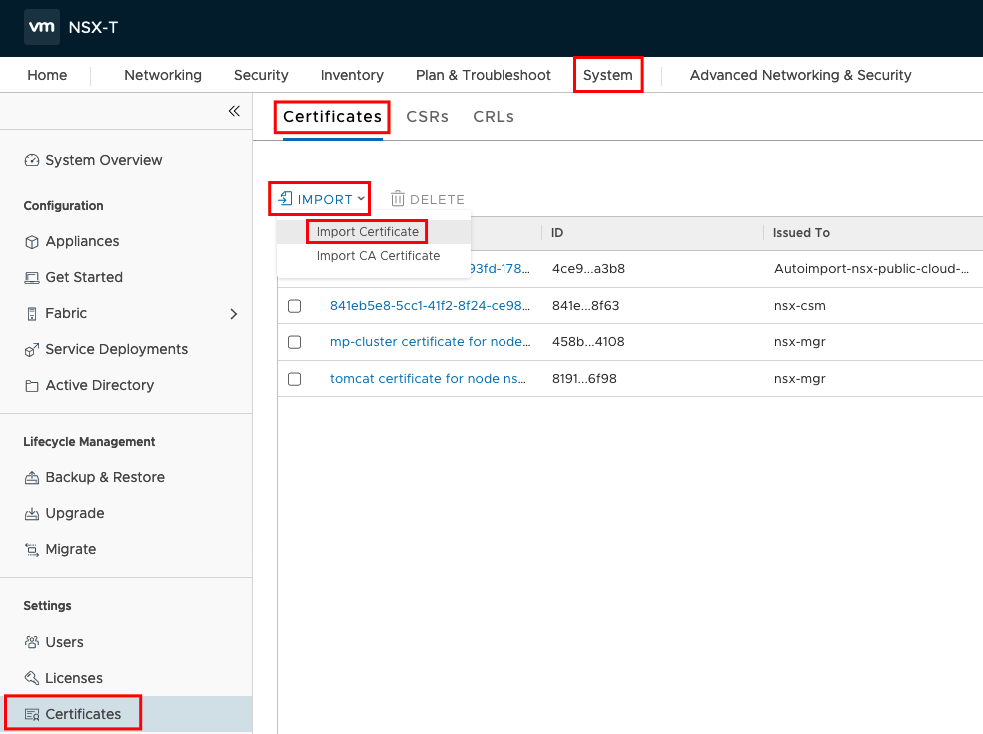
Open your NSX manager and Jump to “System” -> “Certificates” -> “Certificates” -> “IMPORT”-> “Import Certificate” to import your certificate.
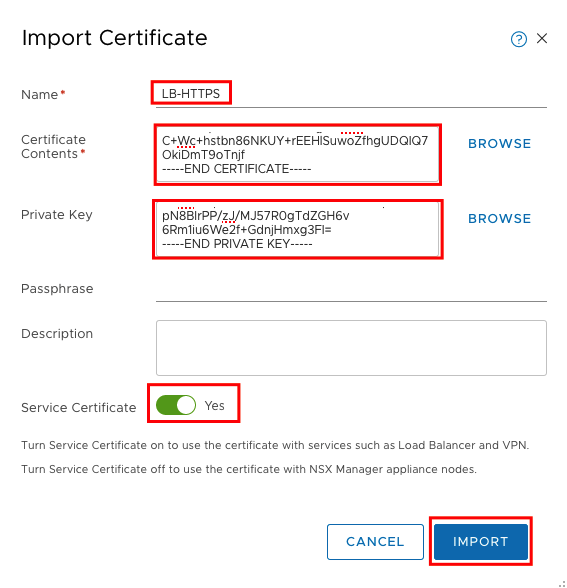
In the new window we will set a Name for the Certificate and paste the content from nsx-lb.cert and nsx-lb.key in the fields.
Make sure to copy the complete information including
For Certificate Contents: —–BEGIN CERTIFICATE—– / —–END CERTIFICATE—–
For Private Key: —–BEGIN PRIVATE KEY—– / —–END PRIVATE KEY—–
Service Certificate must be enabled and Passphrase must be empty.
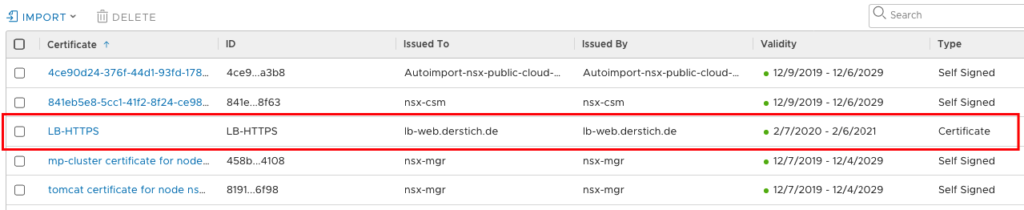
If your certificate is imported, you should see a new Certificate in NSX with Type Certificate.
Now let’s go back to our Load balancer Section and create the VIP
Jump to “Networking” -> “Load Balancing” -> “VIRTUAL SERVERS” -> “ADD VIRTUAL SERVER”-> “L7 HTTP” to create the new Virtual Server.
Create HTTPS VIP
I named the Server https-server and use the same virtual IP 172.24.60.10 we used also for http server.Port will be 443 for HTTPS. We will choose the previous configured Load Balancer and Server Pool.
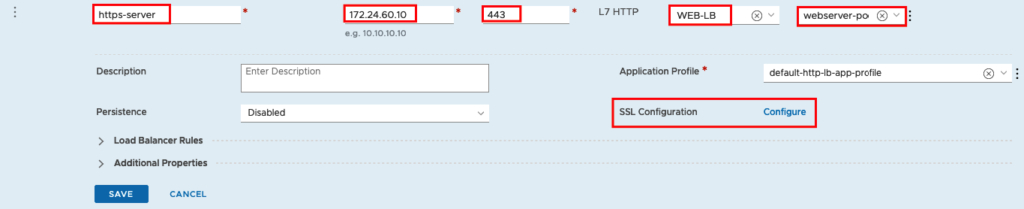
We will enable SSL only between Client and the Virtual Server. From the Virtual Server to the Web Server farm we will still using HTTP (Port 80) because we didn’t configure SSL on our Web Servers.
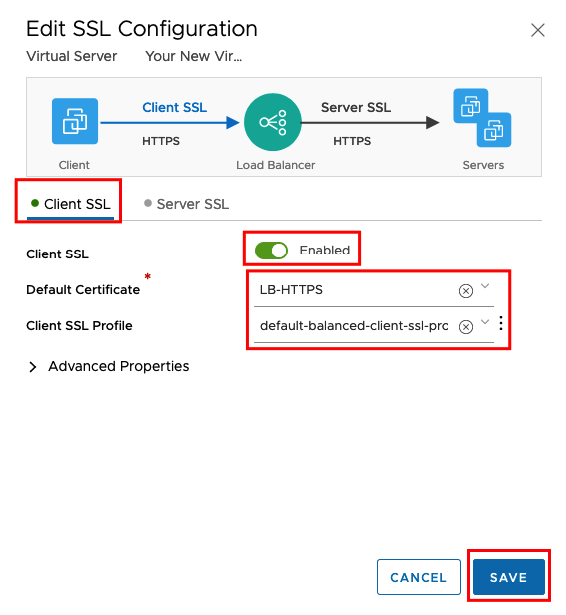
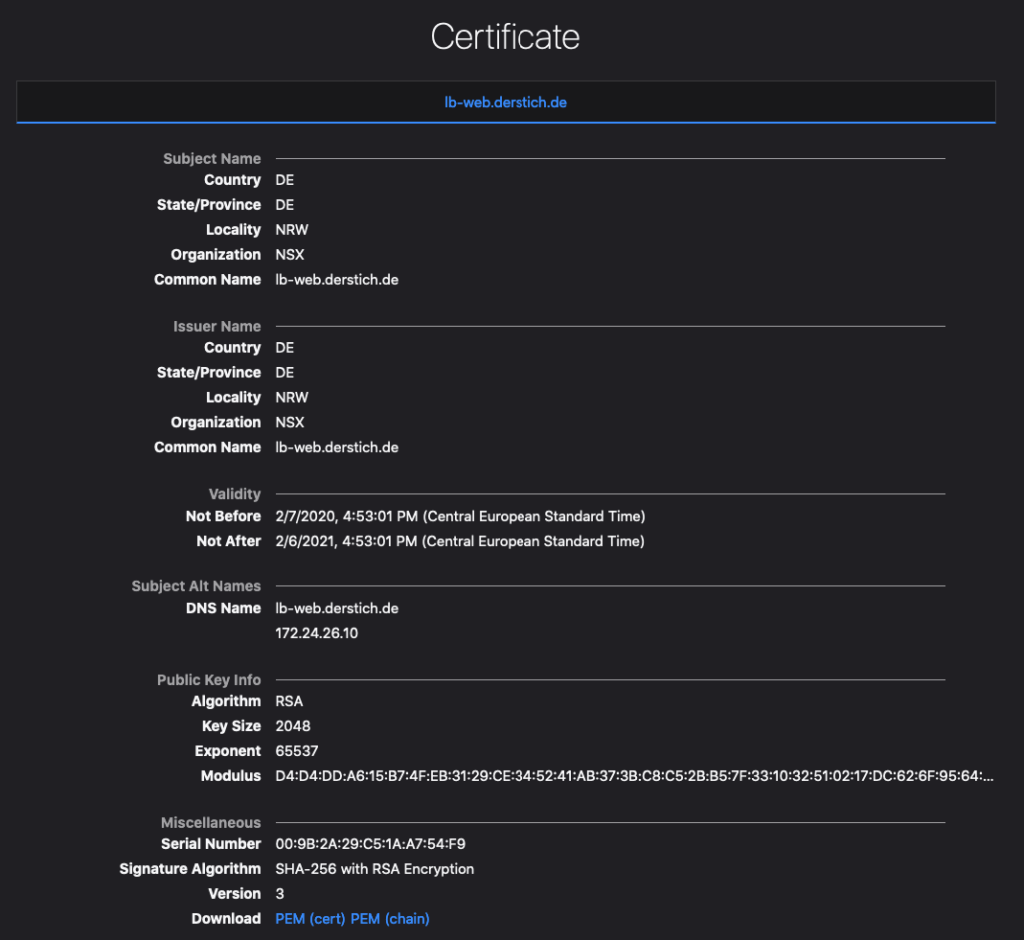
Click on the Advanced Tab and view the Certificate.
The Certificate Content should match the information you have created before.
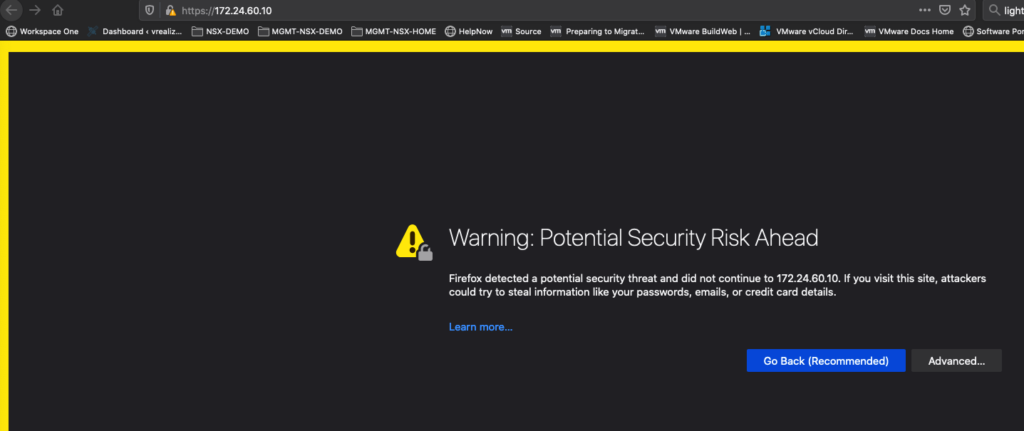
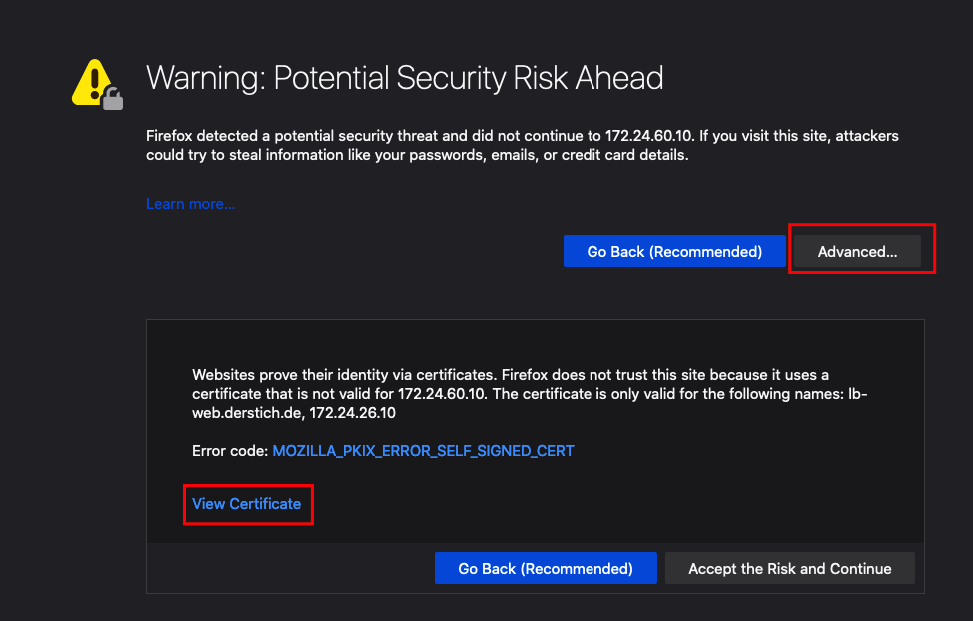
Now we can accept the Risk and continue and should access our Web Server Farm but now with HTTPS instead of HTTP.

- VCF9 NSX-Edge Setup – What has changed - 11. July 2025
- VCF NSX-Edge setup from a network perspective - 2. June 2025
- VCF Workload Domain Setup from a network perspective - 2. June 2025
Pingback: Dual Stack (IPv4/6) in NSX-T with DHCP, SLAAC and Load Balancer » vrealize.it - TechBlog VMware SDDC
Thank you for your informative post. I have a quick question for you. I have two webservsr and I want to load balance between them. I have the customers visiting https://myserver1.mydomain.com:8443/mywebfolder/indext.html and https://myserver2.mydomain.com:8443/mywebfolder/indext.html
I want to create a VIP and then dns entry for myserver.mydomain.com
Is there a configuration I can do to say when a customer visits https://myserver.mydomain.com they get redirected to one of the servers with the full url? i.e /mywebfolder/indext.html