This post shows how to integrate Kubernetes (1.16) running a vSphere 6.7 hosted Ubuntu 18.04 VM with VMware NSX-T 2.5.1
VM Preparation
Create 3 empty VMs: k8smaster, k8snode1, k8snode2
VM settings: Ubuntu 64-Bit VMs, 2 CPU, 4GB RAM, 16GB Disk, 2 vnic (at creation connected to any network)
NSX Preparation
Get NSX-T 2.5.1 Up and running.
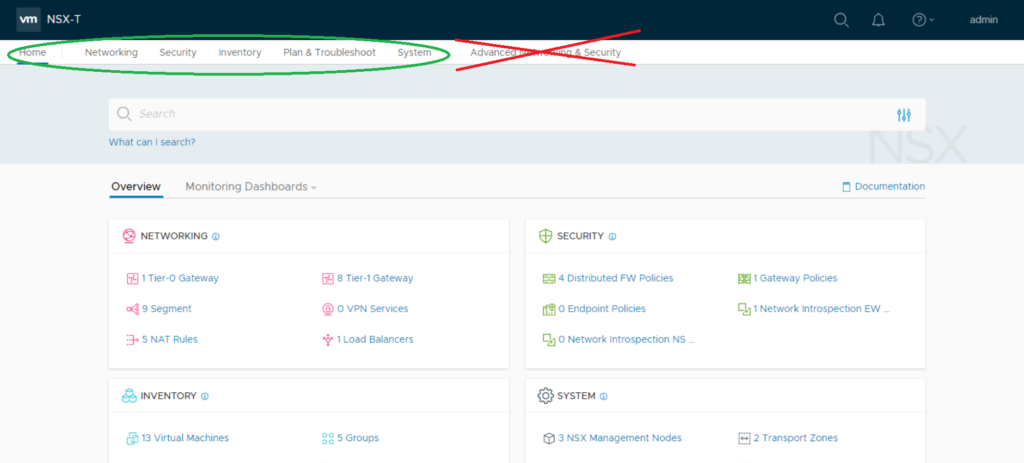
Note: All elements are being created using the Simplified UI introduced in NSX-T 2.4 (so don’t touch “Advanced Networking”)
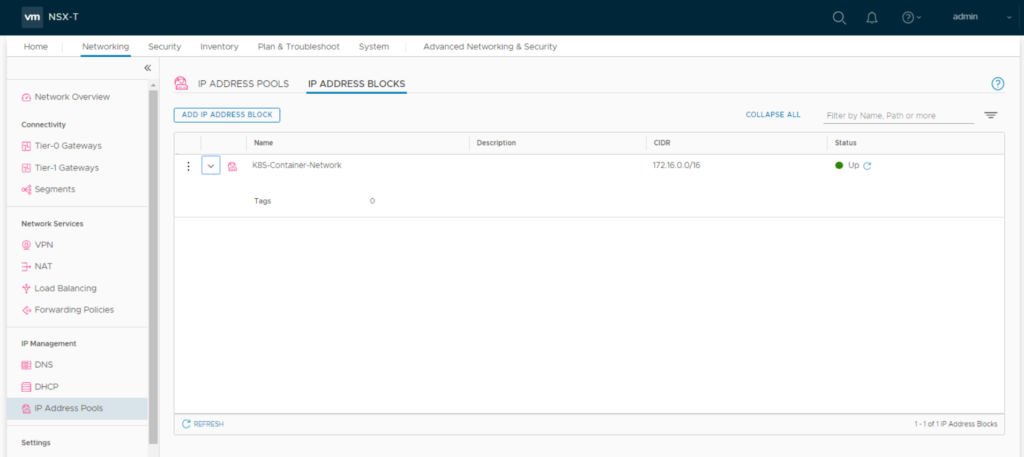
Create a NSX IP address block for container networking. This will be used to apply subnets to the K8S PODs. Can be private IPs as they will not leave the NSX environent. I named it “K8S-Container-Network“
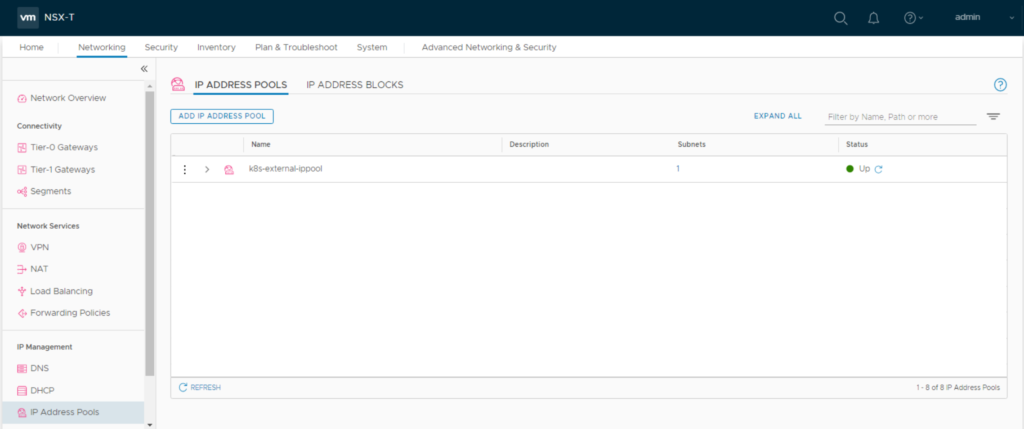
Create a NSX IP address pool for external container networking. Container networks of a namespace will be NAT’ed behind these addresses. So these should be routable in your datcenter. I named it “k8s-external-ippool“
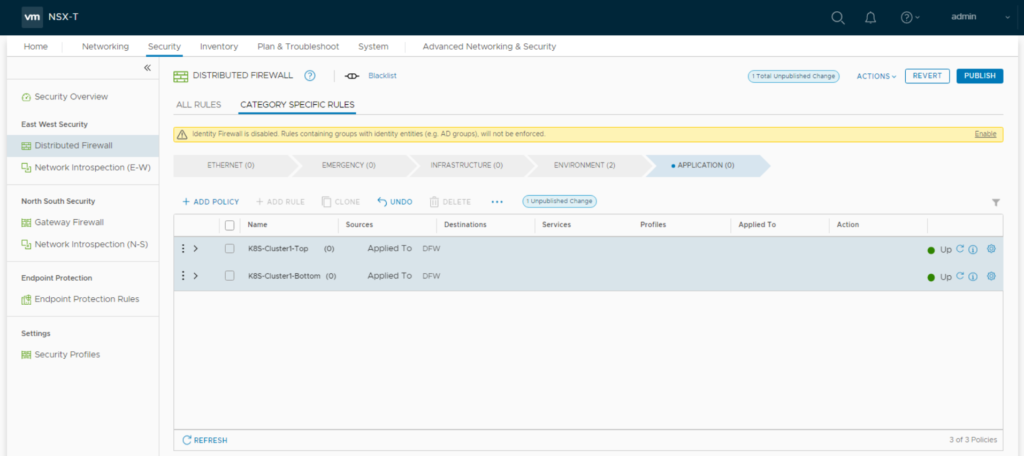
Create two distributed firewall policies “K8S-Cluster1-Top” and “K8S-Cluster1-Bottom“
Management Connection
Have a NSX T0 logical gateway created & configured (North-South traffic / internet access for logical networks should work)
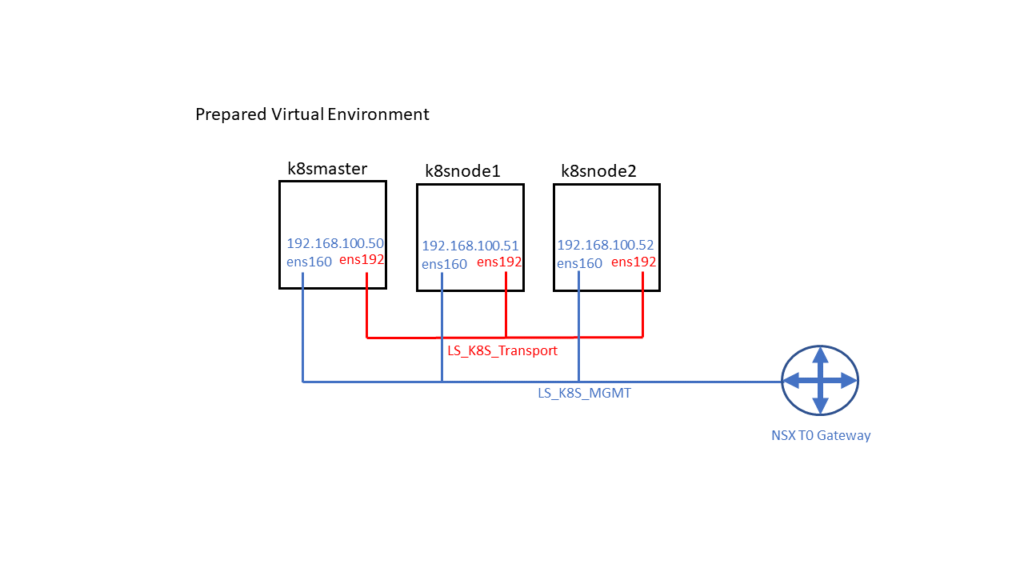
Create a logical segment “LS_K8S_MGMT” for VM management access and connect it to the first vnic of the VMs (later shown in linux as ens160).
As Ubuntu & K8S installation will use this logical segment for management, installation and updates there should be internet access. So connect it to your T0 Gateway
Overlay Connection
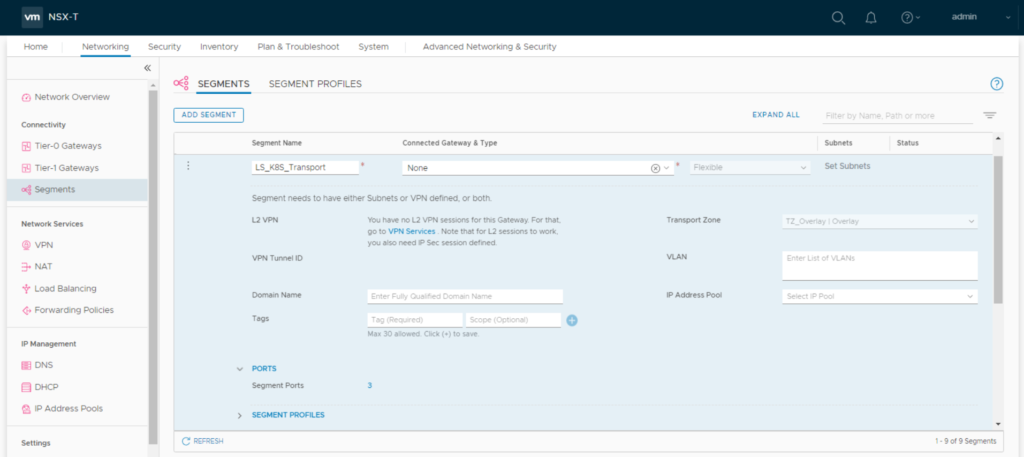
Create a logical segment “LS_K8S_Transport” and connect it to the second vnic of the VMs (shown in linux as ens192). This segment doesn’t need to be connected to any gateway. NSX-T CNA plugin will later use it to
tunnel overlay traffic thru the ESXi hyperbus interface.
Your VM/NSX setup should now look like this (IP Adresses will be setup later):
NSX Port Tagging
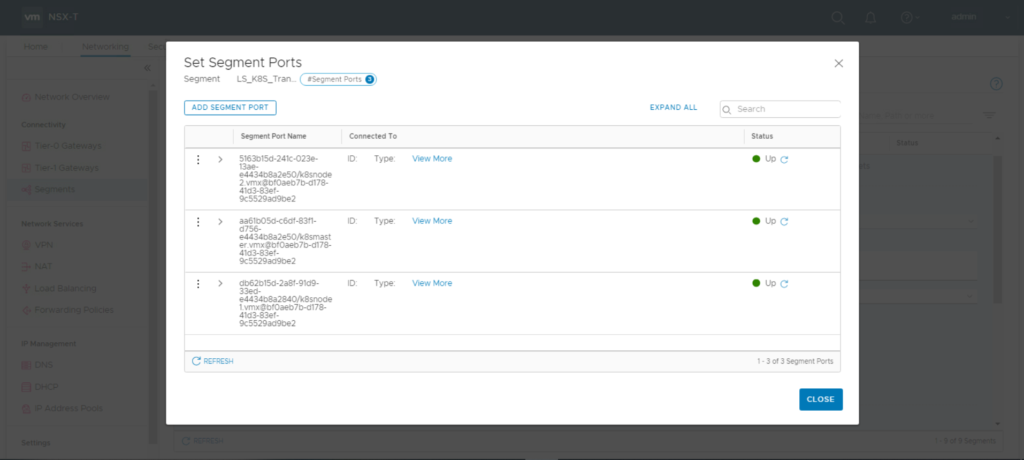
Now as the second vnic is connected to the “LS_K8S_Transport” you need to tag all VM Ports there.
Each VM-connected logical port needs two tags in format:
Tag: [VM-Name] Scope: ncp/node_name
Tag: [k8s Cluster Name] Scope: ncp/cluster_name

For k8smaster:
Tag: “k8s-cluster1” / Scope “ncp/cluster_name”
Tag: “k8smaster” Scope “ncp/node_name”
For k8snode1:
Tag: “k8s-cluster1” / Scope “ncp/cluster_name”
Tag: “k8snode1” Scope “ncp/node_name”
For k8snode2:
Tag: “k8s-cluster1” / Scope “ncp/cluster_name”
Tag: “k8snode2” Scope “ncp/node_name”
Linux Setup
Common Tasks for all three VMs. (you could think about doing it for one VM and clone it)
Linux Setup
Install Ubuntu 18.04 (I just did a minimal install with OpenSSH Server)
Install without SWAP or delete SWAP later in /etc/fstab and reboot
Additional packages needed:
vm@k8smaster:~$: sudo apt-get install docker.io open-vm-tools apt-transport-https python
NSX-T NCP Release Notes state that its only running with kernels up to With Ubuntu Kernel 4.15.0-88 I experienced an issue that the bootstrap container failed because of an error at the openvswitch module build. So I installed and booted into kernel-image-4.15.0-76-generic.
Check running kernel
vm@k8smaster:~$: uname -sr
Install new kernel
vm@k8smaster:~$: sudo apt-get install linux-image-4.15.0-76-generic -y
get installed kernel
vm@k8smaster:~$: grep -A100 submenu /boot/grub/grub.cfg |grep menuentry
You should see two kernels installed
vm@k8s-master:~# grep -A100 submenu /boot/grub/grub.cfg |grep menuentry
submenu 'Advanced options for Ubuntu' $menuentry_id_option 'gnulinux-advanced-d951c267-a105-4dc4-a293-14af96483242' {
menuentry 'Ubuntu, with Linux 4.15.0-88-generic' --class ubuntu --class gnu-linux --class gnu --class os $menuentry_id_option 'gnulinux-4.15.0-88-generic-advanced-d951c267-a105-4dc4-a293-14af96483242' {
menuentry 'Ubuntu, with Linux 4.15.0-88-generic (recovery mode)' --class ubuntu --class gnu-linux --class gnu --class os $menuentry_id_option 'gnulinux-4.15.0-88-generic-recovery-d951c267-a105-4dc4-a293-14af96483242' {
menuentry 'Ubuntu, with Linux 4.15.0-76-generic' --class ubuntu --class gnu-linux --class gnu --class os $menuentry_id_option 'gnulinux-4.15.0-76-generic-advanced-d951c267-a105-4dc4-a293-14af96483242' {
menuentry 'Ubuntu, with Linux 4.15.0-76-generic (recovery mode)' --class ubuntu --class gnu-linux --class gnu --class os $menuentry_id_option 'gnulinux-4.15.0-76-generic-recovery-d951c267-a105-4dc4-a293-14af96483242' {
Deinstall the kernel (not 4.15.0-76!)
vm@k8smaster:~$: sudo apt-get remove --purge linux-image-4.15.0-88-generic linux-headers-4.15.0-88 -y
Check again installed kernel
vm@k8smaster:~$: grep -A100 submenu /boot/grub/grub.cfg |grep menuentry
submenu 'Advanced options for Ubuntu' $menuentry_id_option 'gnulinux-advanced-d951c267-a105-4dc4-a293-14af96483242' {
menuentry 'Ubuntu, with Linux 4.15.0-76-generic' --class ubuntu --class gnu-linux --class gnu --class os $menuentry_id_option 'gnulinux-4.15.0-76-generic-advanced-d951c267-a105-4dc4-a293-14af96483242' {
menuentry 'Ubuntu, with Linux 4.15.0-76-generic (recovery mode)' --class ubuntu --class gnu-linux --class gnu --class os $menuentry_id_option 'gnulinux-4.15.0-76-generic-recovery-d951c267-a105-4dc4-a293-14af96483242' {
Reboot
Check actual Kernel again
vm@k8smaster:~$: uname -sr
Install kernel headers
vm@k8smaster:~$: sudo apt-get install linux-headers-$(uname -r)
As I experienced some issues with netplan in the past I prefer installing the package ifpdown and configure networking in /etc/networking/interfaces
vm@k8smaster:~$: sudo apt-get install ifupdown
Create a new /etc/network/interfaces that fits your environment
Configure the first interface with the network settings you need for managing the VMs, leave the second unconfigured. Now you should be able to ssh into the VM.
vm@k8smaster:~$: cat /etc/network/interfaces
auto lo
iface lo inet loopback
auto ens160
iface ens160 inet static
mtu 8900
address 192.168.100.50
netmask 255.255.255.0
network 192.168.100.0
broadcast 192.168.100.255
gateway 192.168.100.1
dns-search corp.local
dns-nameservers 192.168.1.3
Check Docker Status
vm@k8smaster:~$: sudo systemctl status docker
If not already enabled just do so
vm@k8smaster:~$ sudo systemctl enable docker.service
vm@k8smaster:~$: docker version
If this gives you a “Got permission denied while trying to connect to the Docker daemon socket”
Your current user should get a member of the docker group:
vm@k8smaster:~$: sudo usermod -a -G docker $USER
re-login, check with “groups” command if you’re now member of the group
Install Kubelet
vm@k8smaster:~$: curl -s https://packages.cloud.google.com/apt/doc/apt-key.gpg | sudo apt-key add
vm@k8smaster:~$: sudo touch /etc/apt/sources.list.d/kubernetes.list
vm@k8smaster:~$: echo "deb http://apt.kubernetes.io/ kubernetes-xenial main" | sudo tee -a /etc/apt/sources.list.d/kubernetes.list
vm@k8smaster:~$: sudo apt-get update
As the currently latest NSX-T 2.5 supported K8S version is 1.16 we’ll now install it
Find the latest 1.16 sub-version by
vm@k8smaster:~$: apt-cache show kubelet | grep 1.16
In my case this is 1.16.7-00
vm@k8smaster:~$: sudo apt-get install -y kubelet=1.16.7-00 kubeadm=1.16.7-00 kubectl=1.16.7-00
Prepare NSX-T NCP Plugin
Download NSX-T 2.5 container plugin on your management host, unzip it and copy the directory to the VM
Load NCP Image into local docker repository
vm@k8smaster:~$: docker load -i ~/nsx-container-2.5.1.15287458/Kubernetes/nsx-ncp-ubuntu-2.5.1.15287458.tar
Note the Docker Image Repository output: “Loaded image: registry.local/2.5.1.15287458/nsx-ncp-ubuntu:latest”
This finishes the common tasks for all VMs
Edit ncp-ubuntu.yaml
This only needs to be done at the k8smaster VM. Open “nsx-container-2.5.1.15287458/Kubernetes/ncp-ubuntu.yaml” in your favorite editor. After all the CustomResource/Cluster Role/Service Accounts/Cluster Roles you’ll find the ConfigMap for ncp.ini (around line 281)
Following are the changes I set in my demo environment. Not recommended for production environments. Green entries might be added, for all others just remove the # and edit the setting.
[nsx_v3]
policy_nsxapi = True
nsx_api_managers = 192.168.100.10, 192.168.100.11, 192.168.100.12
nsx_api_user = admin
nsx_api_password = NsxAdminPassword
insecure= True
subnet_prefix = 28
use_native_loadbalancer = True
pool_algorithm = ROUND_ROBIN
service_size = SMALL
container_ip_blocks = K8S-Container-Network
external_ip_pools = k8s-external-ippool
overlay_tz = UUID_of_your_Overlay_TZ
You can choose the T0/T1 Topology. Choose either Option 1 or Option 2
Option 1: if you want a T1 router per k8s namespace and NAT to be done on T0
top_tier_router = T0-Default
Option 2: single shared T1, T0 can run EMCP (no stateful services on T0). Leave “top_tier_router” commented out and add the following:
tier0_gateway = T0-Default
single_tier_topology = True
End of Option 2
top_firewall_section_marker = K8S-Cluster1-Top
bottom_firewall_section_marker = K8S-Cluster1-Bottom
edge_cluster = UUID_of_your_Edge_Cluster
[coe]
adaptor = kubernetes
cluster = k8s-cluster1
node_type = HOSTVM
[k8s]
apiserver_host_ip = 192.168.100.50
apiserver_host_port = 6443
ingress_mode = nat
There is a second ncp.ini ConfigMap around Line 775. This is used for the Node Agent POD
[k8s]
apiserver_host_ip = 192.168.100.50
apiserver_host_port = 6443
ingress_mode = nat
[coe]
adaptor = kubernetes
cluster = k8s-cluster1
node_type = HOSTVM
[nsx_node_agent]
ovs_bridge = br-int
ovs_uplink-port = ens192
After this locate all of the
image: nsx-ncp
imagePullPolicy: IfNotPresent
entries and replace the “image: nsx-ncp” with the image you loaded into the local docker registry:
image: registry.local/2.5.1.15287458/nsx-ncp-ubuntu
imagePullPolicy: IfNotPresent
(should appear six times in the ncp-ubuntu.yaml)
Create K8S Cluster
On k8smaster you now can run
vm@k8smaster:~$: sudo kubeadm init
Note the output after successful run. Now you can join the nodes by running the command from the output of your (!) “init” command on each of your nodes. My example:
vm@k8snode2:~$: sudo kubeadm join 192.168.100.50:6443 --token 3nnh20.p5qn5gmucl13jz7t \
     --discovery-token-ca-cert-hash sha256:c5b9fa020994241ef1e4f7c4711cd47ab5d09ad12dda980f5fc25192cdbfbdb
vm@k8smaster:~$ kubectl get nodes
 NAME         STATUS     ROLES    AGE     VERSION
 k8smaster   NotReady   master   4m54s   v1.16.7
 k8snode1    NotReady    none      2m39s   v1.16.7
 k8snode2    NotReady    none       83s     v1.16.7
(“NotReady” can be okay, we haven’t configured NCP right now)
On the master you can now apply the ncp-ubuntu.yaml file
vm@k8smaster:~$ kubectl apply -f ./nsx-container-2.5.1.15287458/Kubernetes/ncp-ubuntu.yaml
When all PODs are running in namespace nsx-system NCP should be ready. If not it’s time for troubleshooting….
vm@k8smaster:~$ kubectl get pods -nnsx-system
 NAME                       READY   STATUS    RESTARTS   AGE
 nsx-ncp-84d767cbff-2x8vr   1/1     Running   0          2m
 nsx-ncp-bootstrap-c7jz9    1/1     Running   0          2m
 nsx-ncp-bootstrap-ch22r    1/1     Running   0          2m
 nsx-ncp-bootstrap-vwlhm    1/1     Running   0          2m
 nsx-node-agent-8nsl7       3/3     Running   0          2m
 nsx-node-agent-vq2w9       3/3     Running   0         2m
 nsx-node-agent-zmwpl       3/3     Running   0         2m
Creating a new k8s namespace should result in NSX creating a new T1 Router. Just check the NSX GUI after running the following command.
vm@k8smaster:~$ kubectl create ns nsx-demo-test1
 namespace/nsx-demo-test1 created

Awesome post, thank you. I’ve managed to get all the pods up and running but the coredns pods won’t spin up properly, do they do so for you? They log the following:
2020-01-22T21:48:47.789Z [INFO] plugin/ready: Still waiting on: “kubernetes”
Hi David, have seen an issue where coredns didn’t came up because there was no network connection between POD network and Management Network possible. Can you ping container POD IP from Master / Worker nodes and vice versa? Did you create the same topology as I described? If your Management Network is connected to same T0 as the Cluster T1 this shouldn’t be an issue.
Hi Daniel,
From a pod on the container network I can ping the management IP (routed) of my nodes. From the master node I can ping the pod IP. Bit strange as everything else works great, including provisioning Loadbalancers. My T0 advertises routes to my lab router over BGP. I can even ping the pod Ip’s from outside the cluster.
Hi David,
Just checked my environment. coredns works fine. Did you already check the DNS debug docs?
https://kubernetes.io/docs/tasks/administer-cluster/dns-debugging-resolution/
All I’ve found about coredns issues with NSX-T is the hint that master/worker mgmt IP need to communicate to POD IP. When having Management and Transport Network on NSX-T overlay this shouldn’t be an issue. If not you’ll need routing in underlay.
Depending on T0/T1 topology it could make sense to create a NOSNAT entry on the NAT router with high priority specifying source pod cirdr destination node mgmt cidr.